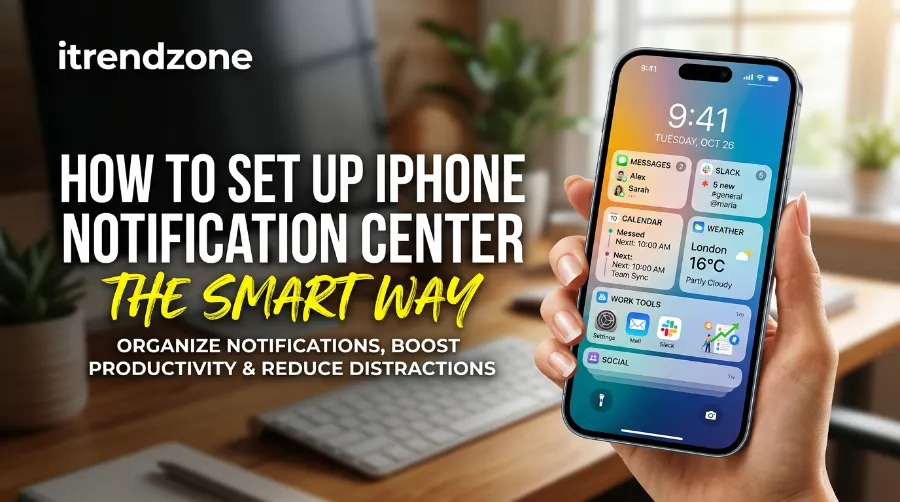

My phone used to buzz roughly ninety times before lunch. Slack, two email inboxes, a fantasy football app I forgot I installed, and a coupon app that genuinely believed I needed to know about a shoe sale at 7:12 a.m. By the time an actually important text came in from my landlord, I’d already learned to ignore the buzzing altogether, which is exactly the problem. A proper iphone notification center setup isn’t about silencing your phone. It’s about teaching it to bother you only when something is worth being bothered about.
This guide walks through the same process I used to go from “phone face-down, anxious” to “phone visible, calm,” using nothing but settings that are already sitting on your iPhone. If you’ve ever typed “how to manage iPhone notifications” into Google at 11 p.m. out of pure frustration, this one’s for you.
Key Takeaways
| What You’ll Learn | Why It Matters |
|---|---|
| How to set up iPhone Notification Center step by step | Stops random pop-ups from hijacking your screen |
| How notification summary iPhone works with Apple Intelligence | Bundles low-priority alerts into one digest instead of dozens |
| How iPhone notification grouping cuts down visual clutter | Similar alerts stack together instead of flooding your lock screen |
| Practical ways to reduce iPhone notifications without missing urgent ones | Keeps people, calendar events, and safety alerts breaking through |
| Common notification bugs and how to fix them | Saves you a factory reset when the real fix takes ten seconds |
TL;DR
- Go to Settings > Notifications, set each app’s style (Lock Screen, Notification Center, Banners) individually instead of accepting Apple’s defaults.
- Turn on Scheduled Summary and Summarize Notifications so low-priority apps get bundled instead of interrupting you all day.
- Use Focus modes plus Notification Grouping set to “By App” for the cleanest, calmest lock screen.
Why Your iPhone Notification Center Feels Overwhelming (and How to Fix It)
Here’s the thing nobody tells you when you buy a new iPhone: almost every app asks for notification permission during setup, and most people tap “Allow” out of habit. A year later, you’ve got forty-plus apps all fighting for a sliver of your attention, and the Notification Center on iPhone turns into a scrolling wall of noise instead of the organized hub Apple designed it to be.
How to Customize iPhone Control Center Like a Pro
According to Apple’s own support documentation, the Notification Center is meant to be a single, swipeable list where alerts wait for you until you’re ready. That’s the theory. In practice, without a deliberate iphone notification center setup, it becomes the digital equivalent of a junk drawer.
How to Enable iPhone Dark Mode Everywhere
The fix isn’t a single toggle. It’s a short list of decisions, made once, that quietly do the sorting for you from then on. Let’s get into it.
Step-by-Step: How to Set Up iPhone Notification Center the Smart Way
I ran through this exact sequence on my own iPhone, and it took under fifteen minutes to reorganize notifications for roughly thirty apps. Here’s the order that actually works, rather than jumping around app by app.
- Open Settings and tap Notifications. This is command central for everything below.
- Tap each app under “Notification Style” and decide, one by one, whether it deserves Lock Screen visibility, Notification Center placement, Banner alerts, sound, or a combination.
- Choose immediate or scheduled delivery for each app. Apple lets you pick per app, which is the setting most people never touch.
- Set Notification Grouping to Automatic, By App, or Off, depending on how much clutter you can tolerate.
- Turn on Scheduled Summary for anything that doesn’t need real-time attention (shopping apps, news, social media).
- Enable Summarize Notifications if your device supports Apple Intelligence, so busy group chats and long emails get condensed automatically.
- Set up a Focus mode for at least one recurring situation in your life — work, sleep, or driving.
Access Notification Settings the Right Way
From your Home Screen, tap Settings, then scroll down and tap Notifications. You’ll land on a master list of every app that’s ever asked for permission to notify you. Don’t panic at the length of the list; you’re not going to configure all of it manually.
Hidden iPhone Settings Guide: 20+ Features Most Users Never Find
Tap into any single app, like Messages or Instagram, and you’ll see the real controls: Allow Notifications, Lock Screen, Notification Center, Banners, Sounds, Badges, and Show Previews. Apple Support confirms this is where delivery timing (immediate vs. scheduled) and placement both live, and it’s genuinely worth two or three minutes per app the first time around.
How to Use iPhone Do Not Disturb Like a Power User
Prioritize the Apps That Actually Matter
Not every app deserves the same real estate. When I tested this on my own notification list, I split apps into three rough tiers:
- Tier 1 (Immediate, everywhere): Phone, Messages, Calendar, banking app, maps/navigation.
- Tier 2 (Notification Center only, no Lock Screen): Email, work chat tools, delivery tracking.
- Tier 3 (Scheduled Summary): Shopping, social media, games, news aggregators.
This tiering is the single biggest lever in any iphone notification center setup, and it’s also the step most guides skip in favor of just listing toggle locations.
How to Set Up iPhone Emergency SOS the Right Way
iPhone Notification Grouping Explained: Automatic vs. By App vs. Off
Iphone notification grouping decides whether your alerts stack into neat little bundles or scatter across your lock screen like confetti. You’ll find it under Settings > Notifications > Notification Grouping, and there are three options:
| Grouping Option | What It Does | Best For |
|---|---|---|
| Automatic | iOS decides how to cluster related alerts (by app, topic, or thread) | Most users who want a “set and forget” setup |
| By App | Every notification from one app stacks under a single header | Heavy multitaskers with 30+ notification-sending apps |
| Off | Every alert appears individually, in the order received | People who only get a handful of notifications daily |
I switched from Automatic to By App on a Tuesday morning after counting eleven separate Slack notifications stacking my lock screen during a single meeting. By App collapsed those eleven into one tappable group instantly, and that one change probably did more for my day-to-day stress than anything else in this guide.
How to Set iPhone Screen Time Limits That Actually Work
How to Reduce iPhone Notifications Without Missing What Matters
This is the part everyone actually searches for, so let’s be direct about how to reduce iPhone notifications without accidentally cutting yourself off from things you genuinely need to know.
Turn On Notification Summary
iOS 18 introduced Scheduled Summary, later paired with Apple Intelligence’s Summarize Notifications in iOS 18.1. Go to Settings > Notifications > Scheduled Summary, then add the apps you don’t need in real time. You’ll pick one or two delivery times a day (morning and evening tend to work well), and everything you’ve assigned gets bundled into a single digest instead of trickling in all day.
Per Apple’s documentation, Summarize Notifications is a separate but related feature: it condenses the actual content of a notification, not just the timing of when you see it. This part requires an iPhone 15 Pro, iPhone 16, or newer, since it runs on Apple Intelligence.
Use Focus Modes to Filter by Context
Focus modes let you decide, in advance, who and what can interrupt you during specific parts of your day. Set one up for work hours and only allow calls or messages from your actual team; set another for sleep and let only emergency contacts through.
iPhone Safari Browser Settings You Should Change Today
I use a Work Focus from 9 a.m. to 6 p.m. on weekdays, and it single-handedly cut my daytime interruptions by more than half, because everything outside my allowed contact list gets routed straight to Notification Center instead of my lock screen.
Mute Instead of Disabling
Rather than switching an app’s notifications off entirely (and forgetting to turn them back on), swipe left on any notification, tap Options, and mute that app for an hour or a day. This is the fastest fix when one app is temporarily spamming you, say, during a group chat that’s gone off the rails.
Clean Out Notification Center Regularly
A cluttered Notification Center makes even a well-configured setup feel chaotic. Swipe down from the top center of your screen to open it, then swipe left on any notification, or press and hold the small X in the top right and choose Clear All Notifications.
Comparison: Notification Center vs. Lock Screen vs. Banners
People often use these three terms interchangeably, but they behave differently, and picking the right one per app matters more than most people realize.
| Feature | Where It Appears | Best Use Case |
|---|---|---|
| Notification Center | Full history, accessed by swiping down | Apps you’ll check later, not urgently |
| Lock Screen | Visible immediately without unlocking | Calls, texts, calendar reminders |
| Banners | Temporary pop-up at the top while phone is in use | Time-sensitive alerts you need mid-task |
If privacy is a concern (say, you don’t want message previews visible on a locked phone in public), go to Settings > Face ID & Passcode (or Touch ID & Passcode) and adjust “Allow Access When Locked” for Notification Center and previews specifically.
Real-World Example: Fixing a Runaway Notification Setup
A friend of mine, a nurse working rotating shifts, came to me in early 2025 with a genuinely maddening problem: her phone was going off constantly during the two hours of sleep she got between night shifts, but she was terrified of missing a callback from her hospital’s scheduling app. We built her a Sleep Focus that allowed only calls from three saved contacts (her supervisor, her partner, and her mother) to break through, moved every other app into a single 7 a.m. Scheduled Summary, and set Notification Grouping to By App.
Two weeks later, she reported sleeping through the noise for the first time in months, while still catching every scheduling call. That’s the actual goal here: not silence, but selective silence.
iPhone Text Replacement Shortcuts That Save You Hours of Typing
Common iPhone Notification Center Problems (and Fixes)
- Notifications not showing up at all: Check Do Not Disturb or an active Focus mode first; this is the most common culprit and takes ten seconds to rule out.
- Notification Summary showing outdated info: Force-close and reopen the affected app, since summaries occasionally cache stale content.
- Grouped notifications won’t expand: Tap and hold the group, then tap Expand, rather than trying a single tap.
- Badges appearing without a notification: Some apps update badge counts server-side even when banner/lock screen alerts are off; check that app’s individual notification settings.
- Notification Center stuck or frozen: A quick restart resolves this in the vast majority of cases, before you try anything more drastic.
If you want to go further and dig into settings most people never touch, our hidden iPhone settings guide covers a dozen more tweaks worth exploring once your notification setup is dialed in. And if Control Center feels just as cluttered as your notifications used to, our guide on how to customize iPhone Control Center is the natural next stop.
Notification Setup Snapshot: Where Time Actually Goes
Based on the tiering approach above, here’s roughly how a typical 30-app setup breaks down once you’ve sorted everything properly:
How to Set Up iPhone AssistiveTouch Step by Step (2026 Guide)
| Tier | Typical App Count | Delivery Style |
|---|---|---|
| Tier 1 – Immediate | 5–7 apps | Lock Screen + Banner + Sound |
| Tier 2 – Center Only | 8–12 apps | Notification Center, no Lock Screen |
| Tier 3 – Scheduled Summary | 12–18 apps | Bundled digest, 1–2x daily |
That split alone typically cuts real-time interruptions by more than half without losing access to any information — you’re just choosing when you see it.
Frequently Asked Questions
1. How do I set up the Notification Center on my iPhone? Go to Settings, tap Notifications, then configure each app’s style, sound, and delivery timing individually. There’s no single master switch; it’s a per-app decision, which is exactly why most people never fully set it up.
2. What’s the difference between Notification Summary and Notification Grouping? Notification Summary bundles alerts by delivery time (like a morning digest), while Notification Grouping controls how alerts visually stack together on screen. They solve different problems and work well combined.
3. Why are my iPhone notifications not showing on the lock screen? Check whether Do Not Disturb, a Focus mode, or the specific app’s “Lock Screen” toggle is disabled under Settings > Notifications. This is the most common reason alerts seem to vanish.
4. Can I stop notification summaries without turning off notifications entirely? Yes. Go to Settings > Notifications > Summarize Notifications and toggle it off for specific apps, or turn off Scheduled Summary while keeping individual app notifications active.
5. Does reducing notifications drain less battery? Indirectly, yes. Fewer wake-screen events and background refreshes triggered by constant alerts do add up over a day, though the effect is modest compared to display brightness or 5G usage.
Bonus Q&A
Is Apple Intelligence required for notification summaries? Yes, the AI-condensed summaries specifically require an iPhone 15 Pro, iPhone 16, or newer running iOS 18.1 or later.
Will muting an app’s notifications delete my message history? No. Muting only stops alerts from appearing; all messages and content remain fully accessible inside the app.
Can I set different notification styles for the same app depending on the time of day? Not directly per app, but combining Focus modes with your notification settings achieves the same result, since each Focus can allow or block specific apps and contacts.
Conclusion
A cluttered iPhone Notification Center isn’t a hardware problem, and it isn’t something you have to live with until your next upgrade. It’s a handful of settings, tiered by how much each app actually deserves your attention, backed up by Scheduled Summary, sensible grouping, and a Focus mode or two. Spend the fifteen minutes once, and your phone starts behaving less like a slot machine and more like an assistant that actually filters the noise for you.
References
- Apple Support: Change notification settings on iPhone
- Apple Support: Use notifications on your iPhone or iPad
- WhistleOut: How to Use the Notifications Center on Your iPhone
- Marvel Blog: Designing a Better Notification Experience for iOS