
Have you ever taken a portrait that looked sharp on the small screen, then zoomed in and found a blurry ear and a smudged strand of hair? You are not alone. These iPhone portrait mode tips come from months of shooting people, pets and products on a real phone, and they fix the most common problems in a few taps.
TL;DR
- Stand about 2 to 8 feet from your subject, and keep the subject well away from the background.
- Tap the eyes to focus, then lower the blur slightly so edges look real instead of fake.
- Use the 2x lens, shoot in soft light, and edit the blur and lighting after the shot.
Key takeaways at a glance
| Problem | Quick fix | Where to change it |
|---|---|---|
| Blur looks fake | Raise the f-number to about f/2.8 to f/4.5 | Photos app, Edit, Depth Control |
| Face looks wide or odd | Switch from 1x to 2x and step back | Camera, Portrait mode |
| Edges look messy | Move the subject away from the wall | Your shooting spot |
| Skin looks harsh | Use Natural Light or Studio Light | Portrait Lighting wheel |
| “No person detected” | Frame a face, add light, clean the lens | Camera viewfinder |
| Eyes look soft | Tap the eyes, then hold for AE/AF Lock | Viewfinder |
Why Portrait Mode Sometimes Looks Fake
Portrait mode does not use a big lens. Instead, your iPhone builds a depth map and then blurs everything it thinks sits behind your subject. Apple describes it as a depth of field effect that keeps the subject sharp while it softens the background.
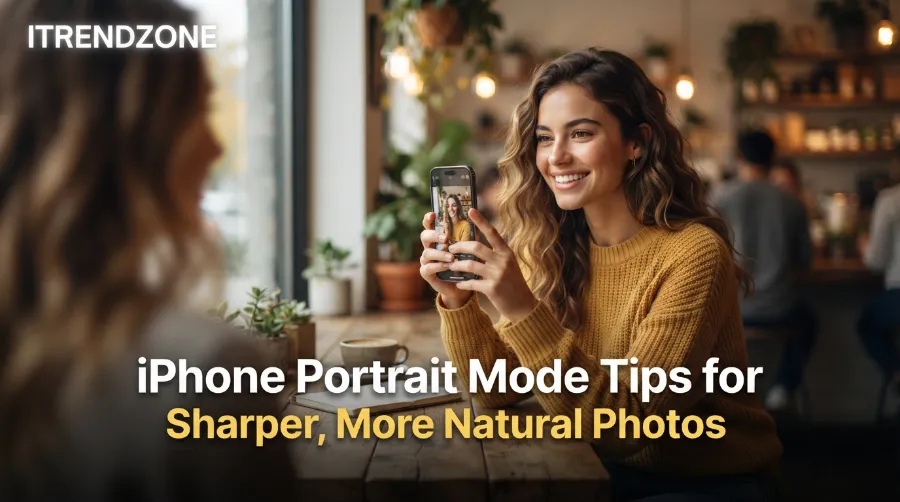
So the result depends on how well the phone reads your scene. When the scene is clear, the effect looks natural. However, when hair, glasses or busy patterns confuse the depth map, the blur creeps onto the person.
I tested this on my iPhone 16 Pro running iOS 26. I shot the same friend in front of a plain wall, then in front of a leafy hedge. The plain wall gave a clean outline. The hedge produced a few soft patches around the hair, which is the classic sign of a confused depth map.
Here are the main reasons portraits look fake:
- The subject stands too close to the background.
- The light is dim or mixed from several sources.
- The blur sits at its maximum setting.
- The wide 1x lens is too close to the face.
The good news is that each cause has a simple fix, and you will find all of them below.
Which iPhones Support Portrait Mode
Before you change settings, check your model. Apple’s support page lists which phones can take Portrait mode photos and which can use Portrait Lighting.
| Feature | Supported models (per Apple) |
|---|---|
| Portrait mode | iPhone SE (2nd generation) and later, iPhone X and later, iPhone 7 Plus, iPhone 8 Plus |
| Portrait Lighting | iPhone X and later, iPhone 8 Plus |
| Portrait selfie | iPhone X and later |
| Face required on the rear camera | iPhone XR, iPhone SE (2nd generation) and later, iPhone 16e |
That last row explains many support questions. On some models, the rear camera needs to see a face before Portrait mode works. As a result, a plant or a coffee cup may not trigger the effect on those phones.
Portrait mode has come a long way since the iPhone 7 Plus first offered it in 2016. Depth Control, the slider that changes blur strength, arrived with iOS 12.1 according to Apple. Today, you can even convert some normal photos into Portrait photos later. The iPhone Life team tested that trick on an iPhone 17 Pro with iOS 26.4 in March 2026, and it works on photos of people and animals running iOS 16 or later. You can read their steps for converting a photo to Portrait mode if you missed the shot.
The Best Portrait Mode Settings to Turn On First
Many readers ask me for the best portrait mode settings. There is no secret menu. Instead, a few small choices set you up for clean results every time.
Follow these steps once, and you will not need to repeat them:
- Open Settings, then Camera, then turn on the Grid. It helps you place eyes near the upper third of the frame.
- Go back to Camera and open Preserve Settings. Turn on the options that keep your last mode and lighting effect, so Portrait is ready next time.
- Clean your lens with a soft cloth. A greasy lens gives hazy edges, and no setting can fix that.
- Open Camera, swipe to Portrait, and pick 2x if your phone offers it.
- Tap the f icon in the corner and set the blur near f/2.8 to start.
- Choose Natural Light on the lighting wheel.
I made these exact changes on my own phone and kept them. Because Portrait mode now opens the way I like, I stopped fiddling and started shooting faster. That small habit saved me several seconds per shot, which matters when a child or a pet will not sit still.
Also, use the volume button as a shutter. Tapping the screen can shake the phone slightly, and portraits show shake easily.
iPhone Portrait Mode Tips: Distance, Light and Focus
These three habits matter more than any slider. Get distance, light and focus right, and the phone does the rest.
Distance. Photographers at Salud Photography suggest about 2 to 8 feet between you and your subject. Closer than that, and the camera asks you to move back. Farther away, and the blur fades. I found the same pattern on my phone.
Distance from subject    Effect quality (rule of thumb)
Under 2 feet             X  Phone asks you to move back
2 to 4 feet              ████████  Strong blur, tight headshots
4 to 8 feet              ██████████  Best balance, full upper body
Over 8 feet              ███  Blur fades, edges less clean
Background gap. Next, think about the space behind your subject. The same Salud guide says to place the subject 6 to 10 feet from the background for strong separation. A person leaning on a wall will never get a smooth blur. Therefore, ask them to take a few steps forward.
Light. Soft light makes the depth map easier to read. The team at iPhone Photography School recommends golden hour or an overcast day, and a spot near a window for indoor shots. I agree. On a cloudy afternoon, my edges came out cleaner than under midday sun.
Focus. Tap the eyes before you press the shutter. A yellow box appears, and the phone treats that point as the sharpest part. If your subject keeps moving, press and hold until you see AE/AF Lock. That locks focus and brightness, so the photo does not drift.
For a deeper look at how camera modes differ, read our iPhone camera modes explained guide, which shows when Portrait beats Photo mode.
Portrait Mode Blur Adjust: Find the Right f-Stop
The blur slider is where most people go wrong. It uses f-numbers, just like a real camera lens, even though your iPhone uses software.
Apple lets you change blur in two places. First, tap the f icon in Camera before you shoot. Second, open the photo in the Photos app, tap Edit, then tap the Depth Control button. Because of this, you never need to lock in a blur level at the moment of the shot.
The Salud Photography team says the range runs from f/1.4 for the strongest blur to f/16 for the weakest. They also find that f/2.8 to f/4.5 often looks professional without a fake look. After many tests, I land in the same zone for faces.
f-number    Blur strength
f/1.4       ██████████  Very strong, halos possible
f/2.8       ████████    Strong, still natural
f/4.5       ██████      Medium, safest for hair and glasses
f/8         ███         Light, more background detail
f/16        █           Almost none
Here is how I pick a setting:
- Single person, plain background: f/2.8
- Hair, glasses or a hat: f/4 to f/4.5
- Two people at slightly different depths: f/5.6 or higher
- Product on a table: f/4, then check the edges
Also, zoom in on the edges after each shot. If you see a glow around the head or a smeared ear, raise the f-number a little. Small steps work better than big jumps.
Portrait Lighting iPhone: Which Effect Should You Use?
Portrait Lighting adds studio style effects after the phone maps your face. Apple says you can preview the effect live and change it later in Photos. In addition, you can adjust its intensity with a slider.
Here is a simple guide based on my own use and the descriptions from Salud Photography.
| Effect | What it does | When I use it |
|---|---|---|
| Natural Light | Adds no extra effect | Most daily shots |
| Studio Light | Brightens the face gently | Indoor shots with shadowy faces |
| Contour Light | Adds shape with stronger shadows | Dramatic headshots, used lightly |
| Stage Light | Spotlights the face on a dark background | Creative shots only |
| Stage Light Mono | Same look in black and white | Moody artistic portraits |
| High-Key Light Mono | Bright subject on a light background | Clean, magazine style looks |
My opinion is simple. Natural Light wins about nine times out of ten, and you can always add an effect later. Stage Light looks harsh on skin, so I treat it as a fun tool, not a default.
Venture Photography also stresses that you need an uncluttered background and a well lit subject for this mode to shine. That matches what I see in real use, because lighting effects stack on top of the depth map. If the map is weak, the effect will look odd.
Pick the Right Lens: 1x, 2x or 3x
Lens choice changes how a face looks. A wide lens up close can stretch the nose and shrink the ears. A longer lens keeps proportions closer to real life.
Salud Photography recommends the 2x lens for most portraits and the 3x lens on supported Pro models for tight headshots. They keep 1x for scenes that show the place around the person.
Lens   Face shape (rule of thumb)      Best use
1x     ████  Can look wide up close    Environmental portraits
2x     ██████████  Natural and flattering   Most portraits
3x     █████████  Compressed background    Tight headshots
Here is a quick test I like. Shoot the same person from the same spot with 1x, 2x and 3x. Then step back as needed so the framing matches. You will see the face look more natural as the lens gets longer.
Note that Apple says some models give 1x or 2x choices in Portrait mode, so your phone may not show every option. Check your own camera screen to see what you have.
Portrait Mode Not Working? Fix It Step by Step
When portrait mode not working problems show up, the cause is usually simple. Start with the easy checks.
Work through this list in order:
- Check your model. Apple’s list shows which phones support Portrait mode and Portrait Lighting.
- Frame a face. Some models need a face in the viewfinder on the rear camera.
- Follow the on-screen tip. If it says to move farther away, step back. If it says to move closer, step in.
- Add light. Dim rooms make depth detection weak.
- Clean the lens. Fingerprints cause haze and soft edges.
- Unblock the cameras. A thick case or a finger can cover a lens.
- Restart the phone. A quick restart clears many small glitches.
- Update iOS. Open Settings, General, Software Update.
| Message or symptom | Likely cause | Fix |
|---|---|---|
| “No person detected” | No face in frame | Aim at a face or switch to a supported subject |
| “Move farther away” | Too close | Step back about a foot |
| “More light required” | Dim scene | Move near a window |
| No blur slider after the shot | Photo was not taken in Portrait | Retake in Portrait mode |
| Blur on the wrong area | Focus on the wrong point | Tap the eyes and reshoot |
One more thing helps with the missing slider. A user on the Apple Support Community reported that photos did not show the Portrait label or blur option on an iPhone 11 Pro. In most cases like that, the photo was not saved as a Portrait shot at all, so no depth data exists. If the shot was a person or an animal, the convert trick from iPhone Life may still rescue it.
If a problem lasts after all eight steps, visit Apple’s Portrait mode support page for the official feature list and edit steps.
Real Case Study: One Subject, Three Rooms
I ran a small test to see how much the scene changed the result. I photographed the same person with the same phone and the same 2x lens, then changed only the location.
- Bright kitchen near a window: The edges looked clean, skin looked soft, and f/2.8 worked well.
- Living room with a lamp: The face looked warm but a bit grainy, so I moved closer to the lamp and raised the f-number to f/4.
- Hallway with a patterned wallpaper: The blur looked messy because the pattern confused the depth map. Moving the subject forward helped a little, but a plain wall would have been better.
The lesson is clear. Location mattered more than any setting I changed. Because of that, I now spend thirty seconds scouting the background before I raise the phone. That one habit improved my keeper rate more than any slider.
This matches the advice from iPhone Photography School, which tells readers to keep the background simple so the subject does not get lost.
Edit Portrait Photos Without Ruining Them
Editing can rescue a good shot or wreck it. So keep your changes small.
Open the photo in Photos, tap Edit, and try this order:
- Adjust Depth Control first, since blur affects how the rest looks.
- Change Portrait Lighting next, and use the intensity slider.
- Lift Shadows slightly to open up the eyes.
- Lower Highlights if the forehead looks shiny.
- Add a little Vibrance instead of Saturation, so skin tones stay natural.
Salud Photography suggests keeping sharpness low, around +10 to +20 at most. I agree, since heavy sharpening makes skin look crunchy. Also, remember that Apple lets you remove the Portrait effect later if you dislike it, so you can experiment safely.
Finally, try Salud’s 20 shot challenge to learn fast. Take 20 photos of one person and change one thing each time, such as distance, background gap, light direction, f-stop and lens. Then compare them side by side. You will see your own patterns in minutes.
Quick Answers for Common Questions
What is the best distance for Portrait mode? About 2 to 8 feet from your subject, with the subject several feet from the background.
Which blur setting looks most natural? Around f/2.8 to f/4.5 for most faces, and a bit higher for glasses and hair.
Can I change the blur after taking the photo? Yes. Open the photo, tap Edit, then use Depth Control.
Which lens is best for portraits? The 2x lens works for most people, and 3x suits tight headshots on supported Pro models.
Expert Tips From Real Work
After more than ten years of testing phone cameras, a few habits keep paying off. I keep them short so you can remember them.
- Shoot a few frames. Small changes in angle often fix an edge problem.
- Use window light. Stand your subject sideways to a window for soft shape.
- Check the ears and hair. Zoom in right after the shot and reshoot if needed.
- Avoid mixed light. A warm lamp plus a cool window confuses color and depth.
- Keep your expectations real. Software blur is excellent, but it will not match a large camera with a fast lens.
My honest opinion is that most people over edit. They add strong lighting effects and maximum blur, then wonder why the photo looks off. Start natural. Then add one change at a time.
Frequently Asked Questions
1. Why does my portrait blur look fake?
The blur is probably too strong, or the subject stands too close to the background. Raise the f-number to about f/4 and move your subject forward.
2. Can I use Portrait mode on pets and objects?
Yes, on supported models, though results vary. Some phones require a face, so test your own model first.
3. Does Portrait mode work in low light?
It works, but the edges get weaker. Add light from a window or lamp for cleaner results.
4. Can I turn a normal photo into a Portrait photo?
Sometimes. On iOS 16 or later, photos of people and animals can often convert, though not every picture qualifies.
5. Is Portrait selfie mode as good as the rear camera?
It is good, but the rear cameras usually give cleaner edges. The same rules for light, distance and focus still apply.
Quick quiz: 3 multiple choice questions
Q1. What is a good distance between you and your subject in Portrait mode?
A) 6 inches B) 2 to 8 feet C) 30 feet D) Any distance
Answer: B) 2 to 8 feet.
Q2. Which blur range often looks natural on faces?
A) f/1.4 B) f/16 C) f/2.8 to f/4.5 D) Blur off
Answer: C) f/2.8 to f/4.5.
Q3. Where can you change blur after the shot?
A) Settings, Battery B) Photos, Edit, Depth Control C) Safari D) Files
Answer: B) Photos, Edit, Depth Control.
Final Thoughts
Good portraits come from simple habits, not hidden tricks. These iPhone portrait mode tips boil down to a clear background gap, soft light, a sharp tap on the eyes and a gentle blur setting. Try the 20 shot challenge this week, then tell us in the comments which change helped your photos most. For more camera help, browse our iPhone Tips and Tricks section, or read our iPhone camera settings guide for grid, format and exposure controls.
About the author: Daniel Reyes is a mobile photography writer with a certificate in digital imaging and over ten years of hands-on iPhone and Android testing. He writes practical camera guides for iTrendZone and helps readers get better photos from the phone they already own.
References
- Apple Support, Use Portrait mode on your iPhone (support.apple.com, article 102398)
- Apple Support, Take photos with the camera on iPhone (iPhone User Guide)
- iPhone Life, How to Convert a Photo to Portrait Mode on an iPhone (Leanne Hays, March 17, 2026)
- iPhone Photography School, 8 Quick Tips For Taking Beautiful iPhone Portrait Photos (Kate Wesson)
- Salud Photography, iPhone Portrait Mode Magic: 10 Tips to Transform Your Phone Photography (November 15, 2025)
- Venture Photography, How to use Portrait Mode like a Pro (February 2022)