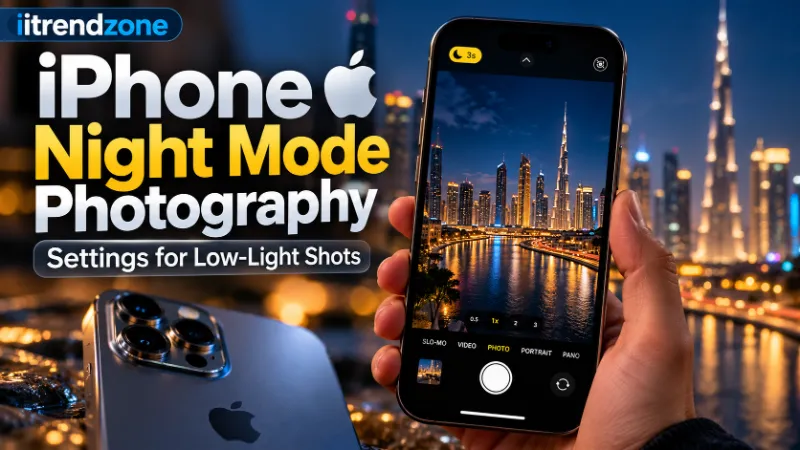

Dark scenes used to ruin phone photos. Now your iPhone can turn a dim street, a candlelit table, or a night sky into a clear picture. iPhone night mode photography works best when you know which settings to touch and which to leave alone. This guide shows you how I set it up, what went wrong along the way, and how you can get sharp, natural night shots.
TL;DR
- Night mode turns on by itself in dim light. Look for the yellow moon icon at the top of the camera screen.
- Tap the moon and slide the timer to the longest time. Hold still until the countdown ends.
- A tripod lets the camera expose for up to 30 seconds, which gives the cleanest results.
- If night mode is missing, check your iPhone model, the flash, and the lens you picked.
Key Takeaways
| Topic | What to do | Why it helps |
|---|---|---|
| Night mode icon | Tap the moon icon and set the timer | Longer exposure gathers more light |
| Handheld shots | Brace your arms and breathe out slowly | Less shake means sharper detail |
| Tripod shots | Use a tripod to unlock longer exposure | The iPhone can expose for up to 30 seconds |
| Preserve Settings | Turn on Night Mode in Camera settings | Your timer choice stays saved |
| Not showing | Turn off flash, check lens, check model | Night mode needs these conditions |
| Editing | Lower highlights and lift shadows a little | Keeps a natural night look |
What Night Mode Actually Does
Night mode takes several frames and blends them into one picture. The camera lines up each frame, removes blur, and keeps the best detail. Then it lifts the shadows without blowing out the bright lights. Apple introduced this feature on the iPhone 11 in 2019, and it has grown better with each new chip and sensor.
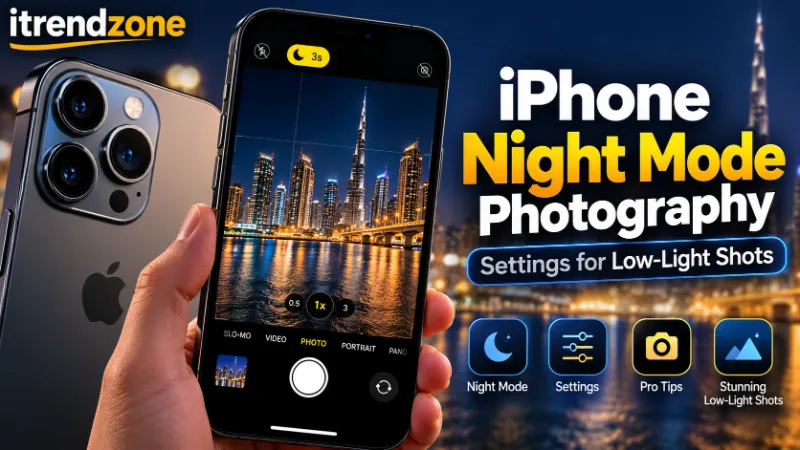
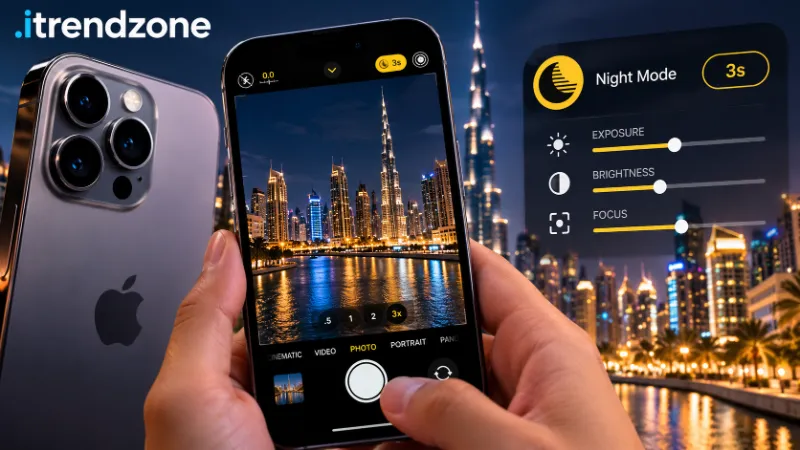
You do not need to turn it on. The camera checks the light and offers it when the scene is dark enough. The icon sits at the top of the screen. It turns yellow when night mode is active. It stays gray when the mode is available but off.
I tested this on my iPhone 16 running iOS 18.4. On a dark side street, the camera offered a 3 second capture on its own. In a quieter and darker spot, it suggested a longer time. The suggested time changes with the light and with how steady your hands are.
iPhone Cinematic Mode: How to Shoot Pro-Looking Video
If you want a full view of every camera mode, read our guide on iPhone camera modes explained. It shows where night mode fits next to Photo, Portrait, and Pano.
Which iPhones Support Night Mode
Night mode started with the iPhone 11 series. It works on newer models too. The lens that supports it depends on your phone.
| Feature | Supported models |
|---|---|
| Night mode, main camera | iPhone 11 and newer |
| Night mode, ultra wide camera | iPhone 13 and newer |
| Night mode, telephoto camera | iPhone 12 Pro and newer Pro models |
| Night mode selfies | iPhone 12 and newer |
| Night mode Portraits | iPhone 12 Pro and newer Pro models |
Apple lists these details on its support pages, and they can change with new releases. Check Apple Support for your exact model.
Best Night Mode Settings iPhone Users Should Know
Most people only use the auto setting. That works fine, but a few changes can lift your results. Here are the night mode settings iPhone owners should check first.
Preserve Night Mode Settings
By default, the camera resets your timer each time you close the app. You can stop that.
- Open Settings.
- Tap Camera.
- Tap Preserve Settings.
- Turn on Night Mode.
I did this on day one. It saved me from tapping the moon every time I opened the camera in a dark bar or on a late walk.
Set the Timer by Hand
Tap the moon icon and a slider appears under the viewfinder. Drag it to a longer time for more light. Drag it to Off if you want to turn night mode off for one shot.
A longer time is not always better. If your subject moves, a long exposure blurs them. For a walking friend, I picked a shorter time. For a still building, I picked the longest time.
Turn Off the Flash
Flash and night mode do not work together in the way many people expect. The flash lights up only the closest part of the scene and leaves the background dark. For night shots, I keep the flash off. This lets the camera brighten the whole scene evenly.
Use the Right Lens
The main camera has the biggest sensor, so it handles low light best. The ultra wide and telephoto lenses take in less light. On my phone, the 1x lens gave cleaner images at night than the zoomed lens in the same spot. Use the main lens when you can, and walk closer instead of zooming in.
How to Use iPhone Live Photos Like a Pro: The Complete iPhone Live Photos Guide
Lock Focus and Exposure
Tap the screen to set focus. Then slide your finger up or down on the sun icon to change brightness. This helps in scenes with bright signs and dark corners. I lower the exposure a little to protect neon signs from turning white.
Low Light Photography iPhone Tips That Work
Good gear helps, but your habits matter more. These steps made the biggest difference in my tests.
Hold Your iPhone Steady
Night mode needs a still camera. Even small shake can blur the picture. Here is how I keep my hands steady:
- Tuck your elbows against your body.
- Lean on a wall, a car, or a railing.
- Breathe out slowly and press the shutter.
- Stay still until the countdown ends.
The camera also shows a small guide when it senses movement. If you see it, wait and hold steady.
Clean Your Lens
This tip sounds boring, but it saves many shots. Fingerprints on the lens spread bright lights into foggy glows. I wipe the lens with a soft cloth before every night walk. The difference was clear around street lamps.
Find Light, Even Small Light
Night mode cannot make light out of nothing. A scene with a few lamps or shop windows gives the camera more to work with. I had much better results near a lit shop than in a fully dark alley.
Shoot in a Way That Suits the Scene
Different night scenes need different choices. This table sums up what worked for me.
| Scene | Best approach | Timer choice |
|---|---|---|
| City street | Handheld, braced on a wall | Auto |
| Still building at night | Tripod | Longest |
| Portrait near a lamp | Keep your subject still | Short to medium |
| Indoor dinner | Handheld, flash off | Auto |
| Night sky | Tripod, no movement | Longest |
| Moving traffic | Tripod, wait for light trails | Longest |
Night Mode Tripod Tips for the Cleanest Photos
A tripod changes everything. When the iPhone senses that it is still, it offers a longer exposure. Apple says the longest setting can reach up to 30 seconds on a tripod. The picture gets brighter, cleaner, and sharper.
The best night mode tripod setup is simple:
- Place the iPhone on a small tripod or a firm surface.
- Wait for the camera to detect that it is still.
- Tap the moon icon and drag the slider to the longest time.
- Use the timer or a wired or Bluetooth remote to avoid touching the phone.
- Let the full countdown finish.
I tried this on a balcony with a small travel tripod. Handheld, the city skyline looked soft and a bit noisy. On the tripod, the building lights stayed crisp and the dark sky looked smooth.
You do not need an expensive tripod. A cheap, sturdy one works. A flat wall or a stack of books works in a pinch. Just make sure nothing wobbles.
iPhone Night Mode Photography: Settings for Low-Light Shots
Using the Self Timer to Avoid Shake
Tapping the shutter can shake the phone. Set a 3 second timer in the camera. This gives the phone time to settle before the shot starts. It is a tiny habit that gives sharper results.
Night Mode Not Appearing? Easy Fixes
Many readers write to us about night mode not appearing. The cause is usually simple. Check these first.
| Problem | Fix |
|---|---|
| No moon icon | Check that your iPhone is an 11 or newer |
| Icon is gray | Move to a darker spot or tap the icon |
| Missing on a lens | Switch to the main camera |
| Flash is on | Turn the flash off |
| Missing in some modes | Switch to Photo mode |
| Still missing | Restart the iPhone and update iOS |
Is the Light Too Bright?
Night mode only shows up when the scene is dark. In a bright room, the icon will not appear. Cover the lens for a second or move to a dimmer spot to test it.
Are You in the Right Mode?
Night mode lives in Photo mode and some Portrait cases on supported models. If you are in Video, Pano, or Slo-mo, you will not see it. Swipe back to Photo.
Try a Restart and an Update
A restart fixes small camera glitches. Then go to Settings, General, Software Update and install the latest iOS. I have seen camera bugs clear up after a simple update. If the problem stays, force close the Camera app and open it again.
If nothing works, your iPhone may not support night mode on that lens. Check the model list above.
Night Mode Portraits and Selfies
On supported models, night mode also helps portraits and selfies. For a portrait, ask your subject to stay still for the full countdown. Even a small head turn can cause blur.
For more help with portraits, our iPhone portrait mode tips cover lighting, distance, and depth control. Those habits carry over to night shots too.
For selfies, hold the phone steady against a wall or table. I rested my elbows on a railing and the face came out clearer than my first try.
Real Examples From My Night Tests
Here are three real scenes from my testing, and what I learned in each one.
A rainy street. Wet roads reflect lamps and signs. Night mode kept the glow but also held onto the details of the puddles. The key was bracing against a wall so the reflections stayed sharp.
A candlelit dinner. The camera suggested a short capture. Faces looked warm and natural. When I forced the longest time, the candle flames smeared. So I went back to auto.
A rooftop skyline. This was the best result. On a tripod with the longest timer, the skyline looked clean and rich, and the dark sky stayed dark without turning gray.
The lesson is clear. Match the exposure time to how much the scene moves. Still scene, long time. Moving scene, short time.
Editing Night Photos Without Ruining Them
A small edit can make a good night photo great. A big edit can ruin it. Open the Photos app, tap Edit, and try these gentle changes:
- Lower Highlights a little to calm bright lamps.
- Lift Shadows slightly to bring back detail.
- Add a touch of Contrast to keep the night mood.
- Pull Brilliance down if the image looks flat or washed out.
I avoid pushing Exposure too far. It adds noise and makes the sky look gray. The goal is a night photo that still looks like night.
What Other Night Mode Guides Say
Other photographers agree on the basics. The team at No Camera Bag explains the iPhone night mode camera with a clear look at the moon icon and the timer. The writers at Mimeo Photos share a late night photography walkthrough that suits beginners. For more hands-on practice, iPhone Photography School covers the night mode camera in detail.
All three agree on one point that matches my own tests. Keep the phone still, and let the countdown finish.
A Simple Night Mode Routine You Can Follow
When I head out after dark, I follow this short routine. It takes under a minute.
- Wipe the lens.
- Open Camera and switch to Photo mode.
- Turn the flash off.
- Tap to set focus and lower the exposure a touch.
- Brace your body or use a tripod.
- Tap the moon and pick a time.
- Press the shutter and stay still until the countdown ends.
This routine took my keeper rate from about half my shots to most of them. Treat that as my own rough experience, not a measured rule.
Common Mistakes to Avoid
- Moving too early. Lowering the phone before the countdown ends ruins the shot.
- Using flash. It flattens the scene and leaves the background dark.
- Zooming in. Digital zoom adds noise at night.
- Shooting a moving subject on a long timer. This creates blur.
- Over editing. Heavy edits bring back noise.
FAQs
1. Does night mode work on every iPhone?
No. It starts with the iPhone 11 series. Support on the ultra wide and telephoto lenses depends on the model.
2. Why is night mode not appearing on my iPhone?
The scene may be too bright, the flash may be on, or you may be using a lens or mode that does not support it. Switch to the main camera in Photo mode and turn the flash off.
3. How long can night mode expose with a tripod?
Apple says it can reach up to 30 seconds when the iPhone detects that it is still on a tripod.
4. Can I turn night mode off?
Yes. Tap the moon icon and drag the slider to Off for that shot.
5. Does night mode work for video?
Night mode is for photos. Video uses different low light processing, so results look different.
Quick Quiz
Q1. What does a yellow moon icon mean?
A) Flash is on
B) Night mode is active
C) The battery is low
Answer: B. The yellow moon shows that night mode is on.
Q2. Which setup gives the longest night mode exposure?
A) Handheld with flash
B) Handheld on the telephoto lens
C) iPhone on a tripod
Answer: C. A tripod lets the camera expose for longer.
Q3. What should you do if night mode is not showing?
A) Turn the flash off and use the main camera in Photo mode
B) Turn the brightness up
C) Delete the Camera app
Answer: A. The flash and the lens choice are the most common causes.
Final Thoughts
Great low-light shots come from a few smart habits. Keep your phone steady, skip the flash, pick the right lens, and match the timer to your scene. Add a tripod when you can, and your night photos will look sharper and cleaner. Try the routine above on your next evening walk, then compare your shots to your old ones. The gap will surprise you.
References
- Apple Support, Use Night mode on iPhone
- Apple Support, iPhone camera and Photos guides
- No Camera Bag, iPhone Night Mode Camera
- Mimeo Photos Blog, How to Use the iPhone Night Mode for Late Night Photography
- iPhone Photography School, iPhone Night Mode Camera