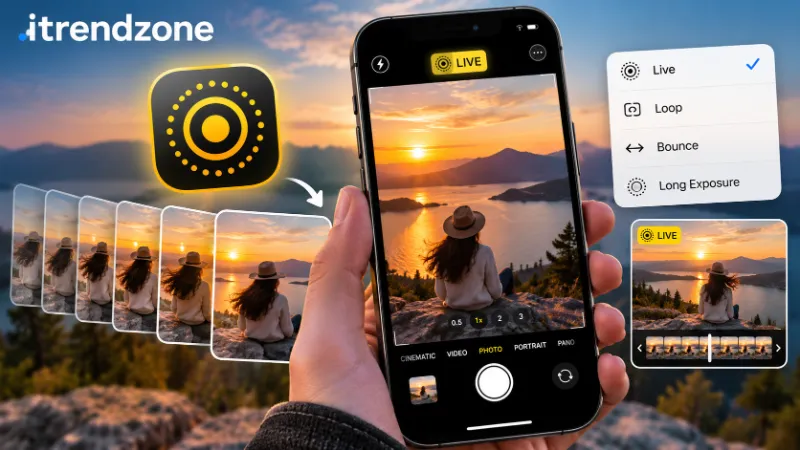

You press the shutter, and the moment is already gone. Your friend blinked, your dog moved, or the wave arrived a second late. Live Photos fix that problem. They save a short clip around every shot, so you can pick the best frame later.
This iPhone live photos guide shows you how to shoot, edit, share, and fix them. I tested every step on an iPhone 16 running iOS 18, so the menus below match what I saw on screen.
Key Takeaways
| Topic | What to know |
|---|---|
| What it records | About 1.5 seconds before and after you tap the shutter, with sound |
| Best use | Moving subjects, kids, pets, water, and group photos |
| Best effects | Live, Loop, Bounce, and Long Exposure |
| Save as video | Share menu, then Save as Video |
| Biggest problem | Low storage and a turned off Live button |
| Trade-off | Files take more space than a normal photo |
TL;DR
- A Live Photo is a still image plus a 3 second clip with sound. Tap the circle icon in the Camera app to turn it on.
- You can change the key photo, trim the clip, add effects, and save it as a video from the Photos app.
- If Live Photos are not saving, check storage, the Live toggle, and your Camera settings first.
What Are Live Photos and Why Should You Care?
Apple introduced Live Photos with the iPhone 6s in 2015. Since then, the feature has become a quiet favorite for everyday shooters. When Live is on, your iPhone records a bit of video and audio just before and just after the shutter tap.
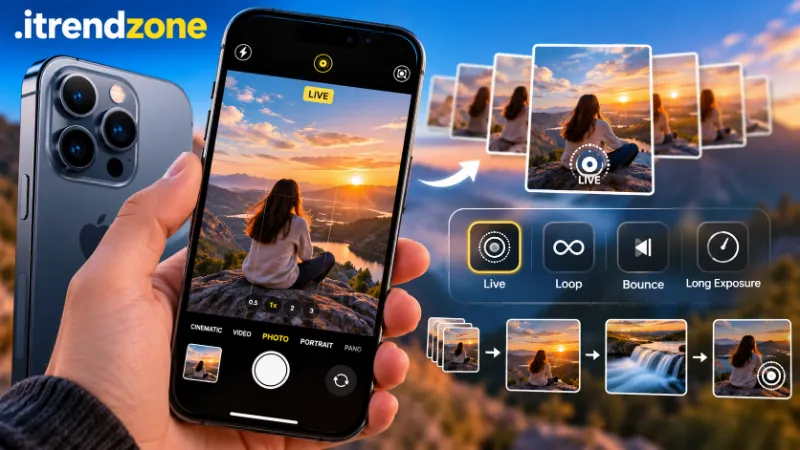
The result looks like a normal photo in your gallery. Press and hold it, and it comes alive. That small extra detail makes birthday clips, pet photos, and travel shots feel real.
Here is why I keep Live on most days:
- You can rescue a shot where someone blinked.
- You can turn a short moment into a looping clip.
- You can share motion without recording a full video.
Photographers who teach this feature agree on the basics. The team at Digital Photography School explains how iPhone Live Photos work in a clear, beginner friendly way, and it is a good second read after this guide.
How to Turn On Live Photos on Your iPhone
Turning the feature on takes two seconds. Here are the steps I use:
- Open the Camera app.
- Tap the circle icon at the top of the screen. It looks like three rings.
- When it turns yellow and shows a line through it no more, Live is on.
- Take your photo and hold still for a moment after you tap.
Many people lose clips because they lift the phone right after the tap. Count “one, two” before you move.
Make Live Photos Stay On
Your iPhone can forget your choice each time you reopen the camera. To keep it on, go to Settings, then Camera, then Preserve Settings, and turn on Live Photo. I did this on day one, and it ended most of my missing clip problems.
iPhone Cinematic Mode: How to Shoot Pro-Looking Video
Pro Tips to Take Better Live Photos
Good Live Photos need a little planning. These habits made the biggest difference in my own shots.
Hold steady. The clip includes the movement before and after the tap. A shaky hand ruins the loop later.
Pick moving subjects. Waves, flags, hair in the wind, and playing kids all look great. A still wall does not.
Watch the sound. The clip records audio, so loud traffic or wind can spoil it. You can mute the sound later in the editor.
Use good light. Dark scenes make the clip look soft. If you shoot at night, read our guide to iPhone Night mode photography to see how Night mode and Live Photos behave together.
Mix with other modes. Live works with many camera styles. For portraits, see our iPhone portrait mode tips, then try turning Live on for a more natural feel. For a full tour of what the camera can do, start with our post on iPhone camera modes explained.
How to Edit Live Photos on iPhone
If you want to edit Live Photos on iPhone, the Photos app has everything you need. You do not have to download anything.
Change the Key Photo
The key photo is the still frame your gallery shows. Here is how to change it:
- Open the Live Photo in the Photos app.
- Tap Edit.
- Tap the Live icon at the bottom.
- Drag the white frame on the timeline to the moment you like.
- Tap Make Key Photo, then tap Done.
I used this on a family photo where my cousin blinked. A frame half a second later fixed it, and nobody noticed.
Trim the Clip
In the same edit screen, drag the ends of the timeline to cut the start or end. This helps when someone walks into the frame at the last second.
Mute the Sound
Tap the speaker icon in the editor to remove audio. Do this before you share a clip from a quiet place such as a classroom or office.
Apply Filters and Adjustments
You can still change brightness, color, and crop. The changes apply to the whole clip, not just the still frame. Be careful with heavy crops, since they can reduce the quality of the clip.
Live Photos Effects on iPhone: Loop, Bounce, and Long Exposure
The live photos effects iPhone users love most live in the Photos app. Open a Live Photo and swipe up to see them.
| Effect | What it does | Best for |
|---|---|---|
| Live | Plays the clip once, as recorded | Normal memories |
| Loop | Repeats the clip in a smooth cycle | Fireworks, fountains, kids on a swing |
| Bounce | Plays forward, then backward, again and again | Jumps, splashes, quick actions |
| Long Exposure | Blends frames into a soft blur | Waterfalls, car lights, moving crowds |
How I Use Each Effect
I tested Long Exposure at a small waterfall near my home. The water turned silky, like a tripod shot, but I only used my phone. It works best when you keep the phone very still, so lean on a rail or a wall.
Bounce is perfect for short, funny moments. A friend tossing a hat made a great Bounce clip that my group chat loved.
Loop needs a scene that starts and ends in a similar way. Steam rising from a coffee cup is a good example.
For more ideas on creative effects, the lessons at iPhone Photography School on Live Photos show several useful examples.
How to Turn Live Photos Into Video
Many people search for how to turn Live Photos into video because they want a file that plays anywhere. Apple makes this easy.
- Open the Live Photo in Photos.
- Tap the Share button.
- Scroll down and tap Save as Video.
- Find the new video in your library.
If you do not see the option, the photo may not be a Live Photo, or you may have turned Live off when you took it. A quick check is to press and hold the photo. If nothing moves, it is a still image.
Why Save as Video?
- Android friends can play it without trouble.
- Social apps often handle videos better than Live Photos.
- You can edit the clip in iMovie or another app.
Remember that the video keeps the effect you chose. Set Loop or Bounce first if you want that look in the final file.
Live Photos Not Saving? Easy Fixes That Work
The live photos not saving problem has a few common causes. Work through this list in order.
- Check the Live button. If it has a line through it, Live is off.
- Check storage. Go to Settings, General, iPhone Storage. Live Photos take more space than normal photos, so a full phone can cause trouble.
- Restart the iPhone. It sounds basic, but it clears small camera bugs.
- Update iOS. Go to Settings, General, Software Update.
- Turn on Preserve Settings. This keeps Live on between sessions.
- Check iCloud. If you use iCloud Photos, give the upload time to finish on Wi-Fi.
- Check third party apps. Some camera apps do not save motion by default.
If you want to confirm the steps against official guidance, the iPhone user guide on Apple Support covers the Camera and Photos apps.
iPhone Night Mode Photography: Settings for Low-Light Shots
A Real Example From My Testing
When I shot a series of photos in quick succession, my phone saved some as plain stills. The cause was a mix of a nearly full storage bar and the camera resetting my Live setting. After I freed up space and turned on Preserve Settings, every shot saved as expected.
Live Photos vs Video vs Burst: Which Should You Use?
Many people ask which mode is best. The answer depends on the moment.
| Feature | Live Photo | Video | Burst |
|---|---|---|---|
| Length | About 3 seconds | As long as you want | A series of stills |
| Sound | Yes | Yes | No |
| Pick the best frame | Yes | Hard | Yes |
| File size | Medium | Large for long clips | Medium to large |
| Best for | Quick moments | Long events | Fast action |
I use Live Photos for casual moments, video for events, and Burst for sports. Many days, I switch between them in under a minute.
How Much Space Do Live Photos Use?
Live Photos include extra video data, so each one is larger than a regular photo. The exact size depends on your scene and your settings. A simple way to see the effect is to check your own library, since sizes vary by phone and iOS version.
| Setting | Effect on storage |
|---|---|
| Live on for every photo | Higher storage use |
| Live on only for key moments | Lower storage use |
| High Efficiency format | Smaller files than Most Compatible |
| iCloud Photos with Optimize Storage | Frees local space |
To save space, go to Settings, Camera, Formats and choose High Efficiency. Then turn Live off when you shoot still scenes.
Sharing Live Photos the Right Way
Sharing works well inside Apple’s world. Messages, AirDrop, and iCloud Shared Albums all keep the motion.
Some apps and devices show only the still frame. That is common when you send a Live Photo to an Android phone or upload it to a site that does not support the format. In that case, use Save as Video first.
Here is the quick rule I follow:
- Sending to an iPhone user: share the Live Photo.
- Sending to an Android user: send a video.
- Posting online: test with one file before you post a whole set.
Live Photos and Photography Skills
Live Photos can teach you better habits. Because you can scrub through frames, you learn to see which moment works best. That builds timing and patience.
If you want a different way to understand how your phone previews a scene, this post on Live View mode on iPhones gives helpful background on how the camera shows a scene before you shoot.
My Practical Workflow for Pro Looking Results
After months of testing, this is the routine I trust:
- Turn on Live and Preserve Settings.
- Hold the phone steady for a full count of two after the tap.
- Open the photo and check the key frame.
- Trim the extra seconds.
- Pick an effect only if the scene suits it.
- Save as Video if I plan to post it.
- Delete the Live versions I do not need to free space.
This takes about a minute per photo, and it saves me from many missed moments.
Frequently Asked Questions
1. How long is a Live Photo?
It is about three seconds in total. Your iPhone records roughly 1.5 seconds before and 1.5 seconds after you tap.
2. Do Live Photos drain the battery?
They use a small amount of extra power and storage, but most people will not notice a big change in daily use.
3. Can I turn a Live Photo into a normal photo?
Yes. Open Edit, tap the Live icon to turn it off, and save. The photo becomes a still image.
4. Why does my Live Photo look blurry when I play it?
The phone may have moved during the clip, or the light may be low. Hold still and shoot in better light.
5. Can I use Live Photos on an iPad or Mac?
Yes. You can view and edit them in the Photos app on both, and they sync through iCloud Photos.
Quick Quiz: Check What You Learned
Question 1: Which effect makes water look silky and smooth?
A) Loop B) Bounce C) Long Exposure
Answer: C) Long Exposure
Question 2: What should you do first if Live Photos are not saving?
A) Buy a new iPhone B) Check the Live button and storage C) Delete all apps
Answer: B) Check the Live button and storage
Question 3: How do you share a Live Photo with an Android friend?
A) Send it as is B) Save it as a video first C) Print it
Answer: B) Save it as a video first
Final Thoughts
Live Photos turn small moments into keepers. With the steps in this iPhone live photos guide, you can shoot with confidence, edit with ease, and fix problems fast. Start with one change today, such as turning on Preserve Settings, and build from there.
References
- Apple Support, iPhone User Guide (Camera and Photos sections)
- Digital Photography School, “iPhone Live Photos”
- iPhone Photography School, “Live Photos”
- iPhotography, “What Is Live View Mode on iPhones and How Does It Work”