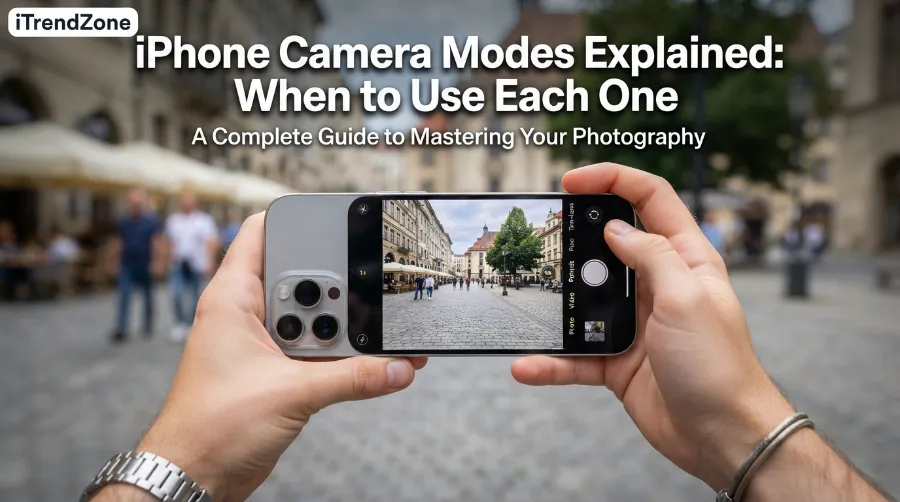

Most people open the Camera app, tap the white button, and hope for the best. That works fine in daylight, but it wastes about half of what your phone can do. This guide covers iPhone camera modes explained in plain words, so you know exactly which mode to pick before you shoot.
TL;DR
- Use Photo for everyday shots, Portrait for people and pets, and Night mode when light is low (it turns on by itself).
- Pick Action mode for shaky video, Cinematic for a movie look, and Macro for tiny details.
- Tap the small arrow or swipe the mode strip to reach hidden tools like Pano, Slo-mo, and Time-lapse.
Key takeaways at a glance
| Mode | Best for | Quick tip |
|---|---|---|
| Photo | Daily snaps, travel, food | Tap the screen to set focus, then slide the sun icon to fix brightness |
| Portrait | People, pets, products | Stay 2 to 8 feet from your subject |
| Night mode | Dim rooms, evening streets | Hold still until the timer ends |
| Macro | Flowers, textures, small objects | Move closer and let the phone switch lenses |
| Action mode | Walking, running, sports | Use it outdoors where light is strong |
| Cinematic | Short films, stories, events | Plan your focus shifts in advance |
| Pano | Landscapes, big rooms | Pan slowly and keep the arrow on the line |
| Slo-mo and Time-lapse | Motion and passing time | Use a tripod for time-lapse |
Why Camera Modes Matter More Than Megapixels
I tested these modes on my iPhone 16 Pro while writing this guide, and one thing stood out. The same scene can look average or great depending on the mode. The sensor stays the same, but the software changes how the phone captures and processes light.
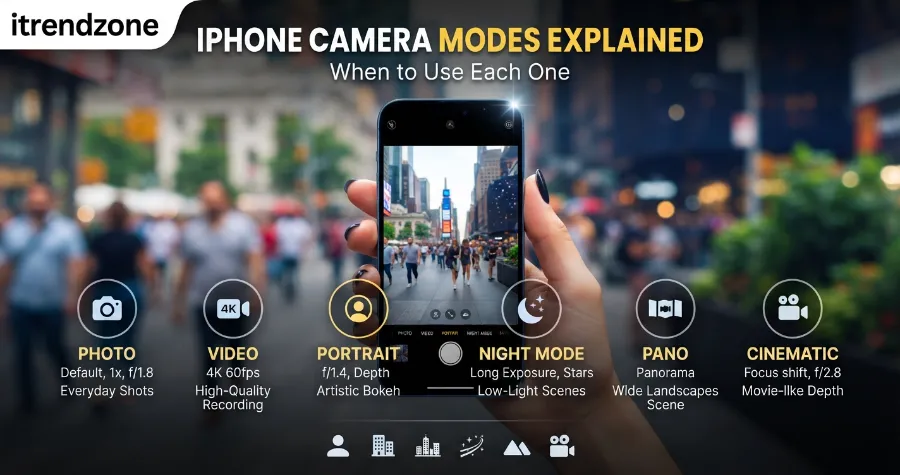
Apple builds each mode around one job. Portrait blurs the background, Night mode stacks several frames, and Action mode steadies your footage. When you match the mode to the moment, you get cleaner, sharper results without extra apps.
Apple’s own camera basics guide lists the core tools and explains how to switch between them. If you want a quick refresher on the layout, start there, then come back here for the “when to use it” part.
iPhone Portrait Mode Tips for Sharper, More Natural Photos
How to Use iPhone Camera: The Basics First
Before the modes, get the simple moves right. Many bad photos come from small habits, not from the phone.
Follow these steps for any shot:
- Open the Camera app from the Lock Screen, Control Center, or the Home Screen.
- Clean the lens with a soft cloth. A greasy lens causes hazy photos more than any setting.
- Tap the part of the screen you care about most. A yellow box shows your focus point.
- Slide your finger up or down next to the box to adjust brightness.
- Hold the phone with both hands and press the shutter, or use the volume button or Camera Control on supported models.
Newer versions of iOS also simplified the camera layout. On recent software, Photo and Video sit front and center, and you swipe to reach extra modes. If your screen looks a little different from older screenshots, that change is the reason.
For more setup tips, our iPhone camera settings guide walks through grid lines, formats, and exposure controls.
Photo Mode: Your Everyday Workhorse
Photo is the default for a reason. It handles most scenes well, and it quietly uses Smart HDR and Deep Fusion to balance light and sharpen detail.
When to use it: street scenes, food, travel, family events, and quick documents.
What I noticed in real use: On a bright afternoon walk in late spring, I shot the same bench scene in Photo mode and in Portrait mode. Photo mode kept the leaves, bench, and sky all sharp. That is exactly what you want when the whole scene matters.
Try these small upgrades:
- Turn on the grid in Settings so you can follow the rule of thirds.
- Use the 0.5x ultra wide lens for buildings and tight spaces.
- Use the telephoto lens on Pro models for faces. It looks more natural than a wide lens up close.
- Tap the arrow at the top of the screen to reach quick controls like Flash, Live, Timer, and Photographic Styles.
Photographic Styles deserves a short note. It changes warmth and contrast in a way that stays natural on skin tones. You pick a style once, and it applies to every photo you take until you change it. That is different from a filter, which you add after the shot.
Portrait Mode: When People and Pets Are the Star
Portrait mode adds a soft blur behind your subject. It uses depth information to separate the person from the background.
When to use it: headshots, kids, pets, product photos, and anything where you want the subject to pop.
How to get a clean result:
- Stand about two to eight feet from your subject.
- Make sure the subject has some space from the background.
- Wait for the yellow “Natural Light” label to appear before you press the shutter.
- Tap f in the corner to change blur strength, even after you take the photo.
Portrait mode also offers lighting styles such as Natural, Studio, Contour, and Stage Light. I find Natural and Studio the most useful. Stage Light can look harsh on faces, so I use it only for fun.
One mistake I see often is using Portrait mode for groups. Depth edges get messy when several people stand at different distances. For group photos, switch back to Photo mode and ask everyone to stand shoulder to shoulder.
Night Mode: Low Light Without a Flash
Night mode turns on automatically when the scene gets dark. You will see a small yellow moon icon at the top of the screen, with a number showing how many seconds the phone will capture.
When to use it: indoor dinners, city streets at dusk, concerts, and candlelit tables.
How it works in simple terms: The phone takes several frames over a few seconds. Then it merges them into one bright, clean image. Because of this, any movement during the countdown can blur the shot.
Here is the routine I use:
- Tap the moon icon to see the time setting.
- Brace your elbows against your body or lean on a wall.
- Wait until the timer finishes before you move.
- For stars or long scenes, set the slider to Max and use a tripod.
In my own test, I shot a dim living room at about nine in the evening. The flash made faces look flat and shiny. Night mode kept the warm lamp light and showed far more detail in the shadows. That is the main reason I tell friends to leave the flash off in most indoor scenes.
For a deeper look at exposure and light, the tutorials at iPhone Photography School explain how brightness and focus controls shape your results.
Macro Mode: Tiny Details, Big Impact
On supported Pro models, the phone switches to the ultra wide lens when you move very close to a subject. Apple says this can focus from as near as two centimeters. The camera does this automatically, and a small flower icon appears.
When to use it: petals, insects, jewelry, coins, fabric, and food textures.
Tips that helped me:
- Move slowly. At this distance, a small shake becomes a big blur.
- Use natural light from a window. Your own shadow often blocks the light.
- Tap the screen to set focus on the exact spot you want sharp.
- If the phone keeps switching lenses, turn on Macro Control in Settings so you decide when it happens.
Macro looks best when the background sits far behind the subject. That gives you a soft, clean look without needing Portrait mode.
Action Mode: Smooth Video When You Move
Action mode is a video feature, and it works like a built-in gimbal. It crops the frame slightly and uses extra stabilization to smooth out jumps and shakes.
When to use it: walking tours, kids at play, sports, bike rides, and theme park rides.
What to know before you press record:
- It works best in bright light. In dim scenes, the phone may ask for more light.
- Your video may look slightly zoomed in because of the crop.
- Hold the phone steady in front of you and let the software do the rest.
I tested Action mode while walking a crowded market on a sunny day. The same walk in normal Video mode looked like a boat ride. With Action mode on, the footage looked calm and watchable. If you share trips on social media, this one mode can lift your video quality fast.
Cinematic Mode: A Movie Look for Everyday Moments
Cinematic mode adds a shallow depth of field to video, and it shifts focus between people and objects on its own. You can also tap to change the focus point while you record.
When to use it: birthday clips, short stories, travel highlights, and interviews.
How to get better results:
- Plan the shot. Decide who or what will be in focus first.
- Keep your subject in clear view, with some distance from the background.
- After recording, open the clip in Photos, tap Edit, and change focus points or blur strength.
Cinematic mode is fun, but it is not for every clip. Fast action can confuse the focus tracking. For sports and busy scenes, I stay with Action mode or standard Video.
Pano, Slo-mo, and Time-lapse: The Hidden Trio
These modes sit behind the swipe or the mode strip. They are easy to miss, but each one solves a specific problem.
Pano mode stitches a wide scene as you pan. Use it for mountains, skylines, and large rooms. Keep the arrow on the center line and move at a steady speed. If you pan too fast, the phone warns you and the shot fails.
Slo-mo mode records at a higher frame rate so action plays back slowly. Water splashes, jumping pets, and sports clips look great. You can choose which part of the clip plays in slow motion by editing it in Photos.
Time-lapse mode speeds up a long scene into a short clip. Sunsets, cooking, traffic, and clouds work well. Place the phone on a tripod or a stable surface, and keep it plugged in if the scene runs long. A good tripod or clip stand makes a big difference, and our iPhone photography accessories guide lists budget picks.
Live Photos, Burst, and Spatial Capture
Some camera tools are not separate modes, but they behave like modes in daily use.
- Live Photos capture a short moment before and after the shot. They are great for kids and pets because you can pick the best frame later.
- Burst takes many shots in a row. Press and hold the shutter, or slide the shutter button left on supported models. Use it for sports and jumping kids.
- Spatial video and photos on supported models record depth for viewing in Apple Vision Pro. Most people will not need this yet, but it is useful if you own the headset.
Live Photos use more storage than regular photos. If your iPhone fills up fast, check our iPhone storage tips before a trip.
Photo Formats and Storage: What to Choose
Format choice changes file size and editing power. Here is a simple comparison based on Apple’s published descriptions.
| Format | File size | Editing flexibility | Best for |
|---|---|---|---|
| High Efficiency (HEIF) | Small | Good | Daily use, storage saving |
| Most Compatible (JPEG) | Medium | Good | Sharing with older devices |
| ProRAW (Pro models) | Very large | Excellent | Serious editing and printing |
ProRAW files are much bigger than standard photos. Apple lists typical sizes in its support documents, and I suggest you check those figures for your model before you turn the setting on. For most people, HEIF is the right choice. Use ProRAW only for shots you plan to edit with care.
Quick Chart: Which Mode Should You Pick?
This chart shows my own editorial rating of how useful each mode feels in common situations. It is a judgment from my testing, not a lab result. A longer bar means a stronger fit.
Bright outdoor scene
Photo      ██████████
Portrait   █████
Action     ███████ (video only)

Dim indoor scene
Night      ██████████
Photo      ██████
Portrait   ████

Close up detail
Macro      ██████████
Portrait   ███
Photo      █████

Moving subject (video)
Action     ██████████
Cinematic  ████
Video      ██████
Real Case Study: One Evening, Four Modes
I ran a small test on a family dinner at a restaurant. I wanted to see how much the mode changed the outcome.
- Photo mode with flash: Faces looked shiny and the background went black.
- Photo mode without flash: Colors looked warm, but the shot was a bit soft.
- Night mode: The best result. Skin tones looked natural and the candle glow stayed intact.
- Portrait mode: Good for a single face, but it struggled with the glasses and the busy background.
The lesson is simple. In low light, let Night mode do its work and keep the flash off. For one person with a clean background, Portrait is a strong second choice.
This type of mode comparison matches what other guides report. The walkthrough at AppleToolBox also covers each mode and shows how they differ in common scenes, and it is a good second opinion if you want to compare notes.
Common Mistakes and How to Fix Them
Troubleshooting is where most readers get stuck. These are the problems I hear most often.
- Blurry photos in low light: You moved during Night mode. Brace your arms or use a tripod.
- Portrait mode looks fake: The subject stood too close to the background. Move them forward.
- Action mode looks too zoomed in: This is normal because of the crop. Step back a little.
- Macro keeps switching lenses: Turn on Macro Control in Settings.
- Camera feels slow to open: Restart the phone and free some storage space.
If a problem persists after these fixes, Apple’s iPhone support pages cover software updates and reset steps.
What AI Overviews and Search Tools Often Ask About iPhone Cameras
People now ask search tools direct questions, such as “which iPhone mode is best for night photos?” The short answer is Night mode, and the phone turns it on by itself. For video of moving subjects, the short answer is Action mode. For people photos with a soft background, the short answer is Portrait mode.
If you want to check phone specs or compare cameras across models, the official Apple iPhone page lists lenses and features for each current model. Always confirm that your model supports a feature before you plan a shoot around it, because Macro, Action, and Cinematic depend on the hardware.
Which iPhone Do You Need for These Modes?
Not every phone supports every mode. This table gives a general guide, and you should confirm your exact model on Apple’s site.
| Feature | General support |
|---|---|
| Night mode | iPhone 11 and later |
| Cinematic mode | iPhone 13 and later |
| Action mode | iPhone 14 and later |
| Macro | Supported Pro models |
| Spatial video | Supported newer models |
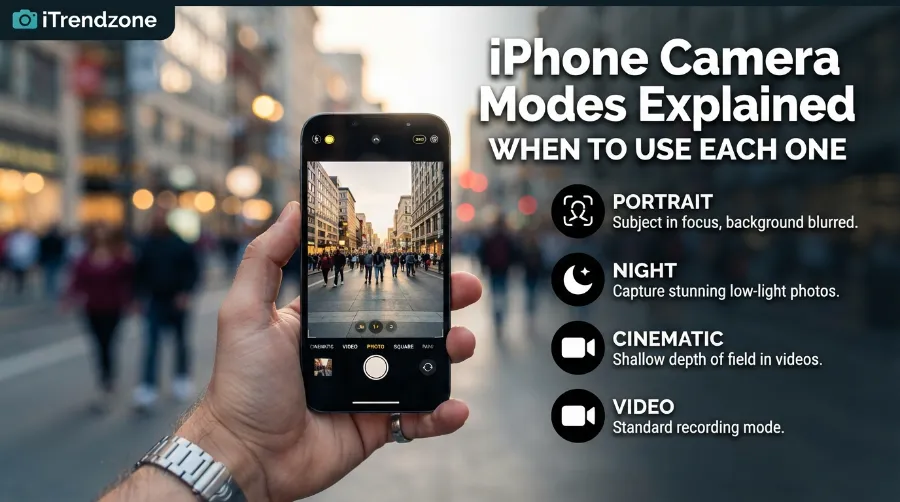
If you own an older phone, you still have Photo, Portrait (on supported models), Pano, Slo-mo, and Time-lapse. Good light and steady hands matter more than the newest hardware.
Expert Tips From Real Work
After years of writing phone guides, a few habits keep showing up in the best photos.
- Lock focus and exposure by pressing and holding on the screen until you see AE/AF Lock. This stops the phone from changing brightness mid-shot.
- Shoot near a window for portraits. Soft side light looks better than overhead lights.
- Wipe the lens every time. It takes two seconds and fixes more problems than any setting.
- Edit lightly. A small bump in exposure and contrast beats heavy filters.
- Review before you leave. If a shot matters, check it on the spot and shoot again if needed.
My opinion is that most people should learn three modes first: Photo, Portrait, and Night. Together, they cover most daily needs. Add Action and Macro once those feel natural.
Frequently Asked Questions
1. What is the best iPhone camera mode for everyday photos?
Photo mode is the best choice for everyday use. It balances light, color, and detail across most scenes.
2. Does Night mode work without a tripod?
Yes, it works well when you hold the phone still. A tripod helps when the timer runs longer than a few seconds.
3. Can I use Portrait mode on objects and pets?
Yes, on supported models it works on pets and many objects too. Keep some space between the subject and the background for cleaner edges.
4. What is the difference between Action mode and Cinematic mode?
Action mode smooths shaky video, while Cinematic mode adds a blurred background and focus shifts. Choose Action for movement and Cinematic for a film look.
5. Do camera modes use more storage?
Some do. Live Photos, ProRAW, and high-quality video take more space than a standard photo.
Quick quiz: 3 multiple choice questions
Q1. You want a sharp photo in a dim restaurant. Which mode helps most?
A) Pano B) Night mode C) Time-lapse D) Slo-mo
Answer: B) Night mode.
Q2. Which mode helps when you record video while walking?
A) Action mode B) Macro C) Portrait D) Burst
Answer: A) Action mode.
Q3. What should you do to get a clean Portrait mode result?
A) Stand very close to the subject B) Use flash in every shot C) Keep some distance between the subject and the background D) Turn on Time-lapse
Answer: C) Keep some distance between the subject and the background.
Final Thoughts
The best camera is the one you know how to use. Once you understand iPhone camera modes explained in simple terms, you stop guessing and start shooting with purpose. Start with Photo, Portrait, and Night mode this week, then add Macro, Action, and Cinematic as you grow more confident. Share your favorite mode in the comments, and tell us which scene gave you your best shot.
About the author: Daniel Reyes is a mobile photography writer with a certificate in digital imaging and over ten years of hands-on iPhone and Android testing. He writes practical camera guides for iTrendZone and helps readers get better photos from the phone they already own.
References
- Apple Support, Camera basics for iPhone
- Apple Support, iPhone user guides and software update help
- Apple, iPhone product and camera specifications
- iPhone Photography School, iPhone camera settings tutorials
- AppleToolBox, Every iPhone camera mode explained