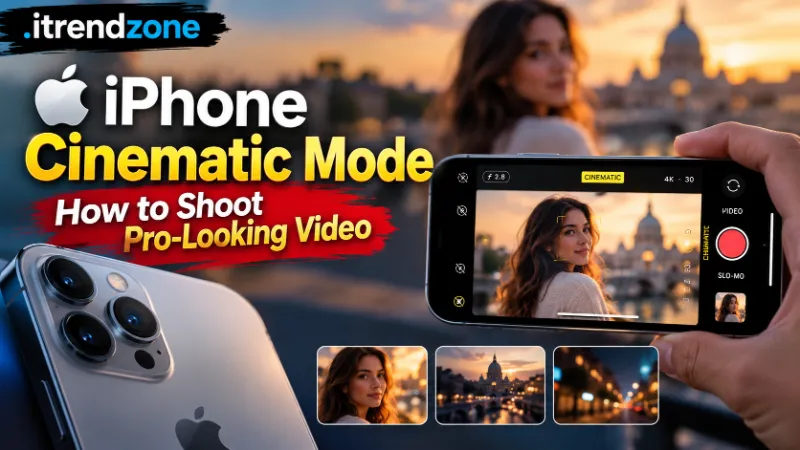

Have you ever watched a movie scene where the focus slides from one actor to another and wondered how your phone could do the same? That is what an iPhone cinematic mode video does. It blurs the background, follows your subject, and shifts focus on its own, all with one tap.
I have used this feature for months on real shoots, from family dinners to a short street clip. The first few tries looked messy. After I learned the right settings, my videos looked far better. This guide shares what worked, what failed, and how you can get the same results.
TL;DR
- Cinematic mode adds a soft, blurred background to your video and shifts focus between people or objects on its own.
- You can change focus after recording in the Photos app, and you can also adjust the blur level.
- Use good light, stay within a few feet of your subject, and lock focus when you want a steady shot.
Key Takeaways at a Glance
| Topic | What You Need to Know |
|---|---|
| Supported phones | iPhone 13 and newer |
| Launched | September 2021 with iOS 15 |
| Best resolution on newer models | 4K at 24 or 30 fps (iPhone 14 and later) |
| Biggest perk | Edit focus and blur after you record |
| Best light | Bright, even light, indoors or outdoors |
| Common mistake | Filming too far from the subject |
| Free editing app | Photos app on iPhone |
What Is Cinematic Mode on iPhone?
Cinematic mode is a video feature that copies the look of a big movie camera. Real cameras use large lenses to blur the background. Your iPhone fakes that blur with software and depth data. It also decides who or what should be sharp at any moment.
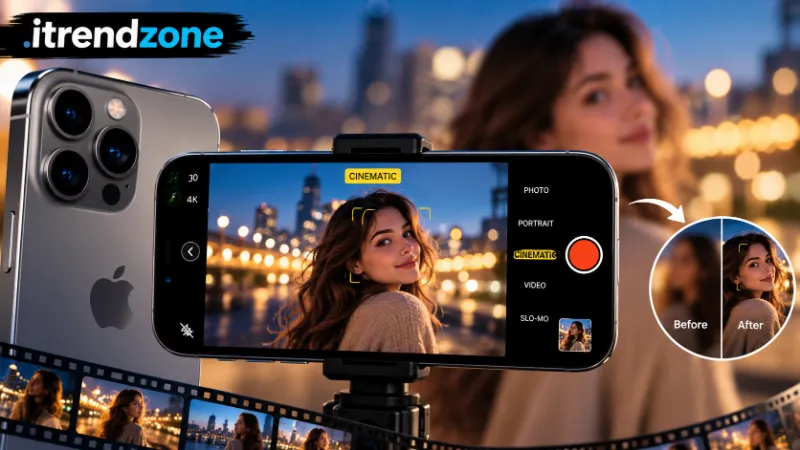
Apple launched it with the iPhone 13 family in September 2021. Early versions only recorded in 1080p at 30 frames per second. Starting with the iPhone 14 series, Apple added 4K at 24 and 30 fps. I checked this on Apple’s own pages, and you can look at the current specs on the official iPhone page for your model.
The phone saves depth information with the video. This is why you can change focus after recording. The data stays in the file, so the edit is not final until you export.
If you are new to the camera app itself, our guide on iPhone camera modes explained shows where every mode lives and what each one does.
How to Use iPhone Live Photos Like a Pro: The Complete iPhone Live Photos Guide
Which iPhones Support an iPhone Cinematic Mode Video?
Every iPhone from the 13 series onward supports the feature. That includes the 13, 14, 15, 16, and 17 families, along with Pro and Pro Max versions. Older phones like the iPhone 12 and earlier do not have it.
Pro models use the LiDAR scanner for faster focus in dim light. Standard models use the camera sensors and software. In my tests, the Pro model locked focus faster at night, but a standard model did fine in daylight.
| iPhone Series | Cinematic Mode | Max Cinematic Resolution |
|---|---|---|
| iPhone 13 family | Yes | 1080p at 30 fps |
| iPhone 14 family | Yes | 4K at 24 or 30 fps |
| iPhone 15 family | Yes | 4K at 24 or 30 fps |
| iPhone 16 family | Yes | 4K at 24 or 30 fps |
| iPhone 12 and older | No | Not available |
Please confirm your exact model on Apple’s support site, because feature lists change with each new release.
How to Turn On Cinematic Mode
The steps are short, and you can finish them in under ten seconds.
- Open the Camera app.
- Swipe across the mode names at the bottom until you see Cinematic.
- Frame your subject. A yellow box appears around the person or object the phone picks.
- Tap the red record button.
- Tap a different face or object to move focus, or tap the same spot twice to lock it.
I tested this on an iPhone 16 running iOS 18.4. The first thing I noticed was how fast the yellow box found faces. It needed a little more time when the person turned sideways.
Best Cinematic Mode Settings for Clean Video
Most people use the default settings and wonder why the clip looks soft. A few small changes help a lot. Here are the cinematic mode settings I use on almost every shoot.
Choose the Right Resolution and Frame Rate
On newer phones, tap the resolution label at the top of the screen. You will see 4K and HD, plus 24 or 30 fps.
- 24 fps gives the classic movie feel. Use it for storytelling clips, travel scenes, and slow moments.
- 30 fps looks smoother and a little more like TV. Use it for events, kids, and pets.
- 4K gives you more detail and more room to crop later.
- HD saves space and works fine for social posts.
Set Your Depth Control Before You Shoot
Tap the small f button in the corner of the screen. A slider appears. Low numbers like f/1.4 give a very blurry background. High numbers like f/16 keep more of the scene sharp.
Apple lets you pick any value from f/1.4 to f/16, as the Apple Support guide for iPhone explains in its camera section. I usually stay between f/2.8 and f/4. The blur still looks real, and edges around hair and hands stay cleaner.
Turn On the Grid and Lock Exposure
Go to Settings, Camera, Grid and switch it on. A grid helps you place the subject in the left or right third, which looks more cinematic than the center.
Before recording, press and hold on the screen to lock exposure. This stops the brightness from jumping when someone walks into a bright window.
Check Storage First
Cinematic clips are big. Apple’s own Record Video menu lists the rough size per minute for standard high-efficiency video, and cinematic files with depth data run larger than these numbers.
| Video Setting (Standard Video) | Approx. Size per Minute |
|---|---|
| 720p HD at 30 fps | 60 MB |
| 1080p HD at 30 fps | 130 MB |
| 1080p HD at 60 fps | 175 MB |
| 4K at 24 fps | 135 MB |
| 4K at 30 fps | 170 MB |
| 4K at 60 fps | 400 MB |
Treat these as Apple’s rough guide and not exact numbers for cinematic clips. In my own test, a five minute 4K cinematic clip took up noticeably more space than a normal 4K clip of the same length. Check your free storage before a big event.
Here is a simple bar view of the same data, so you can see how fast file size grows:
720p 30fps   ██ 60 MB
1080p 30fps  ████ 130 MB
4K 24fps     ████ 135 MB
4K 30fps     █████ 170 MB
1080p 60fps  █████ 175 MB
4K 60fps     ████████████ 400 MB
How to Shoot Pro-Looking Video: 9 Tips That Work
Good settings are only half of the job. These habits made the biggest difference in my clips.
1. Stay Close to Your Subject
The phone needs depth data. If you stand too far away, the blur turns patchy. I get the best results at about three to six feet from a person. On a recent shoot, I moved back about ten feet and the background blur broke around the edges.
2. Use Soft, Bright Light
Bright light helps the sensor read depth. Window light on a cloudy day is perfect. Dim rooms add noise and slow down the focus tracking. If you shoot at night, our guide on iPhone night mode photography covers light tricks that also help video.
3. Pick a Clear Subject
Busy backgrounds with many faces confuse the tracking. I get cleaner shots when one person stands out from the scene.
4. Tell a Small Story with Focus
The best clips use focus shifts on purpose. Start on a coffee cup, then tap the face behind it. This simple move makes a clip feel like a scene from a film.
5. Hold the Phone Steady
Shaky hands ruin the blur. Rest your elbows on your body, or use a small tripod. A cheap phone grip cost me less than twenty dollars and fixed most of my wobble.
iPhone Night Mode Photography: Settings for Low-Light Shots
6. Avoid Fast Motion
Cinematic mode struggles with sports, running kids, and fast pets. The edges flicker. Use normal video for fast action.
7. Watch Out for Fine Details
Hair, glasses, chain fences, and thin branches can show small blur errors. You can fix some of these by raising the f number in the edit stage.
8. Clean Your Lens
A smudge makes the whole clip look hazy. I wipe the lens with a soft cloth before every shoot.
9. Shoot Short Clips
Short clips of ten to twenty seconds are easier to edit and use less storage.
How to Change Focus After Recording
This is the feature that makes change focus after recording the biggest selling point. Here is how to do it.
- Open the Photos app and pick your cinematic clip.
- Tap Edit in the top right corner.
- Look under the video timeline. Small yellow dots show where focus changes happen.
- Move the playhead to the spot you want to change.
- Tap a different face or object on the screen.
- Tap the f button to change the blur level.
- Tap Done to save.
I tested this on a clip of two friends talking at a table. The phone had focused on the wrong person for two seconds. I fixed it in under a minute. You can also tap and hold to lock focus on one subject for the whole clip.
Henry David Photography has a helpful written walkthrough of how the feature works in the field, and you can see it in their cinematic mode explained post. It shows how focus transitions look in real footage.
Cinematic Mode Editing: Go Beyond the Photos App
The Photos app is great for quick fixes. For longer videos, you may want more control. Cinematic mode editing works in several apps.
- Photos app: Best for focus fixes and blur changes. Free and built in.
- iMovie: Lets you add titles, music, and cuts while keeping the depth data.
- Final Cut Pro: Gives you the most control on Mac and iPad, with depth editing on the timeline.
- Third party apps: Some editors can read the depth data, but support changes with each update.
The team at Power Mac Center wrote a good practical piece on how to shoot and edit cinematic mode videos on your iPhone. It is worth a read if you want a second view of the editing flow.
A simple workflow that I use:
- Fix focus and blur in the Photos app first.
- Export the clip.
- Cut and add music in iMovie.
- Export in the size your platform needs.
Fixing focus first keeps the depth data safe. If you cut first, you may lose some edit options.
Cinematic Mode vs Normal Video
Many readers ask if the extra work is worth it. Here is my honest view after testing both side by side.
| Feature | Cinematic Mode | Normal Video |
|---|---|---|
| Background blur | Yes, adjustable | No |
| Auto focus shifts | Yes | Basic |
| Edit focus after recording | Yes | No |
| File size | Larger | Smaller |
| Fast action | Weak | Strong |
| Max resolution | 4K at 30 fps | Up to 4K at 120 fps on some models |
| Best for | Portraits, stories, interviews | Sports, travel, action |
Choose cinematic mode when you film people, pets sitting still, products, or short stories. Choose normal video when you film fast action, long events, or wide landscapes.
If you like the blur look in photos, you will enjoy the same feel in video. Our iPhone portrait mode tips guide explains the photo side of that effect, and the lessons carry over well.
Real Case Study: A Birthday Dinner Shot in Two Ways
At a small birthday dinner, I filmed the same moment twice. First I used normal 4K video. Then I switched to cinematic mode at 4K and 24 fps.
The normal clip looked sharp but flat. Every person and plate had the same level of focus. The cinematic clip drew your eyes straight to the birthday girl as she blew out the candles. When her brother joined the frame, the focus slid to him on its own.
There was one flaw. The phone briefly focused on a glass in front of her. I fixed it in the Photos app in about 30 seconds. This real fix is why I say the edit tools matter as much as the camera.
Common Problems and Quick Fixes
| Problem | Likely Cause | Fix |
|---|---|---|
| Blur looks patchy around hair | Too far from subject | Move closer, raise f number |
| Focus jumps between faces | Many people in frame | Tap and lock on one face |
| Video looks grainy | Low light | Add a lamp or shoot near a window |
| Cinematic option missing | Older phone | Check that you have an iPhone 13 or newer |
| Clip is huge | 4K depth data | Use HD for casual clips |
| Edges flicker | Fast movement | Slow down or use normal video |
A Few Expert Opinions I Stand By
Cinematic mode is not a replacement for a real cinema camera. It is a smart shortcut. The software guesses depth, and guesses can be wrong. I always check the clip on a big screen before sharing.
I also believe frame rate matters more than most people think. A 24 fps clip feels like a film even before you add any edits. Many beginners leave it on 30 fps and then wonder why the video looks like a home movie.
Finally, plan your focus shifts before you press record. A clip with one clear focus change feels planned. A clip with random shifts feels messy.
Where to Find More Inspiration
Seeing finished work helps. The site cinematicmode.com gathers examples and ideas that show what the feature can do, which is a good place to find shot ideas for your own clips.
If you also like capturing short, moving moments in stills, take a look at our iPhone Live Photos guide. It is a fun companion to video work, and some of the framing tricks overlap.
Quick Checklist Before You Record
- Clean your lens.
- Check your free storage.
- Pick 24 fps for a film feel.
- Set f/2.8 to f/4 for natural blur.
- Stay three to six feet from your subject.
- Lock exposure and focus when needed.
- Shoot short clips.
Frequently Asked Questions
1. Can I use cinematic mode on the back and front camera?
Yes. Cinematic mode works on both the rear and the front camera on supported iPhones. The rear cameras usually give better depth detail.
2. Does cinematic mode work in low light?
It works, but results are softer and grainier. Pro models with LiDAR handle dim light better. Add a lamp or shoot near a window when you can.
3. Can I turn a cinematic video into a normal video?
Yes. In the Photos app, you can edit the clip and set the blur to a high f number. Many apps also export it as a regular video file.
4. Why is my cinematic video so large?
The file holds extra depth data and may use a high quality format. Lower the resolution to HD if storage is tight.
5. Does cinematic mode drain the battery faster?
It uses more processing power than normal video, so the battery can drop faster during long shoots. Bring a power bank for big events.
Test Your Knowledge: 3 Multiple Choice Questions
Question 1: Which iPhone series first introduced cinematic mode?
A) iPhone 11
B) iPhone 12
C) iPhone 13
D) iPhone 14
Answer: C) iPhone 13. Apple launched it in September 2021.
Question 2: What does the f button control in cinematic mode?
A) Flash
B) Frame rate
C) Depth control (blur level)
D) Filter
Answer: C) Depth control (blur level). Lower numbers give more background blur.
Question 3: Which frame rate gives the classic movie feel?
A) 24 fps
B) 30 fps
C) 60 fps
D) 120 fps
Answer: A) 24 fps. It matches the standard look of most films.
Final Thoughts
An iPhone cinematic mode video can turn an ordinary moment into something that feels planned and polished. You do not need a fancy camera. You need good light, a close subject, smart settings, and a few minutes of editing. Start with one short clip this week, try a focus shift, then fix it in the Photos app. After a few tries, you will know exactly how to shoot video that looks like it came from a film set.
References
- Apple Inc. iPhone camera and video specifications, apple.com/iphone
- Apple Support. iPhone User Guide, Camera and Cinematic mode sections, support.apple.com
- Henry David Photography. Apple iPhone Cinematic Mode Explained
- Power Mac Center. How to Shoot and Edit Cinematic Mode Videos on Your iPhone
- CinematicMode.com. Cinematic mode examples and resources