
iPhone Camera Control: The Complete Guide to the Button That Changes How You Shoot
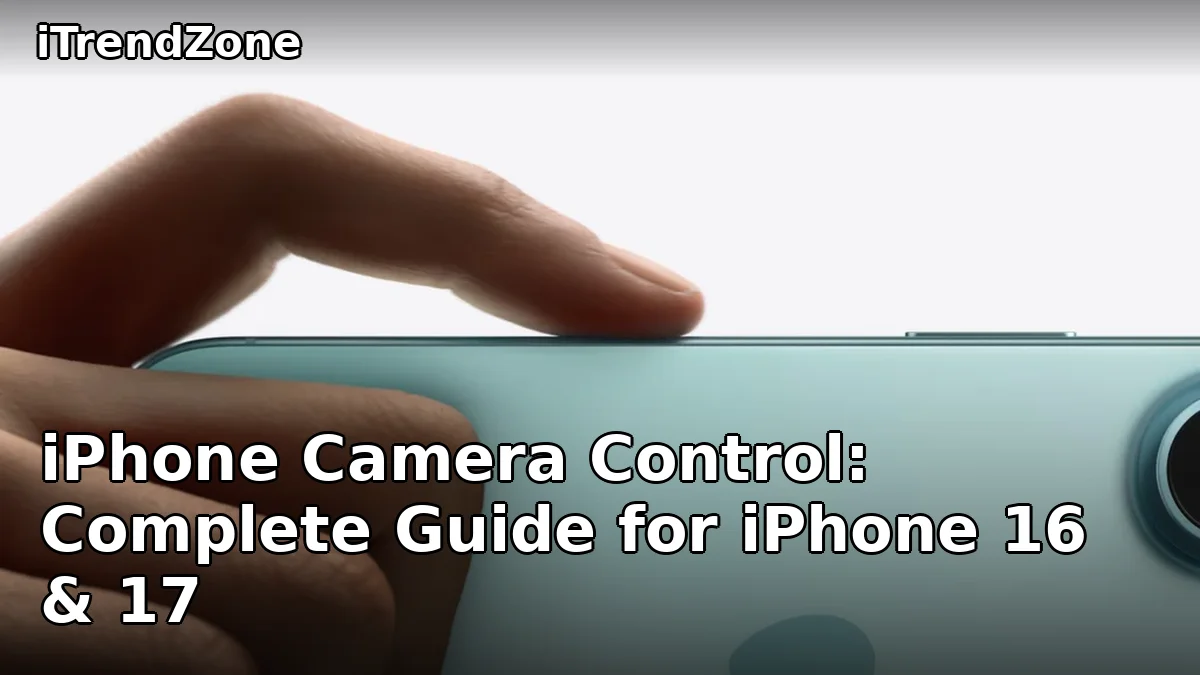
iphone camera control is the dedicated hardware control on the right edge of the iPhone 16, iPhone 17 and iPhone Air, and it is the fastest way to open the camera, take a photo and fine-tune the shot without touching the screen. Apple introduced it with the iPhone 16 range in September 2024, kept it across the iPhone 17 range in 2025, and refined it in iOS 26, so by 2026 it is a settled part of the iPhone rather than a novelty. It is a flush, sapphire-covered control with a force sensor and a capacitive touch surface, which means it can tell a full click from a gentle light press and from a slide of your fingertip. One button therefore becomes a shutter, a zoom dial, an exposure control and a shortcut to Apple Intelligence, all while your eyes stay on the scene. Practise it daily until it feels automatic.
TL;DR: Click iphone camera control once to open Camera and click again to take a photo. Click and hold in Photo mode to record a quick video, or click and hold from anywhere else to open Visual Intelligence. Lightly press twice to open the adjustment overlay, slide to choose Exposure, Depth, Zoom, Cameras, Styles or Tone, light-press to select it, then slide again to adjust it. Customise everything in Settings, then Camera, then Camera Control, where you can change the launch app, switch between Single Click and Double Click, reorder the adjustments and turn on Lock Focus and Exposure. If the button feels too sensitive, change the light-press force in Settings, then Accessibility, then Camera Control.
What Is iPhone Camera Control?
iphone camera control is best understood as three controls packed into one slim strip of hardware. First, it is a physical button with a tactile click, so it works as a shutter release in the same way the shutter button on a dedicated camera works. Second, it is a force sensor, so a light press that stops short of a click does something different from a full press, and Apple uses that half-press to open menus and lock focus. Third, it is a capacitive touch surface, so sliding your finger along it works like turning a dial. That combination is why the learning curve feels strange for the first few days: you are learning a small language of presses, half-presses and slides, and once it becomes automatic, the button disappears and the photography improves.
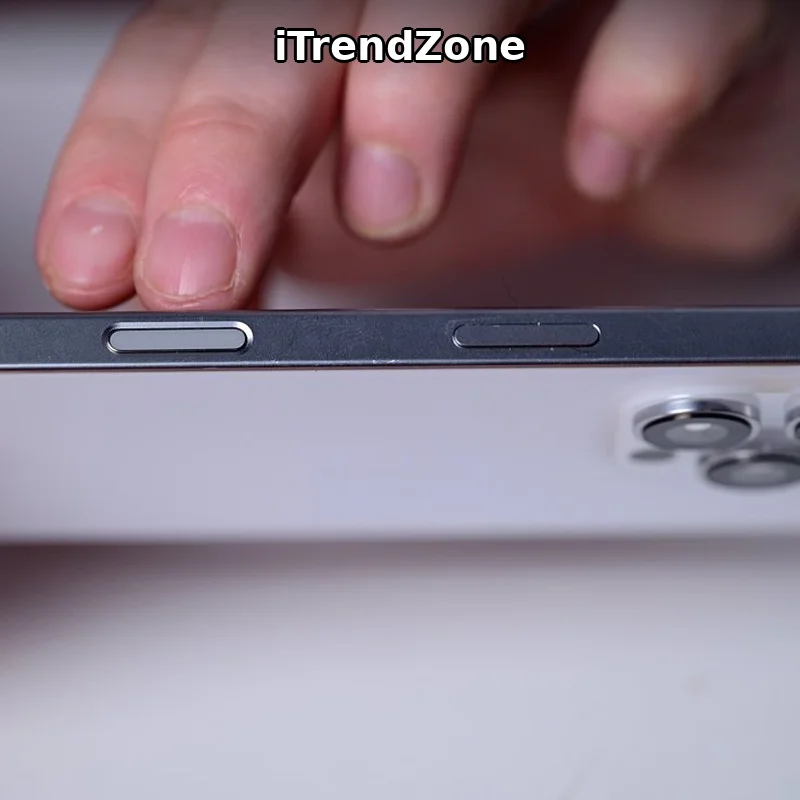
The control sits on the lower half of the right edge, below the Side button, opposite the Action button and the volume buttons. Hold the iPhone sideways, with the cameras at the top left, and your right index finger falls naturally onto it while your left hand supports the other end of the phone. It does not replace the on-screen Shutter button, the volume-button shutter or the Lock Screen camera shortcut. What it adds is speed and discretion: you can go from a locked phone in your pocket to a finished photo in about two seconds, and you can adjust exposure or zoom while the phone is held at arm’s length, without tapping through menus that cover the viewfinder.
Which iPhones Have Camera Control?
Not every iPhone has the button, and this is the first thing to check before following any step in this guide. Camera Control arrived with the iPhone 16 family in September 2024, so every iPhone 16, iPhone 16 Plus, iPhone 16 Pro and iPhone 16 Pro Max has it. Apple carried it across to the iPhone 17 family in September 2025, so the iPhone 17, iPhone 17 Pro and iPhone 17 Pro Max all have it, and the slim iPhone Air launched alongside them has it too. The budget models are the exception: the iPhone 16e and the iPhone 17e do not have Camera Control. If you own one of those, you can still use Visual Intelligence and the Camera app, but you reach them through the Action button, the Lock Screen or Control Centre instead.
| Model | Camera Control | Chip | Launched with | iOS 26 |
|---|---|---|---|---|
| iPhone 16 | Yes | A18 | iOS 18 | Yes |
| iPhone 16 Plus | Yes | A18 | iOS 18 | Yes |
| iPhone 16 Pro | Yes | A18 Pro | iOS 18 | Yes |
| iPhone 16 Pro Max | Yes | A18 Pro | iOS 18 | Yes |
| iPhone 16e | No | A18 | iOS 18 | Yes |
| iPhone 17 | Yes | A19 | iOS 26 | Yes |
| iPhone 17 Pro | Yes | A19 Pro | iOS 26 | Yes |
| iPhone 17 Pro Max | Yes | A19 Pro | iOS 26 | Yes |
| iPhone Air | Yes | A19 Pro | iOS 26 | Yes |
| iPhone 17e | No | A18 | iOS 26 | Yes |
Every model listed with Camera Control can run iOS 26, and the features here assume iOS 26 or later is installed. If your phone is still on iOS 18, most gestures work the same way, but the customisation menu is simpler: iOS 26 adds the ability to reorder the adjustment controls, turn the light-press menu off entirely, and choose which controls appear at all. Updating is therefore the most useful first step if a setting described here is missing. The button itself is identical on the iPhone 16 and iPhone 17 ranges; what changes is what it can adjust, because the cameras behind it differ. An iPhone 17 Pro has 4x and 8x telephoto steps to zoom through, while an iPhone 16 or iPhone 17 reaches 2x, so the button only ever shows the controls that make sense for your model and mode. Our iPhone camera complete guide covers those model differences in full.
The Basics: Click to Open, Click to Shoot
With the phone locked or asleep, click the button once. If the screen is off, the first click wakes the display and a second click opens Camera; if the screen is already on, a single click opens Camera immediately. Either way, the app opens in the mode you last used, so check the mode names at the bottom of the screen before you shoot. Click again to take a photo. Two clicks, about two seconds, one photo, and you never touched the screen. That is the core promise of the button, and it works from the Lock Screen, the Home Screen and inside almost any other app. Apple’s own guide to using Camera Control on iPhone describes exactly this sequence.
By default the camera opens on a single click, which is fastest but can also open accidentally in a pocket or bag. If that happens, go to Settings, then Camera, then Camera Control, and change the launch gesture to Double Click. The camera then needs two quick clicks to open, which almost eliminates pocket launches while adding only a fraction of a second when you genuinely want to shoot.
Once Camera is open, the button follows the mode you are in. In Photo mode, a click takes a still photo. In Video mode, a click starts recording and a second click stops it. Click and hold does two different things depending on where you are: if Camera is already open in Photo mode, holding records a QuickTake video until you release the button; if Camera is not open, holding launches Visual Intelligence instead. Remember it as a sentence: hold outside for Intelligence, hold inside for video. Check the mode before you click, and the button will never surprise you again. For a full explanation of the modes themselves, see our iPhone camera settings guide.
Light Press and Swipe: The Hidden Menu
The light press turns Camera Control from a shutter button into a camera control dial, and it is the gesture most owners miss entirely, because nothing on the phone explains it. A light press means pressing the button just far enough to feel the small haptic pulse, without pushing through to the full click. Think of it as the half-press on a traditional camera shutter. With Camera open, lightly press once and a small overlay appears, showing the control you last adjusted, which is Zoom by default. Slide your finger along the button and the value changes: slide one way to zoom in, the other way to zoom out.
Lightly press the button twice in quick succession and the overlay expands into a menu of all six available adjustments: Exposure, Depth, Zoom, Cameras, Styles and Tone. Slide along the button to move through that menu, light-press once to select the adjustment you want, then slide again to change its value. Lightly press twice again to return to the main menu, or wait a moment and the overlay fades away on its own. Click the button at any point to take the photo with the settings you have just chosen.
The most common mistake is pressing too hard and taking a photo instead of opening the menu. Slow down, press with the flat of your finger, and stop as soon as you feel the haptic pulse. In iOS 26 you can also turn on a swipe-only mode in Settings, then Camera, then Camera Control, so sliding opens the adjustments without any press at all. If the overlay feels too small to read, you can swipe directly on the screen over the overlay instead, because the button and the screen stay in sync.
The Six Adjustments, Explained One by One
All six adjustments do something useful, but they are not equally useful every day. Knowing what each one does, and when to reach for it, is what separates owners who use the button well from owners who open the menu once and never open it again.
Exposure: Brighten or Darken the Scene
Exposure brightens or darkens the whole image, and it is the adjustment you will use most often, because the iPhone’s automatic exposure is good but not psychic. A person standing in front of a bright window comes out as a silhouette, and a white dog in snow comes out grey. Slide the exposure up and the image brightens; slide it down and it darkens, in steps of a third of a stop, from minus two to plus two. The change is live in the viewfinder, so you can watch the face brighten as you slide and stop the moment it looks right. Use it for backlit portraits, sunsets, stage performances and snow scenes, and slide it slightly down to deepen the colours in a sunset.
Depth: Control the Background Blur
Depth controls the background blur, and selecting it turns on Portrait mode if it was not already selected. Slide one way and the background melts into a soft blur that makes the subject stand out; slide the other way and more of the background comes into focus. The effect is measured in f-stops, from a very shallow f/1.4 blur to a nearly sharp f/16. Depth is the adjustment for portraits of people and pets, food photography, and any shot where a messy background distracts from the subject. It works best when the subject is between half a metre and two metres away, with distance between the subject and the background. If the blur looks patchy around hair or glasses, slide back towards f/4 or f/5.6, where the effect is gentler. Our iPhone Portrait mode guide goes deeper into depth and lighting.
Zoom: The Smoothest Way to Frame a Shot
Zoom is the default adjustment, and sliding along Camera Control gives the smoothest zoom on any iPhone, far smoother than tapping the 1x, 2x and 5x buttons on screen. The zoom moves continuously through the optical range, so you can stop at 3.2x or 6.7x instead of jumping between fixed steps, and the framing feels like turning a zoom ring on a real lens. A small haptic tick marks each optical step, so you can feel when you have reached a true optical zoom level without looking at the numbers. Use the slide for video as well as photos: a slow zoom during a video looks cinematic in a way a sudden tap never does. The chart section below compares the zoom ranges across models in detail.
Cameras: Switch Lenses Without Tapping the Screen
Cameras lets you switch between the available lenses, including the front-facing camera, without tapping the small icons on screen. Slide through the options and light-press to select the lens you want: the ultra wide 0.5x for landscapes and interiors, the main 1x for everyday shots, the telephoto 2x, 4x, 5x or 8x for distant subjects, and the person icon for the front camera when you want a selfie. This matters most when the phone is on a tripod, held at arm’s length, or used by someone whose hands are full, because the lens icons on screen are small and easy to miss. Note that the available lenses change with the model and the mode, and in macro photography the ultra wide lens takes over automatically when you move close to a subject.
Styles: Change the Photographic Style
Styles changes the Photographic Style, which adjusts the tone and colour of a photo before it is taken, rather than applying a filter afterwards. The styles have names such as Standard, Vibrant, Natural, Luminous, Dramatic, Quiet, Cozy, Ethereal, Amber and Gold, and each one shifts the warmth, saturation and contrast in a different direction. Sliding through them shows a live preview, so you can see what a portrait will look like in Amber before you take it. Unlike a filter, a Photographic Style keeps skin tones natural while changing the rest of the scene. On iPhone 16 and iPhone 17 models, styles are non-destructive, so you can change them after the photo is taken in the Photos app, and experimenting costs nothing.
Tone: Lighten or Deepen the Mood
Tone is the subtlest of the six adjustments, and the one most owners ignore, which is a shame, because it is often the difference between a flat photo and one with atmosphere. Tone lightens or deepens the mood by shifting the shadows and highlights, without changing the colours the way a Style does. Slide it one way and the image becomes brighter and airier, with lifted shadows; slide it the other way and it becomes moodier, with deeper shadows and more contrast. Use Tone after you have set the Style: pick the Style for the colour, then use Tone for the mood. A portrait in the shade often benefits from a slightly lifted tone, while a dramatic landscape or a night street scene benefits from a deeper one.
Chart: The Zoom Range You Can Reach from Camera Control
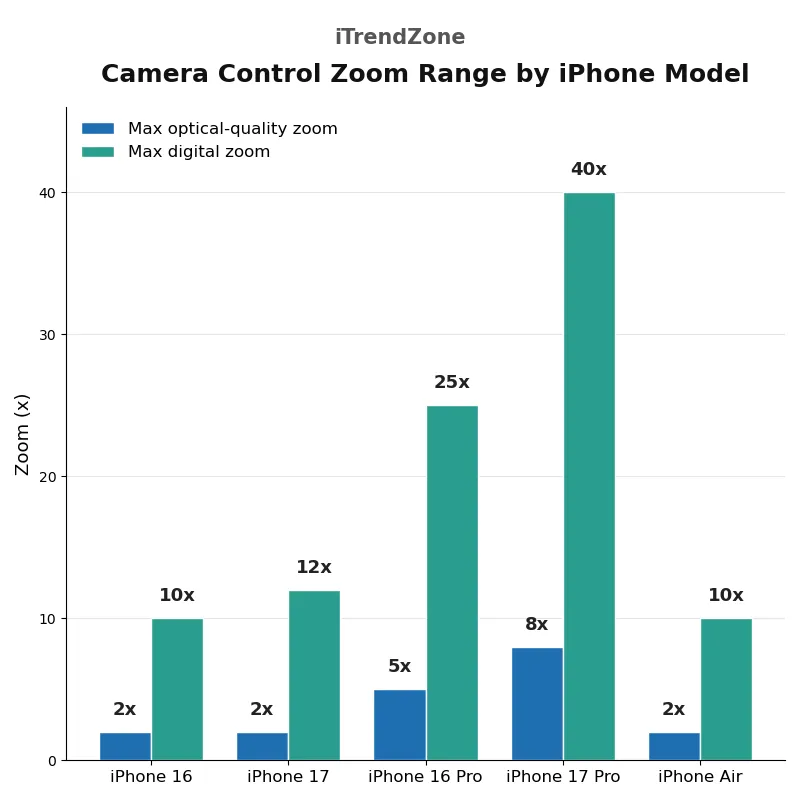
The chart below compares the zoom range available through iphone camera control on each current model, using Apple’s published specifications for the iPhone 16 and iPhone 17 ranges. Each model is shown as a bar running from its widest lens to its longest telephoto, with the maximum digital zoom marked at the end of the bar. The pattern is immediately clear. The iPhone 16 and iPhone 17, with dual-camera systems, cover 0.5x to 2x in optical quality and reach 10x digitally on the iPhone 16 and 12x digitally on the iPhone 17. The iPhone 16 Pro and iPhone 16 Pro Max extend that to a 5x telephoto and 25x digital zoom. The iPhone 17 Pro and iPhone 17 Pro Max go further still, with 4x and 8x telephoto steps and digital zoom up to 40x, the longest reach of any iPhone in 2026. The iPhone Air sits between the groups, with a single 48MP Fusion camera, 2x optical-quality zoom and 10x digital zoom, because its slim design leaves no room for a separate telephoto lens.
What the chart makes obvious is that the button is only as powerful as the lenses behind it. On an iPhone 17 Pro, a long slide takes you smoothly from a sweeping 0.5x ultra-wide landscape to an 8x close-up of a distant building, all without lifting your finger. On an iPhone 16, the same slide covers a much shorter range, and the phone switches to digital zoom beyond 2x, which crops into the image and loses detail. The haptic tick at each optical step is your guide: if you feel the tick, you are at a true optical zoom level and the image will be at its sharpest.
Customising Camera Control in Settings
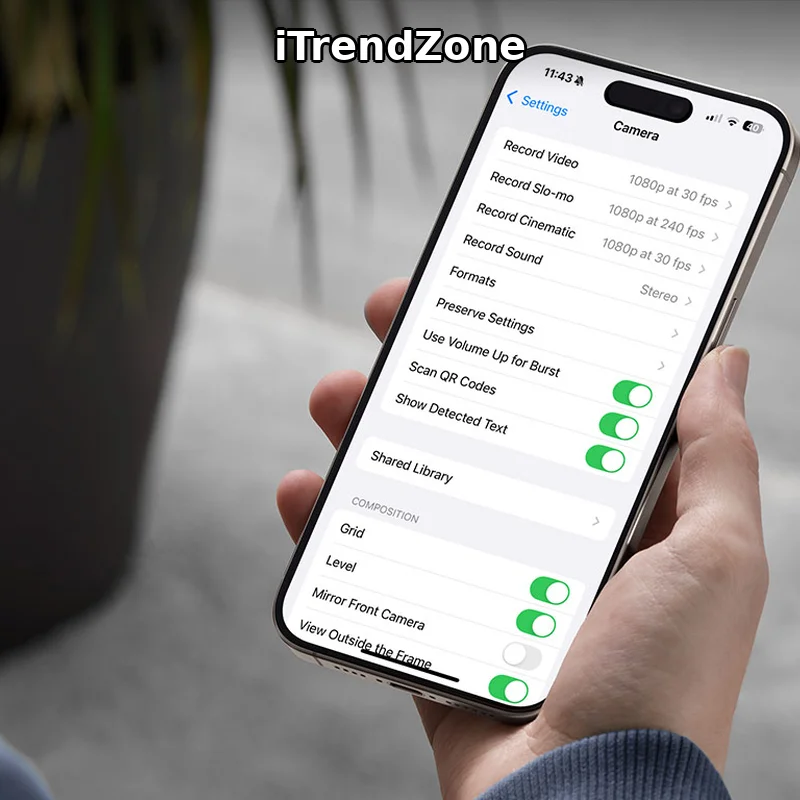
Everything about the button can be changed in Settings, then Camera, then Camera Control. Launch Camera chooses what the button opens: the Camera app by default, or the Code Scanner, the Magnifier, or a third-party camera app that supports Camera Control. Single Click opens fastest; Double Click almost eliminates pocket launches. The Camera Adjustments switch turns the light-press overlay on or off, and Customize lets you choose which of the six adjustments appear and drag them into your preferred order, so put Exposure first if you adjust brightness constantly. Lock Focus and Exposure lives on the same screen.
Visual Intelligence: Click and Hold to Understand the World
Visual Intelligence is Apple Intelligence’s way of understanding what the camera sees, and Camera Control is its fastest trigger. From the Home Screen, the Lock Screen or any app, click and hold the button and the camera opens in Visual Intelligence mode. Point it at a restaurant to see its hours and rating, at a plant or animal to identify the species, at a poster to create a calendar event from the date printed on it, or at text to have it translated or read aloud. Apple’s guide to using Visual Intelligence on iPhone explains the full range of actions, including the iOS 26 ability to use it on a screenshot.
Lock Focus and Exposure with a Light Press and Hold
Lock Focus and Exposure is the closest the iPhone comes to the half-press autofocus lock on a traditional camera, and it is off by default. Turn it on in Settings, then Camera, then Camera Control, then point at your subject and light-press and hold until AE/AF Lock appears above the frame. Focus and exposure are now frozen, so you can recompose the shot without the phone refocusing on the background. This is the technique for a portrait where the subject is at the edge of the frame, and for video, where it stops the phone drifting focus to a passer-by. Our iPhone Night mode guide explains how focus and exposure behave when the light drops.
Accessibility: Make the Button Work for Your Hands
The most important accessibility settings live in Settings, then Accessibility, then Camera Control. Light-Press Force offers Default, Lighter and Firmer: Lighter suits reduced finger strength, while Firmer suits anyone who keeps triggering the overlay by accident, and the screen lets you try each option without opening Camera. Double Light-Press Speed and Double Click Speed offer Default, Slow and Slower, for fingers that do not move quickly. The same screen can turn Camera Control off entirely, which is the right choice if accidental presses are frequent; the Camera app still works from the Lock Screen and Home Screen.
Using Camera Control with Cases, Gloves and Wet Hands
Apple’s own cases have a sapphire crystal window over the button that preserves the click, the light press and the slide, and most reputable third-party cases made since late 2024 have a similar capacitive cut-out. Cheap cases often cover the button with thick silicone, which blocks the slide even if the click still works, so you can take a photo but cannot zoom. The full click works through most gloves, because it is mechanical, but the light press and slide need skin contact or conductive fingertips. With wet hands, dry the button first, and rely on the click, which is mechanical and reliable when wet.
Troubleshooting: When Camera Control Does Not Behave
Most problems have a simple cause. If the button does nothing, check it is turned on in Settings, then Accessibility, then Camera Control, and that your model actually has it, because the iPhone 16e and iPhone 17e do not. If the light press does nothing, check Camera Adjustments is on and try the Firmer or Lighter force setting. If the camera opens in your pocket, switch to Double Click and turn on Require Screen On. If photos are blurry, brace your elbows and press smoothly rather than jabbing, because pressing a physical button shakes the phone. If the Camera app itself crashes or freezes, our iPhone camera not working fix guide walks through restarts, settings resets and software updates.
Frequently Asked Questions
Can I turn Camera Control off completely?
Yes. Go to Settings, then Accessibility, then Camera Control, and turn it off. The Camera app still works from the Lock Screen and Home Screen.
Does Camera Control work with third-party camera apps?
Yes, if the app supports it. Choose it under Launch Camera in Settings, then Camera, then Camera Control. Unsupported apps open but may ignore the light press and slide.
Why does my iPhone take a photo when I only meant to open the menu?
You pressed slightly too hard and passed through the light press into a full click. Press more gently, stop at the haptic pulse, or set Light-Press Force to Firmer.
Can I use Camera Control to take a selfie?
Yes. Light-press twice, slide to Cameras, and select the front camera, then click to shoot. It is ideal at arm’s length, where the on-screen rotate icon is hard to reach.
Is Camera Control available on the iPhone 16e?
No. The iPhone 16e and iPhone 17e do not have the button. The iPhone 17 Pro technical specifications confirm which models include it, and Apple’s iPhone 17 page lists it as a feature of the iPhone 17 range.
References
Apple Support, Use the Camera Control on iPhone, iPhone User Guide, accessed 2026. Apple Support, Use Visual Intelligence on iPhone, iPhone User Guide, accessed 2026. Apple Support, iPhone Camera Basics, iPhone User Guide, accessed 2026. Apple Support, iPhone 17 Pro Technical Specifications, accessed 2026. Apple, iPhone 17, accessed 2026. Further reading: iPhone Camera Complete Guide, iPhone Live Photos Tips Guide, iPhone ProRAW and ProRes Guide, iPhone Photo Editing Guide, iPhone Shortcuts for Photos and Camera.
Quiz: Test Your iPhone Camera Control Knowledge
Question 1: What happens when you click iphone camera control once while the screen is already on? A) It takes a photo immediately. B) It opens the Camera app. C) It opens Visual Intelligence. D) It locks focus and exposure.
Question 2: How do you open the full adjustment overlay with six settings? A) Click the button three times. B) Swipe up on the screen. C) Press and hold the Side button. D) Lightly press Camera Control twice.
Question 3: Which adjustment turns on Portrait mode if it was not already selected? A) Depth. B) Tone. C) Zoom. D) Styles.
Question 4: Where do you change the light-press force to Lighter or Firmer? A) Settings, then Camera, then Preserve Settings. B) Settings, then General, then About. C) Settings, then Accessibility, then Camera Control. D) Settings, then Camera, then Formats.
Question 5: What does clicking and holding Camera Control do when you are on the Home Screen? A) It records a QuickTake video. B) It opens Visual Intelligence. C) It takes a burst of photos. D) It switches to the front camera.
Quiz answers: Question 1: B. Question 2: D. Question 3: A. Question 4: C. Question 5: B.