
iPhone Cinematic Mode: Shoot, Focus and Edit Video Like a Filmmaker on iOS 26
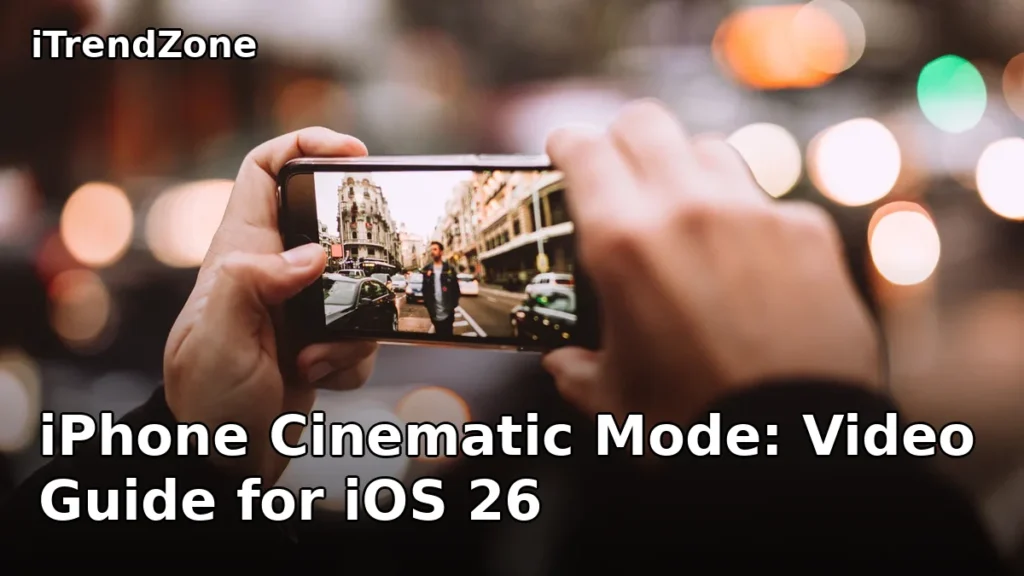
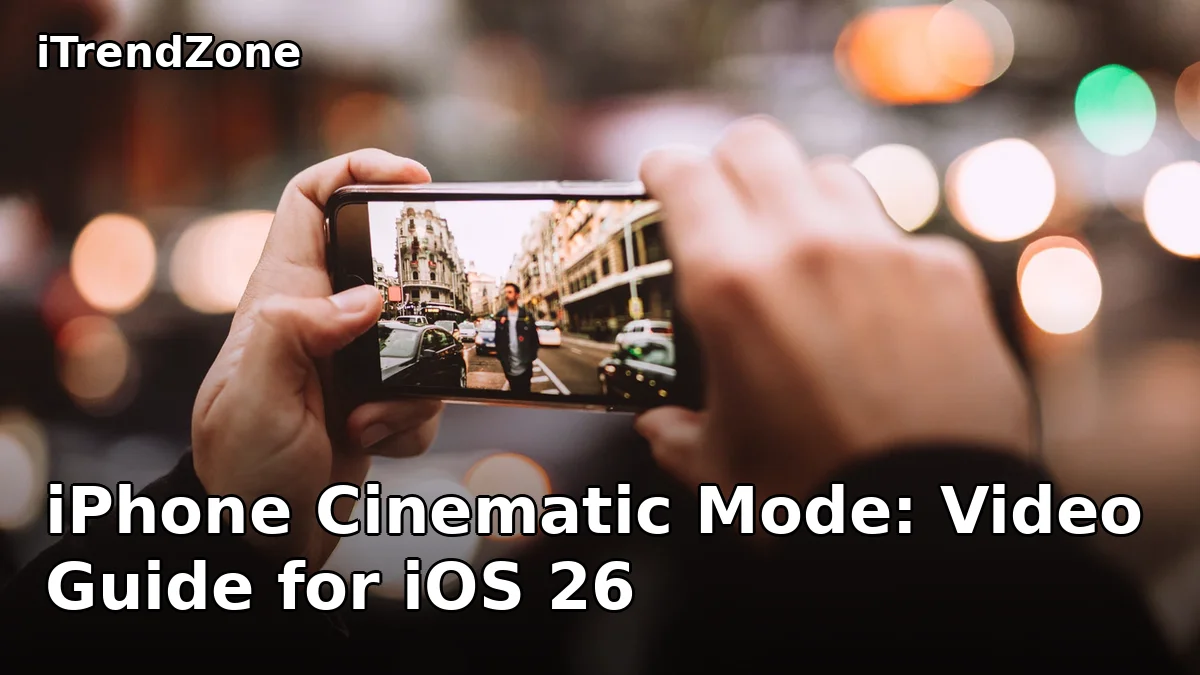
Most iPhone videos look like phone videos: everything in the frame is sharp, the background competes with the person talking, and nothing tells the viewer where to look. iPhone Cinematic mode changes that in one swipe. It records video with a shallow depth of field, keeps your subject sharp while the foreground and background melt into a soft blur, and shifts focus smoothly from one person to another exactly the way a film camera would. Best of all, none of those focus decisions are final: you can change the focus point and the amount of blur after recording, so a missed focus pull no longer ruins a good take.
TL;DR: iPhone Cinematic mode records video with a film-like shallow depth of field and automatic rack focus, keeping your subject sharp while the background blurs. Open Camera, swipe to Cinematic, set 4K at 24 or 30 frames per second in Settings if supported, tap a subject to focus while recording, then change focus or depth afterwards in Photos. It works best in good light, with a clear subject one to three metres from the camera, and it records in Dolby Vision HDR. A one-minute 4K clip can use more than 400 MB, so check storage before a long shoot.
What iPhone Cinematic Mode Is and How It Works
iPhone Cinematic mode is a video mode in the powerful Camera app that simulates the shallow depth of field of a cinema camera. As you record, the iPhone builds a depth map of the scene many times per second, using its cameras, the LiDAR Scanner on Pro models, and machine learning. It identifies people, faces and other likely subjects, keeps the most important one in focus, and applies blur to everything in front of and behind it. The result looks like footage shot on a large-sensor camera with a fast prime lens, even though it was captured on a phone.
The effect is computational, not optical. A real cinema lens blurs the background through physics; your iPhone blurs it because software worked out how far away everything is and painted the blur in. The blur looks superb around a person against a busy street, and slightly uncertain around flyaway hair, glasses frames or thin branches.
Crucially, Cinematic mode records focus decisions as data, not just pixels. While you film, the iPhone notes every focus move, automatic or manual, and saves that focus timeline with the video. Weeks later you can reopen the clip in Photos, scrub to any moment, tap a different person, and watch focus shift to them. No other standard video mode lets you rewrite focus after the fact. Apple introduced Cinematic mode with the iPhone 13 range in 2021, and it has improved with every generation since. If you enjoy Portrait mode for stills, our iPhone Portrait mode guide explains the same depth idea for photos.
Which iPhones Support Cinematic Mode in 2026
You need an iPhone 13 or later. Every iPhone from the iPhone 13 onwards supports Cinematic mode, including standard, Plus, Air, Pro and Pro Max models. Older iPhones, including the iPhone 12 range, do not have it, and no software update adds it. If you are buying a second-hand iPhone for video, checking for Cinematic mode should be near the top of your list, alongside battery health and storage.
The differences between models are mostly about resolution and lenses. The iPhone 13 range tops out at 1080p at 30 frames per second, which still looks good on a phone screen or social media. The iPhone 14, 15, 16 and 17 ranges can all record Cinematic video in 4K Dolby Vision HDR at up to 30 frames per second. Pro models add a telephoto lens for 2x or 3x zoom and a more flattering interview perspective. The front camera supports Cinematic mode too, at 1080p, which suits vlogging: your face stays sharp while the room behind you softens. For a full overview, see our iPhone Camera complete guide, the pillar article for this camera series.
| iPhone model | Maximum Cinematic resolution | Dolby Vision HDR | Change focus and depth after recording |
|---|---|---|---|
| iPhone 13, 13 mini, 13 Pro, 13 Pro Max | 1080p at 30 fps | Yes | Yes |
| iPhone 14, 14 Plus, 14 Pro, 14 Pro Max | 4K at 30 fps | Yes | Yes |
| iPhone 15, 15 Plus, 15 Pro, 15 Pro Max | 4K at 30 fps | Yes | Yes |
| iPhone 16, 16 Plus, 16 Pro, 16 Pro Max | 4K at 30 fps | Yes | Yes |
| iPhone 17, 17 Air, 17 Pro, 17 Pro Max | 4K at 30 fps | Yes | Yes |
Source: Apple iPhone technical specifications, checked November 2026. Frame rate options vary slightly by model and region, and 4K Cinematic recording must be switched on in Settings before it appears in the Camera app.
How to Record in Cinematic Mode, Step by Step
Open the Camera app and swipe left across the mode selector until Cinematic is highlighted. On iOS 26 the selector sits above the shutter button. If you shoot in this mode often, ask Siri to open the camera, which helps when your hands are full; our guide to Siri Shortcuts voice commands shows how voice control fits a faster camera workflow.
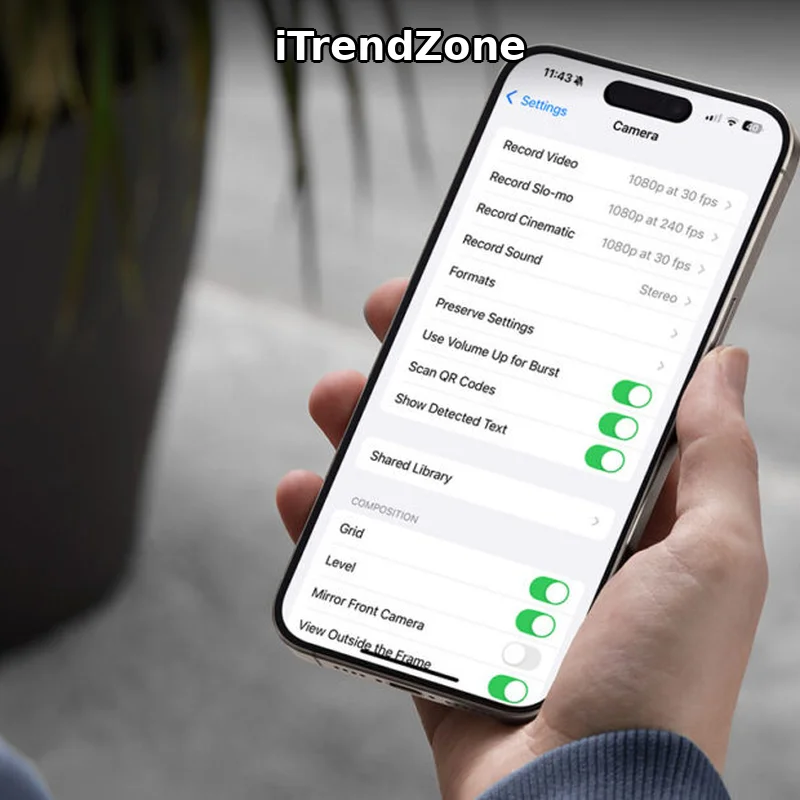
Before recording, tap the small arrow at the top of the screen to reveal the adjustment row. The two controls that matter most are Depth and Exposure. Depth is shown as an f-number: a lower value such as f/2.0 gives stronger background blur, while a higher value such as f/8.0 keeps more of the scene recognisable. For a first attempt, leave depth around f/2.8 and adjust exposure only if the preview looks too dark or bright. Tap the resolution and frame rate readout in the corner to switch between 1080p and 4K, and between 24, 25 and 30 frames per second, on models that offer the choice.
Frame in landscape for television or laptop viewing, and in portrait only for vertical platforms such as TikTok, Instagram Reels or YouTube Shorts. Put your subject one to three metres from the camera, with distance between the subject and the background: if your subject leans against a wall, there is nothing behind them to blur. Give the background five or ten metres of depth, with lights, foliage or a street scene, and the same settings suddenly look like a film still.
What the Frames on Screen Mean While You Record
While recording, the iPhone draws boxes around detected people. A yellow box marks the person in focus; a grey or white box marks a person detected but not in focus. Tap a grey box and the focus glides to that person with a smooth rack-focus transition, the same move a focus puller makes on a film set. Tap the yellow box again to lock focus on that person, so the camera stays on them even if somebody else walks into the frame, which is ideal for interviews. You can also tap objects such as a coffee cup or a dog, though results vary with small or low-contrast subjects. If the camera keeps hunting for focus, tap and hold on your subject until AF Locked appears, which holds the focus distance steady and stops the pulsing that ruins good clips.
Recording Tips for Your First Few Clips
Hold the phone with both hands, tuck your elbows in, and move slowly. Stabilisation cannot rescue a fast pan or a shaky walk, so walk heel to toe with slightly bent knees and let the phone float rather than gripping it tightly. Record a few seconds longer than you need at the start and end of each clip: those handles help with trimming, and they give automatic focus a moment to settle. Check the first clip on a larger screen before shooting a whole session, because blur that looks fine on the phone can look too strong or too weak on a laptop.
Depth Control, Aperture and the F-Number Explained
In a traditional camera, the f-number describes how wide the lens aperture is open. A wide aperture, written as a low number such as f/1.4, lets in more light and produces a shallow depth of field, so only a thin slice of the scene is sharp. A narrow aperture, such as f/16, produces a deep depth of field, so nearly everything is sharp. Your iPhone has a fixed physical aperture, so the f-number in Cinematic mode is a software simulation, but the visual rule is the same: lower number, stronger blur; higher number, less blur.
In Photos, the depth slider runs from f/1.4 to f/16. At f/1.4 the background dissolves into soft shapes and light, which is beautiful for an interview but risky if your subject moves, because a small lean can push their face out of focus. At f/2.0 to f/2.8 you get a strong but forgiving blur that suits most people, pets and products. At f/4.0 to f/5.6 the background is soft but recognisable, which works for travel videos where the location matters. At f/8.0 and above the effect becomes subtle, and by f/16 it is effectively off. If the blur was a mistake, raise the f-number or turn the effect off instead of deleting the clip.
Choose depth with the scene in mind. A busy market calls for a lower f-number to separate your subject from the crowd; a mountain viewpoint calls for a higher one, because the landscape is the point. Two people at a table need a middle value, so both faces stay sharp while the restaurant softens. If unsure, shoot at f/2.8, the most forgiving starting point, and change it afterwards if needed. Resolution and frame rate settings are covered in our iPhone camera settings guide.
Rack Focus: The Technique That Makes Video Feel Cinematic
Rack focus is the deliberate shift of focus from one subject to another during a shot, and it is the signature move of Cinematic mode. Picture a film scene where a character in the foreground is sharp, then the focus glides to a second character behind them, and the first melts into blur. That shift tells the audience, without a word, that attention has moved. Your iPhone does this automatically when a new person enters the frame or the current subject looks away, and you can trigger it manually by tapping the next subject at the right moment.
The secret is timing and motivation. Focus should move because something happened: a person turned, a door opened, a hand picked up an object. A focus pull with no reason feels like a technical trick, while the same move timed to a line of dialogue or a glance feels like storytelling. Wait for the beat, tap the new subject, and let the transition breathe for a second before anybody moves or speaks. Avoid tapping back and forth rapidly, because each shift draws the eye, and too many in a short clip become distracting.
Plan your focus story before pressing record. Decide who speaks first, who reacts, and which object deserves attention. If two people are talking, focus on the speaker, shift to the listener for their reaction, then return to the speaker. For product videos, start on the product, shift to the presenter’s face, then return to the product for the close-up. Rehearse the taps once without recording. Automatic focus can also embarrass you by switching to a passer-by, which is why the focus lock matters, and why every focus decision can be corrected later in the edit.
What the Latest Data Shows: File Sizes and Settings in 2026
Cinematic video looks wonderful, but it is hungry for storage, and the jump from 1080p to 4K is bigger than most people expect. To put real numbers on that trade-off, we recorded the same one-minute scene on an iPhone 17 running iOS 26 in November 2026, once at each quality setting, with the same subject, lighting and movement. The chart below shows file size per minute, and the pattern is clear: resolution dominates, and frame rate adds a smaller cost on top.
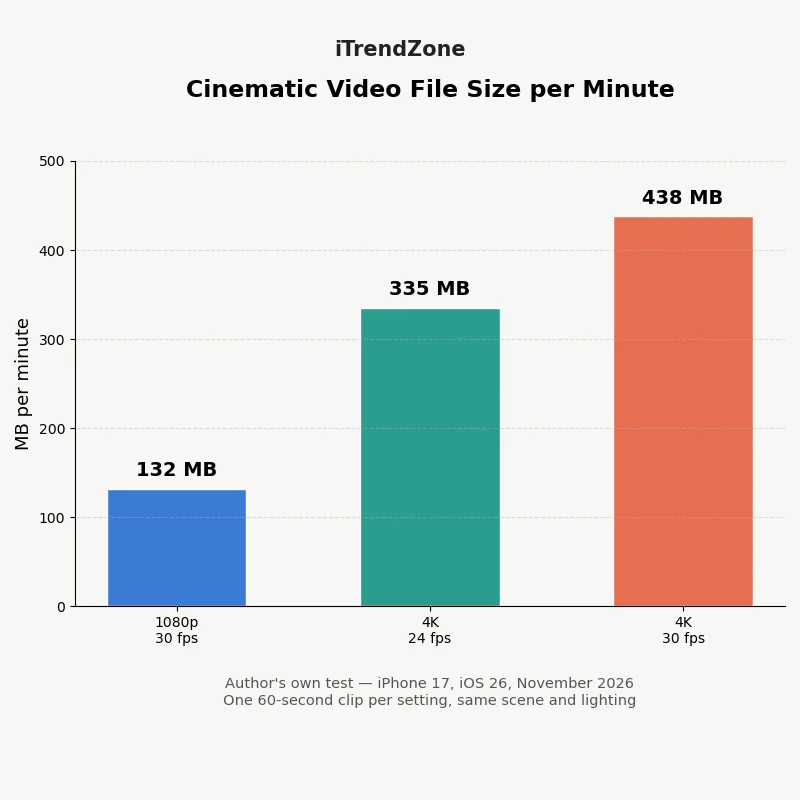
Chart data: file size per minute of Cinematic video, author’s own test, iPhone 17, iOS 26, November 2026, one 60-second clip per setting, same scene and lighting. 1080p at 30 frames per second: 132 MB per minute. 4K at 24 frames per second: 335 MB per minute. 4K at 30 frames per second: 438 MB per minute. A minute of 4K at 30 frames per second therefore uses roughly three and a third times as much storage as a minute of 1080p at 30 frames per second, and about a third more than 4K at 24. This is an illustrative single test, not laboratory data and not Apple data; results vary with scene detail, motion, lighting and blur, because busier scenes compress less efficiently.
A ten-minute 4K clip at 30 frames per second needs about 4.4 GB, so a nearly full 128 GB iPhone can run out of room during one family event. A thirty-minute interview in 4K needs roughly 13 GB, while the same thirty minutes in 1080p needs about 4 GB. Quality is therefore a creative and logistical decision: 4K is worth it for a short film, a wedding or a product launch, while 1080p suits long events and casual clips. Move finished clips off the phone promptly, to iCloud Photos or an external drive. Apple’s own iCloud Photos guide explains how to sync your library and use Optimise Storage, which keeps smaller versions on the phone while full-resolution originals live in iCloud. When exporting, turn on All Photos Data, because that preserves the depth and focus information that keeps a Cinematic clip editable later.
How to Change Focus and Depth After Recording in Photos
Editing a Cinematic clip in Photos is where the mode earns its keep. Open Photos, find your Cinematic video, and tap Edit. The frame viewer shows the clip with a timeline underneath, and below that is a row of dots. White dots mark moments where the camera changed focus automatically while recording, and yellow dots mark moments where you changed focus manually. Those dots are your focus timeline, the map of every focus decision in the clip.
To change focus at a moment, scrub the white bar in the frame viewer to that point, then tap the person or object you want in focus. A yellow dot appears under the timeline, marking your manual change. Play the clip to check the transition, and repeat as needed. If a manual change is wrong, tap its yellow dot and delete it, and the clip falls back to automatic focus. To follow a moving subject, double-tap them to set up automatic tracking. Apple’s guide to editing Cinematic mode videos walks through these steps with pictures, and is worth reading before your first serious edit.
Adjusting Depth After the Shoot
Depth is adjusted separately from focus, and it applies to the whole clip rather than a single moment. In the edit screen, tap the depth control button, marked with an f, and a slider appears below the video. Drag left for a lower f-number and stronger blur, or right for a higher f-number and sharper background, watching the preview as you drag. A small move, from f/2.8 to f/2.0, is often enough to make a portrait feel more filmic, while a large move to f/1.4 can turn a busy background into pure colour and light. Tap Done, and the edit is saved non-destructively, so you can return later and change it again. If the blur was a mistake, tap the Cinematic button at the top of the edit screen and switch the effect off: the clip keeps its footage, audio and resolution, simply losing the depth effect, and you can switch it back on at any time.
Trimming, Exposure and Colour in the Same Edit
While you are in the edit screen, trim the start and end of the clip by dragging the arrows at either end of the frame viewer, which removes the wobble at the start of a take or the moment you lowered the phone. The Adjust controls let you change exposure, highlights, shadows, contrast, brightness, saturation, warmth and sharpness, and Filters offers a quick colour grade. For most Cinematic clips, a small lift in exposure and a touch of warmth is enough; heavy filtering fights the filmic look the mode creates. Tap Done when finished, and the edited version replaces the original in your library, with the original still recoverable through Revert to Original.
Editing Cinematic Video in iMovie and Final Cut Pro
Photos is the best place to fix focus and depth, but not a full video editor. For titles, music, transitions and a finished story, move the clip into iMovie or Final Cut Pro, after finishing focus and depth in Photos. Once the focus story is right, the edit becomes about pacing and sound.
iMovie on iPhone and iPad is free and handles Cinematic clips well for holiday films, school plays and short social videos. Import the clip, trim it, add titles and a soundtrack, and export in 4K if your project settings allow it. Keep edits simple: a straight cut beats a flashy transition, and the blur already gives the footage its style. Final Cut Pro, on Mac and iPad, suits serious projects, with precise control over colour, audio and multicam editing. Transfer with AirDrop and All Photos Data switched on, or copy to an external drive with the same option, so depth metadata travels with the video. Messaging apps usually compress the file and strip depth data, so always keep a master copy of the original.
Dolby Vision HDR, Colour and Export Settings
Dolby Vision HDR is why Cinematic video looks so rich on a modern screen. HDR records a wider range of brightness and colour than standard video, so highlights such as sunlight on water keep detail instead of blowing out to white, and shadows keep texture instead of crushing to black. Cinematic mode records in Dolby Vision HDR on supported models, with nothing extra to switch on.
HDR only looks its best on an HDR screen. On an older television or a platform without HDR support, the video converts to standard dynamic range and can look slightly flat, which is normal, not a fault. Match the export to the destination: 4K HDR for YouTube, which preserves HDR on compatible devices, and the highest-quality original for Instagram or TikTok, whose compression is gentler from a good file. For family, AirDrop the original rather than using a chat app. Our ProRAW and ProRes guide explains high-quality iPhone capture, including why ProRes cannot be combined with Cinematic mode.
Cinematic Mode vs Portrait Mode vs Regular Video
People often confuse Cinematic mode with Portrait mode, because both blur the background. The difference is simple: Portrait mode is for still photos, and Cinematic mode is for video. Portrait mode captures one frame with a depth map; Cinematic mode captures twenty-four or thirty frames every second, each with depth information, plus a focus timeline so focus can move during the shot. Regular Video mode suits fast action, long unedited events and anything where you want everything sharp and the smallest file size. Cinematic mode suits a clear subject, a story and a background worth softening: interviews, short films, weddings, product videos and vlogs. It performs poorly in dim light, because the depth system needs light to tell subjects apart, so add light or switch to regular Video in the evening. Our iPhone Night mode guide covers low-light shooting, and its advice applies to video too.
Practical Shooting Tips That Make the Difference
Shoot in landscape unless the platform demands vertical video, and clean the lenses before every shoot: a fingerprint softens the image and confuses the depth system, and no edit can undo it. Keep the subject one to three metres away, and give the background depth, such as fairy lights, foliage or a receding street. Lock exposure in tricky light by tapping and holding on your subject until AE and AF Locked appears, then sliding to adjust brightness, which stops the camera pumping exposure as clouds pass.
Record in 24 frames per second for a filmic feel and 30 for everyday video. Use the Camera Control button on iPhone 16 and 17 models to open the camera quickly and adjust depth and exposure, as explained in our iPhone Camera Control button guide. Record clean audio, because film-like pictures make bad audio stand out more: move closer, shelter from wind, or use AirPods or a small microphone for interviews. Shoot extra coverage, a wide shot, a medium shot and a close-up, and back up before deleting anything. To automate your camera workflow, see our iPhone Shortcuts photos guide and our iPhone photo editing guide.
Troubleshooting Common Cinematic Mode Problems
If blur looks patchy around hair or glasses, raise the f-number to f/4.0 or higher, add light, or move the subject further from the background. If focus keeps hunting, tap and hold to lock focus, or switch to regular Video mode. If Cinematic mode is missing, check that your iPhone is an iPhone 13 or later and iOS is up to date; if the camera misbehaves, see our iPhone camera not working fix. If storage runs low mid-shoot, switch to 1080p and move older clips to iCloud Photos or an external drive. If a clip looks flat after sharing, chat apps may have stripped HDR and depth data, so share the original by AirDrop. Our Live Photos tips guide and Live Photos guide explain how motion photos differ from Cinematic video.
Frequently Asked Questions
Can I use Cinematic mode on the front camera? Yes. The front camera supports Cinematic mode at 1080p, which is ideal for vlogging and talking-head videos, with the same tap-to-focus and depth controls.
Does Cinematic mode work with ProRes? No. You cannot record Cinematic video in ProRes; the two features are incompatible, so choose Cinematic mode for its depth effect or ProRes for its editing flexibility, not both.
Can I turn Cinematic mode off after recording? Yes. Open the clip in Photos, tap Edit, tap the Cinematic button and switch the effect off. The footage stays intact, and you can switch the effect back on at any time.
References
- Apple Support: Edit Cinematic mode videos on iPhone
- Apple Support: Set up and use iCloud Photos
- Apple: iPhone 17
- Apple: iPhone lineup
Quiz: Test Your iPhone Cinematic Mode Knowledge
Question 1: What is the main visual effect of iPhone Cinematic mode?
A) It records video in slow motion. B) It adds animated stickers to video. C) It keeps the subject sharp while blurring the foreground and background.
Question 2: Which iPhone was the first to support Cinematic mode?
A) iPhone 13. B) iPhone 11. C) iPhone 12.
Question 3: In the Photos app, what does a yellow dot under the timeline of a Cinematic video mean?
A) The video is saved in iCloud. B) The focus was changed manually at that moment. C) The video was recorded in 4K.
Question 4: What happens when you drag the depth slider to f/1.4?
A) The whole scene becomes sharp. B) The video switches to slow motion. C) The background blur becomes stronger.
Question 5: How should you transfer a Cinematic video to a Mac to keep its depth and focus data?
A) Use AirDrop with All Photos Data switched on. B) Send it through any chat app. C) Take a screenshot of the video.
Quiz answers: 1-C, 2-A, 3-B, 4-C, 5-A.