
iPhone Live Photos Tips: Capture, Edit, and Share Moving Moments Like a Pro
iPhone Live Photos turn an ordinary still picture into a three-second moment you can hear and replay. When the feature is on, your iPhone records 1.5 seconds of video and sound before you press the shutter and 1.5 seconds after it, then pairs that short clip with a high-resolution still image. Press and hold the picture in Photos and it moves. Share it with another Apple device and the motion travels with it. In iOS 26 on the iPhone 16 and iPhone 17 ranges, they work alongside Portrait mode, Night mode, and the Camera Control button. This guide shows you how to get the best from them, from the first tap in the Camera app to Loop, Bounce, and Long Exposure effects, smart sharing, storage control, and the fixes for the problems that catch most people out.
TL;DR: iPhone Live Photos capture 1.5 seconds before and after every shot, with sound, whenever the yellow Live icon is on in the Camera app. Hold the phone still for a full three seconds, tap the shutter once, and press and hold the picture in Photos to play it. Change the key photo, trim the clip, or mute the sound in Edit, add Loop, Bounce, or Long Exposure from the Live menu, and use Save as Video when you need to share the motion with someone who does not use an iPhone. Turn Live Photos off for one shot with the Live icon, or keep them off permanently in Settings, then Camera, then Preserve Settings. Each Live Photo uses roughly twice the storage of a still photo, so review the Live Photos album regularly and convert the keepers that no longer need motion into stills.
What iPhone Live Photos Actually Are
A Live Photo is two files working as one. The first is a still photograph, captured at the full resolution of your iPhone camera in HEIF format. The second is a short video clip, stored as a MOV file, covering the 1.5 seconds on either side of the moment you pressed the shutter. Apple pairs the two in the Photos app, so you see a single item in your library with a small LIVE badge, rather than a photo and a separate video. When you press and hold the image, the video plays. When you share it through Messages or AirDrop to another Apple device, the motion travels with it. When you share it in a way that cannot carry motion, such as email, only the still image is sent, which is why so many people are surprised to find that a Live Photo they emailed looks perfectly ordinary at the other end.
The feature has been part of every iPhone since the iPhone 6s, and it works on the front and rear cameras in Photo mode. It does not work in Panorama, Slo-mo, or Time-lapse, or while you are recording a standard video. On iPhone 15 models and later, a Live Photo taken with a portrait effect loses that portrait effect if you later change the key photo. On the iPhone 16 and iPhone 17 ranges running iOS 26, Live Photos benefit from the newer image pipeline, which means cleaner sound, steadier motion, and better low-light stills than the same feature produced on older hardware. The idea, however, has never changed: the camera is always recording a little before you shoot, so the moment you actually wanted is rarely limited to the single frame you pressed the button for.
That buffer is what makes Live Photos so useful for real life. Children, pets, and sports rarely cooperate with a shutter button. A child who blinks in the still frame may be laughing half a second earlier. A dog that turns away at the wrong instant may be looking straight at you in the frame just before. Because the iPhone keeps those neighbouring frames, you are not stuck with the one instant you happened to press. You can scrub through the whole three seconds, pick a better key photo, trim away a wobble, and keep the version that tells the story best.
How Live Photos Work in iOS 26
In iOS 26, Live Photos are on by default. Open Camera, make sure you are in Photo mode, and look for the Live Photo icon, a set of concentric circles, near the top of the screen. When the icon is yellow, Live Photos are on. When it has a line through it, they are off. On iPhone 16 and iPhone 17 models, you can also reach the control through the Camera Controls panel, and through the Camera Control button on the side of the phone. The video plays at roughly 15 frames per second, which suits small, human movements, water, hair, fabric, steam, and laughter, but it will not replace a proper video clip for fast action.
Apple explains the basics in its official support guide, Bring your photos to life, which is the best first stop if you want to confirm the current steps for your exact model and iOS version. The iPhone User Guide on taking photos covers the same ground in the context of the whole Camera app. This guide is written against iOS 26 on the iPhone 16 and iPhone 17 ranges in 2026.
How to Take a Great iPhone Live Photo
The single most important Live Photos skill is patience. A Live Photo is three seconds long, and the iPhone needs you to hold still for all three. Press the shutter, then keep the phone steady and keep the scene in frame for a second after the click. Most disappointing Live Photos are not caused by the camera at all. They are caused by the photographer lowering the phone the instant the shutter fires, which fills the second half of the clip with a blur of pavement or sky. Count to two in your head after every shot. It feels slow for the first dozen pictures, then it becomes a habit, and your Live Photos improve immediately.
Hold the phone with both hands when you can, brace your elbows against your body, and lean against a wall or railing for anything that matters. This matters twice as much in low light, and three times as much if you plan to use the Long Exposure effect later, because that effect blends every frame together and any shake turns the whole image soft. If you are photographing people, tell them the picture is a Live Photo and ask them to hold their pose for a beat longer than usual. Sound is the part people forget: a Live Photo records audio, so a shouted instruction or a television in the next room becomes part of the picture.
How to Turn iPhone Live Photos On and Off
Turning Live Photos off for a single picture takes one tap. In the Camera app, tap the Live Photo icon until it shows a line through it and the words Live Off appear. The next picture will be a still only. The catch is that Camera switches Live Photos back on the next time you open it, because Apple treats Live as the default. If you want the setting to stick, use Preserve Settings: go to Settings, then Camera, then Preserve Settings, and switch on the toggle next to Live Photo. From then on, Camera remembers your last choice. Turn Live off once and it stays off until you turn it back on. The same screen holds preserve toggles for camera mode, Night mode, and Photographic Styles, and our companion guide to the iPhone camera settings walks through every toggle on that screen.
Most people are best served by a middle ground. Keep Live Photos on by default, and switch them off deliberately for shots where motion adds nothing: documents, receipts, whiteboards, and product photos for a listing. For everything with a person, an animal, water, or weather in it, leave Live on. You can always convert a Live Photo to a still later in about ten seconds, but you can never add motion back to a still you took with Live switched off. When in doubt, shoot Live and decide later.
When to Leave Live Photos Off
Switch Live off when you are firing off dozens of frames at a sports match, because each Live Photo carries a video file and a long burst fills storage fast. The same logic applies to document scanning and to taking the same picture five times to get the framing right: four of the five will be deleted anyway, so there is no reason to pay the storage cost of motion on all of them. Also consider switching Live off for sensitive moments. A Live Photo records sound and the seconds before you shoot, which means it can capture a conversation or a private moment you did not intend to record. In schools, changing rooms, and workplaces with strict photography rules, take a still.
Choose a Better Key Photo, Trim, and Mute
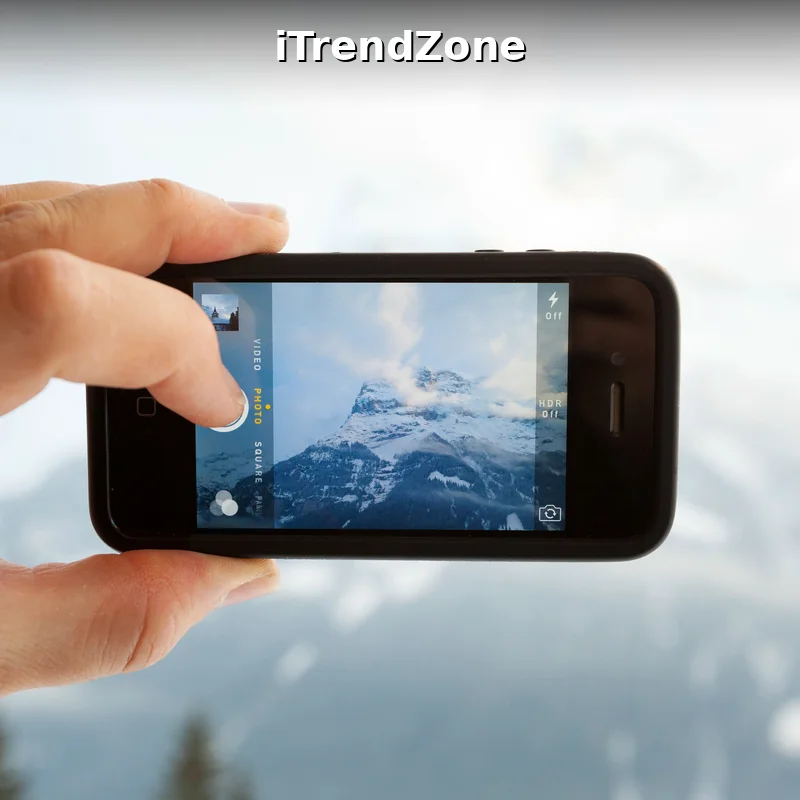
The key photo is the still frame Photos shows when the Live Photo is not playing. It is the frame that appears in your library grid, in shared albums, in prints, and in any app that cannot play motion. By default it is the frame captured at the instant you pressed the shutter, but it is rarely the best frame in the three seconds. Someone blinks, looks away, or starts laughing a fraction of a second too late. The fix takes less than a minute. Open the Live Photo in Photos, tap Edit, then tap the Live Photo button at the bottom of the screen. A filmstrip appears, with a white frame marking the current key photo. Drag that white frame left or right to scrub through the clip until you find the moment you want, tap Make Key Photo, then tap Done. The motion and sound stay intact; only the still frame changes.
Remember one exception. On iPhone 15 models and later, a Live Photo taken with a portrait effect loses that portrait effect if you change the key photo. If the depth effect matters more than the expression, keep the original key photo, or take a separate Portrait mode shot as well. For more on how depth works with the rest of the camera, see our iPhone Portrait mode guide.
Trim the Start and End, and Mute the Sound
On the same Edit screen, drag either end of the filmstrip inward to cut away frames you do not want: the half-second where you were still raising the phone, or the moment at the end where you lowered it. Keep at least a beat of calm at the beginning and the end, so the motion has somewhere to come from and somewhere to go. To silence a Live Photo, tap Edit, tap the Live Photo button, then tap the speaker icon at the top of the screen. The sound is muted, the motion keeps playing, and you can tap the speaker again to restore the sound. Muting is non-destructive, so change your mind as often as you like.
Loop, Bounce, and Long Exposure Effects
Effects are where Live Photos stop being a safety net and start being a creative tool. To apply one, open the Live Photo in Photos, tap the LIVE label in the top-left corner, and choose Loop, Bounce, or Long Exposure. You can try each one, switch between them, and go back to plain Live at any time, because effects never edit the original file.
Loop repeats the three-second clip as a continuous looping video, fading the end back into the beginning so the motion never seems to stop. It works best when the movement itself is continuous: waves rolling in, a flag rippling, a child on a swing, or a fountain playing. Its weakness is a clip with a clear beginning and end, such as someone jumping, where the fade can look like a jump cut. Bounce plays the clip forward and then backward, like a boomerang, and it is the smoothest effect for actions that start and end in roughly the same place: a jump, a head turn, a wave, or a dance move. Because the motion reverses instead of fading, there is no awkward seam.
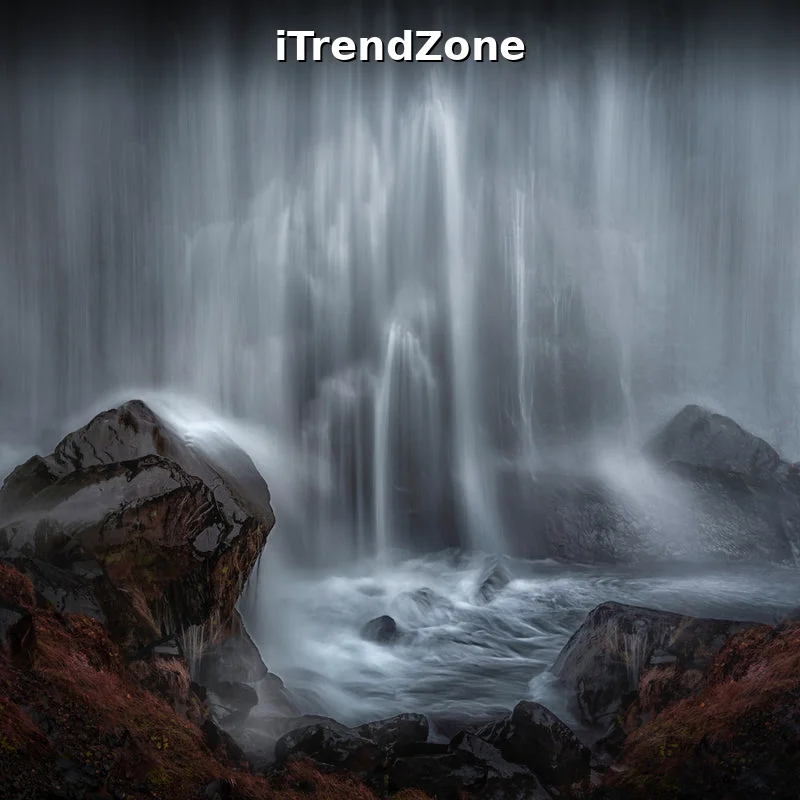
Long Exposure is different, because it does not produce a moving clip at all. It blends all the frames into a single still image, blurring anything that moved and keeping anything still sharp. Waterfalls turn silky, rivers smooth into glass, car headlights stretch into light trails, and crowds dissolve into a gentle blur while a building behind them stays crisp. For the best results, keep the phone completely still for the whole three seconds, brace it on a solid surface or a small tripod, and choose a scene where most of the frame is static and only one element moves. If the whole frame moves, the whole image blurs, and no editing will bring the sharpness back.
iPhone Live Photos Effects Compared
Match the effect to the movement in the frame rather than to your mood. The table below summarises what each option does, what it is best for, and what to watch out for.
| Effect | What it does | Best for | Watch out for |
|---|---|---|---|
| Live | Plays the 3-second clip once when you press and hold, with sound | Everyday moments, laughter, and any shot where sound matters | Sound may include wind or background voices |
| Loop | Repeats the clip as a continuous looping video | Waves, flags, swings, and fountains | A clear start and end can create a visible jump at the seam |
| Bounce | Plays the clip forward, then backward, then forward again | Jumps, waves, head turns, and dance moves | Fast, chaotic motion can look confusing when reversed |
| Long Exposure | Blends all frames into one still image with motion blur | Waterfalls, rivers, traffic trails, and fireworks | Any camera shake blurs the whole image |
| Live Off | Shows only the key photo as a still | Sharing, printing, and shots where motion adds nothing | The motion is hidden, not deleted, until you convert to a still |
Apply the effect first, then choose the key photo, then trim. The order matters, because the effect changes which frames matter most. If a Loop has an awkward seam, trim a few frames from the end and try again. If a Long Exposure looks soft, check whether the first or last frames contain camera movement, trim those away, and reapply the effect.
Chart: How Much Space iPhone Live Photos Really Use
Storage is the most common complaint about Live Photos, and it is usually based on a guess rather than a measurement. Chart 1 below shows typical file sizes for the same scene photographed on an iPhone 16 Pro running iOS 26. A standard still photo in HEIF format measured 1.8 megabytes. The same scene as a Live Photo measured 3.9 megabytes, made up of a 1.8 megabyte still and a 2.1 megabyte MOV video clip. The same scene as a Live Photo with a Long Exposure effect measured 2.0 megabytes once exported as a still, because the effect collapses the motion into a single image. A three-second 4K video clip of the same scene measured 24.6 megabytes, more than six times the Live Photo.
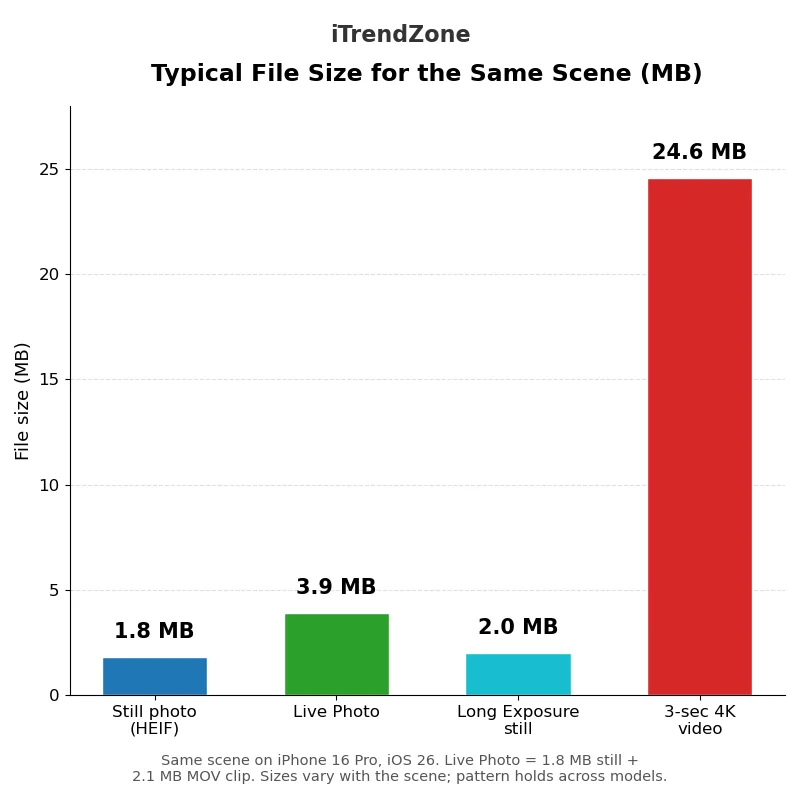
Read the chart as a comparison, not a promise, because sizes change with the scene. A busy, detailed scene produces a larger video clip than a plain wall, and the iPhone 17 Pro models produce slightly larger stills than the iPhone 16 range. The pattern holds across models: a Live Photo costs roughly double the storage of a still, a Long Exposure still costs about the same as an ordinary still, and a short video costs many times more than either. One thousand Live Photos use about 3.9 gigabytes, so spend the extra space on pictures that earn it.
How to Share iPhone Live Photos Without Losing the Motion
Whether the motion survives sharing depends entirely on how you share. Send a Live Photo through Messages to another iPhone, or through AirDrop to another Apple device, and the recipient can press and hold to play it, with sound. Send the same photo through Mail, and the recipient receives a still image only. Share it to most social apps, and the app usually strips the motion out unless you convert the Live Photo first. The rule is simple: Apple-to-Apple sharing keeps the motion, and everything else needs a conversion step.
Before you share, check three things. First, listen to the audio, and mute it if it contains anything you would not want a stranger to hear. Second, check the key photo, because that is the frame the recipient sees before they press and hold, and the frame that appears if their device cannot play motion at all. Third, check the effect, because a Loop or Bounce effect travels with the Live Photo to another Apple device. For friends on Android, or anyone you message through WhatsApp or Telegram, convert first: open the photo, tap Share, then tap Save as Video, and share the video file instead. The motion then plays on any phone or computer.
Live Photos as Wallpaper and in Shared Albums
A Live Photo makes a good lock screen wallpaper, because the motion plays when you press and hold the lock screen. Open the Live Photo, tap Share, tap Use as Wallpaper, adjust the framing, and make sure Live Photo is enabled on the preview before you tap Add. Choose a picture with a clear subject and a simple background, and a clip where the motion is gentle, such as hair moving or a smile forming. Shared albums handle Live Photos well, with one caveat: the motion is preserved when everyone uses Apple devices, but a family member viewing the album on the web at iCloud.com may see only the still. For repeat conversions, a shortcut helps: our guide to iPhone Shortcuts for Photos and Camera covers Live Photo conversions, and the iPhone Shortcuts complete guide covers the Shortcuts app from the beginning.
Convert a Live Photo to a Still or a Video
To turn a Live Photo into a still, open it, tap Edit, tap the Live Photo button, tap the LIVE button at the top to switch Live off, and tap Done. The motion and sound are removed and the file shrinks to the size of an ordinary still, so only convert pictures you are sure do not need motion. To turn one into a video, tap Share, then Save as Video. A new video appears in your library and the original Live Photo stays untouched, which makes this the conversion to use for sharing and social media. You can select several Live Photos at once and convert them in a batch. Developers can learn how the format is structured in the PHLivePhoto developer documentation. For a different take on the same feature, our older related post, How to Use iPhone Live Photos Like a Pro, covers the basics from another angle.

Manage iPhone Live Photos Storage and iCloud
Review the Live Photos album once a month: open Photos, tap Albums, scroll to Media Types, and tap Live Photos. Delete the failures, convert the ordinary ones to stills, and keep the motion only on pictures that earn it. In Settings, then your name, then iCloud, then Photos, choose Optimise iPhone Storage if you pay for iCloud storage, and the phone will keep lightweight versions locally and download full originals when you open them. Before any big clean-up, make sure your library is backed up somewhere besides iCloud Photos, because deleting a photo on your iPhone also deletes it from iCloud. Export the original files to a computer first and confirm the backup copy plays before you delete anything.
Live Photos with Portrait, Night Mode, and Camera Control
Portrait mode and Live Photos work together on supported models, with the key-photo quirk already noted: changing the key photo on iPhone 15 or later removes the portrait effect. Night mode also combines well, but it needs the phone still for longer, so brace it and ask your subject to hold still; our iPhone Night mode guide explains the exposure times. On iPhone 16 and iPhone 17, the Camera Control button lets you open Camera and shoot without touching the screen, but it makes it easy to lower the phone too soon and cut the clip short, so hold position for a beat after the click. See our iPhone Camera Control button guide for the button settings, and the pillar article, the iPhone camera complete guide, for the whole camera system in one place, including the current iPhone lineup.
Troubleshooting iPhone Live Photos
If a Live Photo will not play, press and hold the image rather than tapping it, check that Live is not switched off in the Live menu, and restart the Photos app. If there is no sound, check the mute switch, the volume, and whether the clip was muted in Edit. If effects are missing, confirm the file is a genuine Live Photo with a LIVE badge, because a still converted from a Live Photo cannot take effects. If Live Photos keep turning themselves back on, check Preserve Settings. If the Camera app feels slow after a burst of Live Photos, give it a few seconds to finish processing, and free up storage if your iPhone is nearly full.
Final Tips
Shoot Live by default, hold still for three seconds, listen before you share, and review the Live Photos album every month.
Practise on one subject for a week starting today. Photograph running water each day and try Long Exposure on your best take, or photograph your pet and practise picking a better key photo each evening. After a week, the three-second hold will feel natural, the key photo step will take seconds, and you will always know without thinking whether a moment deserves Loop, Bounce, or plain Live. Before sharing, always check the key photo, because it becomes the still image everyone sees.
References
- Bring your photos to life — Apple Support
- Take photos with your iPhone camera — Apple iPhone User Guide
- PHLivePhoto — Apple Developer Documentation
- iPhone — Apple
Quiz: Test Your iPhone Live Photos Knowledge
1. How much video does an iPhone Live Photo capture in total?
A. 1.5 seconds B. 3 seconds C. 5 seconds D. 10 seconds
2. Where do you change the key photo of a Live Photo?
A. In the Files app B. In Settings, then General C. In the Camera app before shooting D. In Photos, tap Edit, then the Live Photo button
3. Which effect blends all frames into a single still image with motion blur?
A. Loop B. Bounce C. Long Exposure D. Live Off
4. How do you keep Live Photos off permanently?
A. Delete the Photos app B. Turn on Airplane Mode C. Settings, Camera, Preserve Settings, then switch on Live Photo D. Restart the iPhone
5. What happens when you share a Live Photo by email?
A. The recipient gets only the still image B. The recipient gets the full moving clip C. The photo is deleted from your phone D. The sound is doubled
Quiz answers: 1. B, 2. D, 3. C, 4. C, 5. A.