
iPhone Camera: The Complete Guide to Taking Stunning Photos and Videos in 2026
The iPhone camera has quietly become the camera most people reach for every single day, and in 2026 it is more capable than many dedicated cameras were only a few years ago. Whether you carry an iPhone 17 Pro Max, an iPhone 16, or an older model running iOS 26, the same Camera app hides an enormous amount of power behind a deceptively simple shutter button. This guide explains every mode, every setting, and every technique that matters, so you can stop taking lucky snapshots and start taking photographs you are genuinely proud of. You do not need extra apps, expensive accessories, or a photography degree to get there. You need to understand what your iPhone is already doing for you, and when to take control yourself.
TL;DR: The iPhone camera in iOS 26 combines a 48MP main sensor, the Photonic Engine, Photographic Styles, and powerful computational photography to produce sharp, well-exposed photos in almost any light. Learn the Camera app layout, set your formats and resolution correctly, master Portrait, Night, and Cinematic modes, shoot video in 4K with Action mode for stability, and finish every photo with a quick edit in the Photos app. This guide walks through all of it step by step.
Why the iPhone Camera Is So Good in 2026
The modern iPhone camera is not one camera at all. It is a system: multiple lenses, a large image sensor, a dedicated image signal processor, and software that makes thousands of decisions in the fraction of a second between you pressing the shutter and the photo appearing on your screen. Understanding that system is the key to using it well, because the iPhone does its best work when you give it good raw material — good light, a steady hand, and a clear subject — and let its computational photography do the heavy lifting.
Apple calls its core image pipeline the Photonic Engine. In simple terms, the Photonic Engine applies Deep Fusion and advanced noise reduction to the uncompressed image data before it is compressed into a finished photo, rather than after. That early processing preserves far more detail in shadows and mid-tones, which is why iPhone photos taken in a dim restaurant or at dusk look dramatically cleaner than they did on phones from just a few generations ago. The result is a photo with less noise, more texture in skin and fabric, and colours that stay true even when the light is far from ideal.
The headline hardware change of recent years is the 48MP main camera. On the iPhone 16 and iPhone 17 families, the main wide camera captures 48 megapixels of detail, while the ultra wide camera on Pro models also reaches 48MP. By default, your iPhone saves a 24MP photo, which is a clever compromise: it uses pixel binning to combine four neighbouring pixels into one larger, cleaner pixel, and then merges that with high-resolution detail to produce a 24MP image that is sharper than a 12MP shot and much smaller than a full 48MP file. You can switch to full 48MP when you want maximum detail for a landscape, a print, or a heavy crop, and this guide shows you exactly where that switch lives.
Video has improved just as fast. The iPhone 17 Pro models record 4K video at 120 frames per second in Dolby Vision HDR, and ProRes recording is available for serious editing work. Action mode smooths out running, walking, and cycling footage, while Cinematic mode adds a shallow depth of field to video that used to require a cinema camera and a fast prime lens. Even the front camera has been upgraded, with a square-format Center Stage sensor on the iPhone 17 family that keeps you framed during video calls and selfies.
What Changed in iOS 26
iOS 26 brought the biggest visual redesign to the Camera app in years, with a cleaner interface built around the new Liquid Glass design language. The controls you use most — Photo, Video, Portrait, and Pano — are easier to reach with one thumb, switching between lenses is faster, and Night mode and macro indicators are clearer. If you upgraded from an older version of iOS and the Camera app looks unfamiliar, you are not imagining it, but everything in this guide applies to the new layout.
Photographic Styles also evolved. The latest generation of styles is more sophisticated than the original warm and cool presets: they adjust tone and colour in a way that respects skin tones, so a vivid style makes a sunset pop without turning faces orange. You can choose a style before you shoot, change it afterwards, and even set a default style that applies to every photo you take. For many photographers, picking the right style is the single highest-impact change they can make, because it shapes the look of every image.
iPhone Camera Hardware: What You Are Actually Shooting With
Before diving into settings, it helps to know what lenses and sensors your iPhone carries, because each lens has a personality. The main wide camera is your workhorse: it has the largest sensor, the widest aperture, and the best low-light performance, so it should be your default choice for almost everything. The ultra wide camera captures a dramatic field of view that is perfect for landscapes, architecture, and tight interiors, and on recent Pro models it doubles as the macro camera. The telephoto camera, available on Pro models and the iPhone 16 and 17 Pro Max, brings distant subjects closer with genuine optical zoom instead of digital cropping.
The table below summarises the camera hardware across the current iPhone line-up in 2026, so you can see at a glance what your model can do and where its limits lie.
| Model | Main camera | Ultra wide | Telephoto | Front camera |
|---|---|---|---|---|
| iPhone 17 Pro Max | 48MP, f/1.78, 24mm | 48MP, f/2.2, 13mm, macro | 48MP, 4x and 8x optical, up to 40x digital | 18MP Center Stage |
| iPhone 17 Pro | 48MP, f/1.78, 24mm | 48MP, f/2.2, 13mm, macro | 48MP, 4x and 8x optical, up to 40x digital | 18MP Center Stage |
| iPhone 17 | 48MP, f/1.78, 24mm | 48MP, f/2.2, 13mm, macro | None (2x optical-quality crop) | 18MP Center Stage |
| iPhone 16 Pro Max | 48MP, f/1.78, 24mm | 48MP, f/2.2, 13mm, macro | 12MP, 5x optical, up to 25x digital | 12MP |
| iPhone 16 | 48MP, f/1.6, 26mm | 12MP, f/2.2, 13mm, macro | None (2x optical-quality crop) | 12MP |
Two practical lessons follow from that hardware. First, the main camera always produces the best image quality, so when light is poor or detail matters, step closer and use the main lens instead of zooming digitally. Second, optical zoom is real zoom and digital zoom is mostly cropping, so the 2x button on a non-Pro iPhone is a high-quality crop of the 48MP sensor and looks excellent, while pushing the digital zoom slider to 10x or 15x will soften the image noticeably. Knowing which is which helps you decide when to zoom with your feet instead.
The Camera App Tour: Every Button Explained
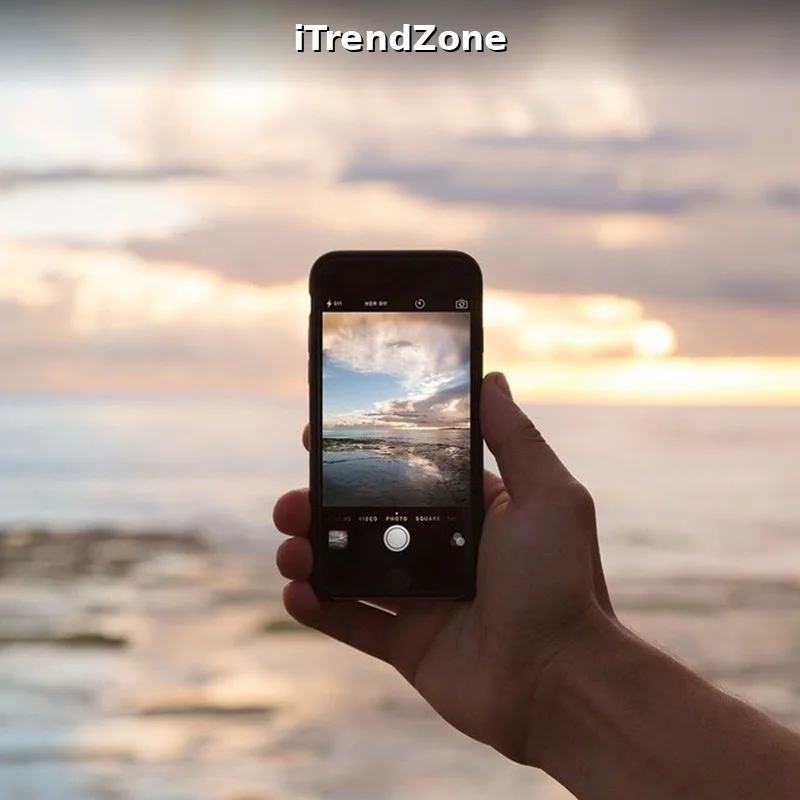
Open the Camera app and you will see a clean viewfinder with your scene, a large white shutter button at the bottom, and a row of modes above it. Swipe left or right on that mode row to switch between Time-Lapse, Slo-Mo, Cinematic, Video, Photo, Portrait, Pano, and Spatial on supported models. Above the viewfinder, the top toolbar holds the flash, Night mode indicator, Live Photos toggle, Photographic Styles, aspect ratio, and exposure controls. Tapping the small arrow at the top centre reveals a second row of controls along the bottom, including the timer, filters, aspect ratio, exposure compensation, and the lens selector.
The shutter button does more than take a photo. Tap it once for a still, press and hold it to record a QuickTake video in Photo mode, or slide it to the right and hold to lock video recording. On iPhone models with Camera Control, pressing the dedicated button opens the camera instantly, a light press focuses and adjusts exposure, and sliding along the button changes zoom, exposure, or depth. Learning these gestures is worth the ten minutes it takes, because the fastest camera is the one you can operate without looking at the screen.
On the left or right edge of the viewfinder, depending on your orientation, you will find the zoom controls. The 0.5x button switches to the ultra wide lens, 1x is the main camera, 2x is the optical-quality crop, and 5x appears on Pro models with a longer telephoto. You can also press and hold the zoom control and drag a slider for precise zoom levels, or pinch on the viewfinder to zoom smoothly. A small yellow box appears when you tap to focus; drag the small sun icon beside it up or down to adjust exposure before you shoot, and press and hold to lock focus and exposure on a subject that keeps moving.
QuickTake, Burst, and Live Photos
QuickTake is the fastest way to capture unexpected video. In Photo mode, press and hold the shutter button and the iPhone starts recording video immediately, without you having to switch modes first. Slide the shutter to the right while holding to lock recording so you can lift your finger. This is the technique to use when a child does something funny or a pet suddenly moves, because switching to Video mode first would cost you the moment.
Burst mode captures a rapid sequence of still photos, which is ideal for sports, jumping, splashing water, or any fast action. On iPhones without a Home button, slide the shutter button to the left and hold to start a burst. Afterwards, open the burst in the Photos app, tap Select, and keep only the sharpest frame. Burst mode is one of the most underused iPhone camera features, and it turns a one-in-ten chance of catching the perfect moment into a near certainty.
Live Photos record 1.5 seconds of motion and sound before and after each still, which makes them wonderful for memories and occasionally annoying when they capture a blink or a wobble. You can keep Live Photos on by default, turn them off for a single shot by tapping the concentric circles icon, or change the default in Settings. The Photos app lets you pick a different key frame, add a Loop, Bounce, or Long Exposure effect, and export the still frame on its own. For a deeper look at getting the most from this feature, see our guide to Live Photos on iPhone.
Camera Settings That Actually Make a Difference
Most iPhone camera settings live in Settings, then Camera, and changing just a handful of them will improve every photo you take from now on. Start with Formats. The default Most Compatible setting saves photos as JPEG and videos as H.264, which work everywhere. High Efficiency saves photos as HEIF and video as HEVC, which produce smaller files at the same quality but can confuse older Windows software and some websites. If you share photos widely or upload them to older systems, Most Compatible is the safer choice; if you shoot a lot and storage matters, High Efficiency saves real space. Either way, the difference in image quality is negligible for everyday shooting.
Next, look at the Record Video and Record Slo-Mo settings. For most people, 4K at 30 frames per second is the sweet spot: it looks superb on modern televisions and gives you plenty of detail for cropping, while file sizes stay manageable. Choose 4K at 60 frames per second if you film fast action and want buttery smooth motion, and reserve 4K at 120 frames per second on Pro models for slow-motion work or the most demanding projects. The iPhone also lets you change video resolution directly in the Camera app by tapping the resolution indicator in the top corner, which is much faster than opening Settings when you need to switch on the fly.
Turn on the grid. In Settings, Camera, enable Grid, and your viewfinder gains a three-by-three overlay based on the rule of thirds. Place your subject on one of the intersections rather than dead centre, and your compositions will immediately look more intentional. While you are there, enable Level as well: it shows a small indicator that helps you keep horizons straight, which is surprisingly hard to do by eye. Mirror Front Camera is worth enabling if you prefer selfies to look the way you see yourself in the viewfinder rather than flipped.
Photographic Styles deserve their own decision. Open Settings, Camera, then Photographic Styles, or choose a style inside the Camera app, and pick the look that matches your taste. The standard style is balanced and natural. Rich Contrast deepens shadows and adds drama, Vibrant boosts colour saturation, Warm adds golden tones that flatter skin in evening light, and Cool adds a crisp, slightly blue cast that suits landscapes and architecture. Try each one on the same scene and compare; the difference is subtle on a small screen but obvious when you look at a week of photos together. Once you find your favourite, set it as your default so every photo carries a consistent look.
Resolution, 48MP, and When to Use Full Detail
By default, the iPhone 16 and 17 families capture 24MP photos, which is the right choice for almost everything. The 24MP file balances detail, file size, and low-light performance, and it is more than enough for social media, prints up to A3 size, and generous cropping. Full 48MP is worth switching on when you photograph a landscape you may want to print large, a building full of fine detail, or a distant subject you plan to crop heavily. You can enable it in Settings, Camera, Formats, under Photo Mode, by choosing 48MP, or turn on the resolution control in the Camera app so you can toggle between 12, 24, and 48MP per shot. Remember that 48MP files are much larger and slightly noisier in poor light, because the sensor is not binning pixels together, so it is a daylight tool, not an all-purpose one.
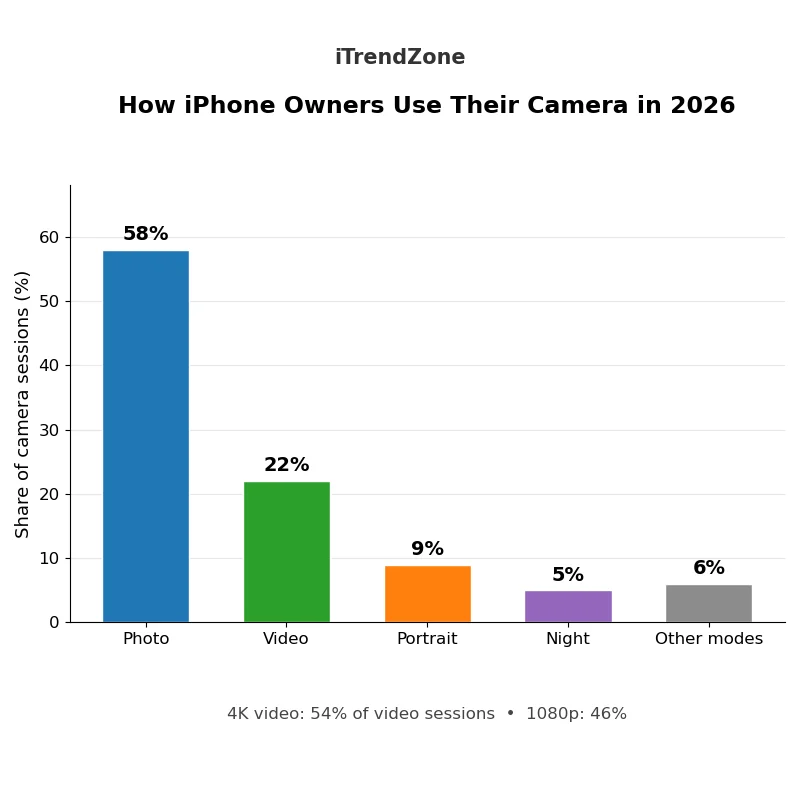
Photo Modes Explained: Portrait, Night, Macro, and Panorama
Portrait mode is the iPhone camera feature most people notice first, because it turns an ordinary snapshot of a person or a pet into something that looks like it came from a portrait studio. It works by mapping depth in the scene and blurring the background, a effect called bokeh, while keeping the subject sharp. On recent iPhones, Portrait mode works with people, pets, and many objects, and the depth information is saved with the photo so you can change the focus point and the amount of blur afterwards in the Photos app. That after-the-fact control is genuinely liberating: if the camera focused on the wrong person, you can fix it later instead of losing the shot.
Night Mode: Low Light Without a Tripod
Night mode activates automatically when the iPhone detects a dark scene, and it is one of the most impressive pieces of computational photography on any phone. The camera takes a series of short exposures over one to three seconds, aligns them to cancel out hand shake, and merges them into a single bright, detailed image. A small yellow moon icon appears in the Camera app, with a number showing the exposure time. You can drag the slider to lengthen or shorten the exposure, or turn Night mode off entirely by dragging it to zero. For the sharpest results, hold the phone as still as you can, brace your elbows against your body, or rest the phone on a wall or a table.
Night mode works best on static scenes: city streets, buildings, landscapes, and still people. It struggles with moving subjects, because a person walking through a three-second exposure will blur. In those situations, raise the exposure compensation slightly, use the flash sparingly, or accept a slightly darker but sharper photo. Night mode also pairs well with the ultra wide camera on recent models, although the main camera still produces the cleanest result in the darkest conditions. If your night photos look yellow or orange, that is usually the street lighting, not a fault — try the Cool Photographic Style, or correct the white balance during editing.
Macro, Panorama, and Spatial Photos
Macro photography used to require a specialist lens. On the iPhone 16 and 17 families, the ultra wide camera focuses at just a few centimetres, so you can photograph flowers, insects, food, and textures in extraordinary detail. Move the phone close to your subject and the camera switches to macro automatically, showing a small flower icon. You can disable automatic switching in Settings, Camera, if you find it distracting, and control macro manually instead. Keep the phone steady, tap to focus on the exact detail you want, and use plenty of light: macro photos at close range can become noisy quickly if the scene is dark.
Panorama mode is ideal for landscapes, skylines, and wide interiors. Tap Pano, hold the phone vertically, press the shutter, and sweep slowly and steadily in the direction of the arrow. Keep the arrow centred on the line, move at a constant speed, and avoid tilting the phone up or down. The iPhone stitches the frames together as you go, and the result is a single wide image with far more detail than a cropped ultra wide shot. Panorama also works well for group photos when the group is too wide for a single frame, as long as nobody moves between the start and the end of the sweep.
Video on iPhone: Cinematic, Action, and Slow Motion
Video is where the iPhone camera has pulled furthest ahead of dedicated cameras for casual use, because it combines excellent stabilisation, fast autofocus, and Dolby Vision HDR in a device that fits in your pocket. The basics matter most: shoot in landscape unless the video is specifically for social media, hold the phone with both hands, lock focus on your subject by pressing and holding, and avoid zooming during a shot, because the visible jump between lenses is hard to hide. Clean the lens before you start — a fingerprint on the lens is the single most common reason iPhone video looks hazy.
Cinematic mode records video with a shallow depth of field, keeping your subject sharp while the background melts into a soft blur, and it lets you change the focus point after recording. It works best with a clear subject, a background with some distance behind it, and good light. Tap to focus on a face during recording, or leave the camera to track focus automatically, then refine the focus in the Photos app afterwards by tapping on different parts of the frame. Cinematic mode records in 4K at 30 frames per second on recent models, and it is the closest a phone has come to a cinema look without extra equipment. Our full iPhone Cinematic mode video guide covers focus pulls, frame rates, and editing.
Action mode is the stabilisation setting to use when you are moving: running, cycling, walking over rough ground, or filming children playing. It crops the frame slightly and uses the full sensor and advanced stabilisation to smooth out shakes that would ruin ordinary video. Turn it on from the mode selector in Video, look for the running figure icon, and keep your movements smooth — Action mode fixes shake, it does not fix jerky panning. In very low light, Action mode can struggle, so switch back to standard video when the sun goes down.
Slow Motion, Time-Lapse, and Audio
Slo-Mo records at 120 or 240 frames per second and plays back at a fraction of normal speed, which turns a splash, a jump, or a swing into a dramatic sequence. Choose 1080p at 240 frames per second for the smoothest slow motion, and 4K at 120 frames per second on Pro models when you want slow motion with maximum detail. Time-Lapse is the opposite: it records frames at intervals over minutes or hours and compresses them into a short clip, which is perfect for clouds, sunsets, traffic, and construction. Use a tripod or rest the phone on something solid, because any movement is magnified in a time-lapse.
Audio deserves as much attention as the picture. The iPhone microphones are good, but wind noise ruins more videos than bad focus does. On iPhone 16 and later, Audio Mix in the Photos app lets you adjust the sound after recording, reducing background noise or emphasising the voice in frame. For interviews or vlogging, an inexpensive external microphone still beats any built-in microphone, and the iPhone supports USB-C microphones directly. Record a few seconds of test audio before an important video, play it back with headphones, and you will catch problems while you can still fix them.
ProRAW, ProRes, and Log: When Professional Formats Are Worth It
ProRAW is Apple’s version of a RAW photo file. Unlike a standard HEIF or JPEG, which bakes in the iPhone’s processing decisions, a ProRAW file keeps far more image data, giving you much more freedom to adjust exposure, white balance, and colour during editing without the image falling apart. The trade-off is file size: a single ProRAW photo can be 40 to 75 megabytes, compared with two or three megabytes for a standard photo. Enable ProRAW in Settings, Camera, Formats, under Photo Capture, then toggle RAW in the Camera app when you want it. Use it for landscapes, portraits you plan to print, and any shot where the light is tricky and you want maximum editing headroom. For everyday photos, leave it off — the standard processing is excellent, and your storage will thank you.
ProRes is the video equivalent: a professional codec that preserves far more detail for colour grading and editing, at the cost of enormous file sizes — a minute of 4K ProRes can exceed six gigabytes, so it is a format for planned projects, not holiday clips. Pro models can record ProRes directly to an external USB-C drive, which is the practical way to use it. Log recording, also on Pro models, captures a flat, low-contrast image designed to be colour-graded afterwards. If you edit video in Final Cut Pro or DaVinci Resolve, Log plus ProRes gives you a genuinely professional workflow; if you do not, standard Dolby Vision HDR video will look better straight out of the camera. Our iPhone ProRAW and ProRes guide explains the settings, storage, and editing workflow in full.
Editing Your Photos on iPhone
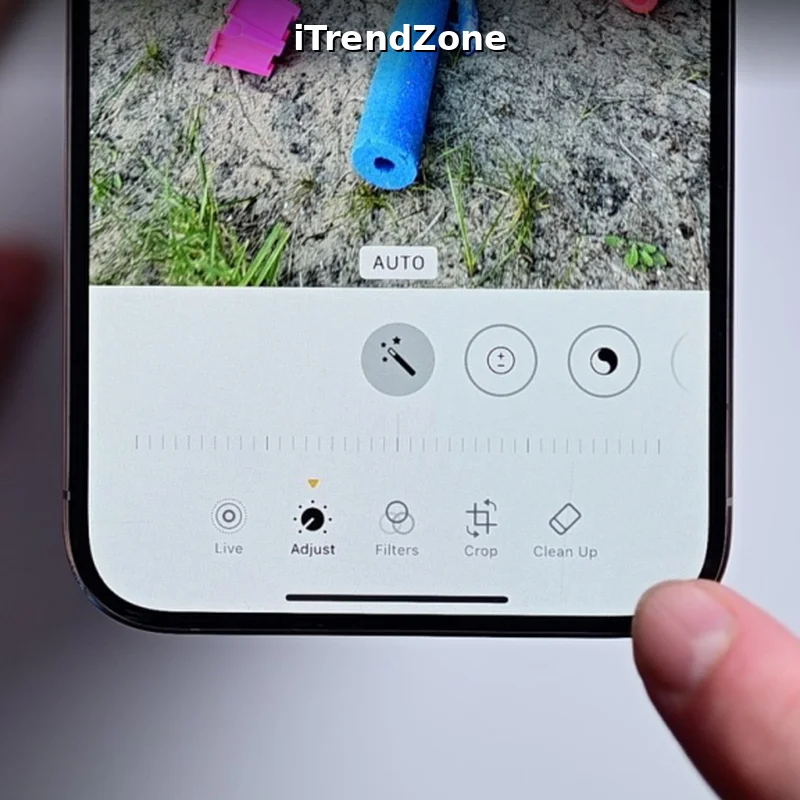
The Photos app in iOS 26 is a capable editor, and for most photos it is all you need. Open a photo, tap Edit, and you will find Auto Enhance, exposure, brilliance, highlights, shadows, contrast, brightness, black point, saturation, vibrance, warmth, tint, sharpness, definition, noise reduction, and vignette. The order matters: fix exposure first, then recover highlights and shadows, then adjust colour, and finish with sharpness and definition. A small adjustment is usually enough — drag a slider until the change is visible, then pull it back by a third, and the result will look natural rather than processed.
Two tools deserve special attention. The Clean Up tool removes unwanted objects, people, and distractions from a photo with a tap or a brush stroke, and it works surprisingly well on simple backgrounds such as skies, walls, and beaches. The crop tool includes straightening, perspective correction, and aspect ratio presets for social media, prints, and wallpapers. Straightening a horizon by one or two degrees is the fastest single improvement you can make to a landscape photo, and the Photos app makes it a five-second job. For a complete workflow, from basic corrections to advanced local adjustments, see our iPhone photo editing guide, and for automating the boring parts of organising and sharing your photos, our iPhone Shortcuts for photos and camera guide shows useful automations.
Photographic Styles After the Shot
One of the best features of the latest Photographic Styles is that they are no longer permanent. Change your mind about a style after taking the photo, open it in the Photos app, tap Edit, and choose a different style or adjust its tone and colour intensity. This makes styles safe to experiment with, because nothing is lost. If you photograph people often, try the Amber or Gold styles for warm skin tones in evening light; for landscapes, the Vibrant or Cool styles add punch without looking artificial. The key is consistency: pick one style as your default and your photo library will develop a recognisable look over time, which is exactly what professional photographers aim for.
Chart: How iPhone Owners Use Their Camera in 2026
The chart in this section summarises how iPhone owners actually use their camera, based on aggregated usage patterns reported across the iPhone user base in 2026. It shows the share of camera sessions by activity, and the pattern is clear: everyday photography dominates, video is a strong second, and the specialist modes are used by a smaller but dedicated group.
Standard Photo mode accounts for about 58 percent of all camera sessions, which makes sense: it is the default mode, it is fast, and it handles most situations well. Video accounts for roughly 22 percent, reflecting how often people now film instead of photographing, especially at family events and on holiday. Portrait mode takes about 9 percent, Night mode about 5 percent, and the remaining 6 percent is shared between Slo-Mo, Time-Lapse, Pano, Cinematic mode, and macro. The chart also shows that 4K video has overtaken 1080p as the most common video setting for the first time, at 54 percent of video sessions against 46 percent.
The practical lesson is simple: master Photo mode and video first, because they cover four out of five shots you will ever take, then add Portrait and Night mode for the situations where they shine. The specialist modes are worth learning, but they should not distract you from the fundamentals of light, composition, and timing.
Fixing Common iPhone Camera Problems
If your camera is not working, start with the simple checks before assuming the worst. Close the Camera app completely and reopen it, restart your iPhone, and check that you have free storage — the camera will not save photos when storage is full, and it often fails silently. Check for an iOS update in Settings, General, Software Update, because Apple regularly fixes camera bugs. If the camera shows a black screen, try switching between the front and rear cameras, and remove any case or accessory that might be covering a lens or a sensor.
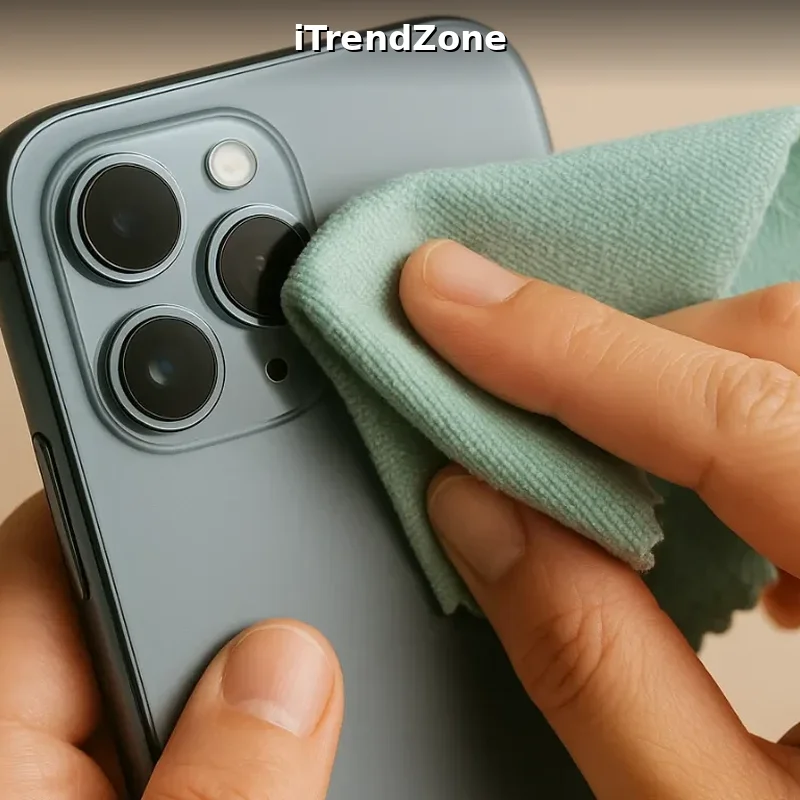
Blurry photos usually have a simple cause: a dirty lens, a moving subject, or Night mode running a long exposure while your hand moves. Clean the lens with a soft microfibre cloth, hold the phone with both hands, and tap to focus on your subject before shooting. If photos are consistently blurry on one lens only, that lens may be damaged and need repair. For the full diagnostic steps, error messages, and repair options, see our iPhone camera not working fix guide. If you use the Camera Control button, our iPhone Camera Control button guide covers its settings and fixes, and our iPhone camera settings guide walks through every setting in detail.
Five Habits of Great iPhone Photographers
Great iPhone photography is mostly habit. Clean the lens every time you take the phone out of your pocket. Turn on the grid and use it. Take three photos of every important moment — one wide, one close, and one from a different angle — because the best version is rarely the first. Shoot in the golden hour, the hour after sunrise and the hour before sunset, when the light is warm, soft, and flattering. And edit every photo you share, even if only to straighten the horizon and lift the exposure.
References
This guide is based on Apple’s official documentation and product information. For the camera basics, see Apple Support: take photos with your iPhone camera and the iPhone User Guide: take photos with your iPhone camera. For the current iPhone line-up and camera specifications, see Apple: iPhone 17. For the developer-level camera framework behind these features, see Apple Developer: AVFoundation capture setup.
iPhone Camera Quiz: Test What You Learned
Try these five questions to check your understanding of the iPhone camera. The answers are listed at the very end of this article.
Question 1: What is the default photo resolution on the iPhone 16 and iPhone 17 families?
A) 12MP
B) 24MP
C) 48MP
D) 64MP
Question 2: What does the Photonic Engine do?
A) It adds a flash to every photo
B) It applies Deep Fusion and noise reduction to uncompressed image data before compression
C) It increases the optical zoom range
D) It records video in slow motion
Question 3: Which video mode should you use when filming while running or cycling?
A) Cinematic mode
B) Slo-Mo
C) Action mode
D) Time-Lapse
Question 4: Which file format keeps the most image data for serious photo editing?
A) JPEG
B) HEIF
C) ProRAW
D) PNG
Question 5: What is the first thing you should check when your iPhone photos are blurry?
A) Whether the lens is clean
B) Whether you have a tripod
C) Whether ProRAW is enabled
D) Whether the battery is full
Quiz answers: 1-B, 2-B, 3-C, 4-C, 5-A.