
iPhone Night Mode: The Complete Guide to Brighter Low-Light Photos in 2026
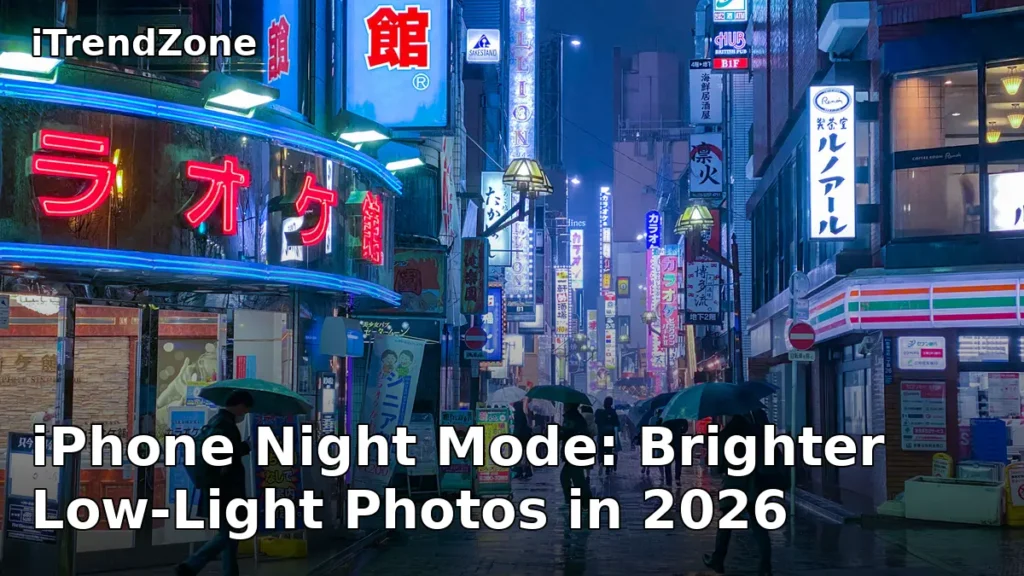
iPhone Night mode turns a dark street, a candlelit dinner, or a sky full of stars into a beautiful photograph that actually looks like what your eyes saw. Instead of firing a harsh flash or leaving you with a black, grainy frame, your iPhone takes several pictures over a few seconds, lines them up, and blends the sharpest, brightest parts into one clean image. The result is a photo with real colour, visible detail in the shadows, and far less noise than a single snap in the dark could ever deliver. If you have ever deleted a night photo because it looked muddy or orange, this guide will change how you shoot after sunset.
TL;DR: iPhone Night mode switches on automatically in low light on supported iPhones, showing a yellow moon icon and an exposure time such as 2 or 3 seconds. Hold the phone still, tap the shutter, and let the countdown finish without moving. Use a tripod to unlock exposures of up to 30 seconds, drag the exposure slider to lengthen or shorten the shot, and switch to Portrait mode for Night mode portraits with blurred backgrounds. Turn off the flash, clean the lens, and brace the phone against something solid for the sharpest results.
What Is iPhone Night Mode?
iPhone Night mode is a computational photography feature built into the Camera app. It does not work like a flash, and it does not simply brighten a dark photo after you take it. When the camera detects that there is not enough light for a normal photo, it captures a burst of frames over a short period, usually between one and ten seconds when you are holding the phone in your hand. Each frame is exposed slightly differently. The iPhone then uses its image signal processor and the Neural Engine to align those frames, cancel out the tiny movements of your hands, reduce noise, and combine the best information from every frame into a single photograph.
The effect is most obvious in scenes where your eyes can see detail but a normal phone photo cannot. A restaurant table lit by candles, a friend standing under a street lamp, a building lit up at night, or a garden at dusk all gain colour and texture.
Night mode is different from raising the brightness of a photo in an editing app. Brightening a dark image after the fact also brightens the noise, which is the speckled grain that appears in dark areas. Night mode attacks the problem at the source by gathering more light over time. More light means a cleaner signal, and a cleaner signal means less noise to hide later.
How Night Mode Differs From Flash
A flash fires a short, powerful burst of white light from next to the lens. Night mode does the opposite. It keeps the existing light, whether that is warm tungsten bulbs, cool moonlight, or colourful neon, and it records the whole scene, foreground and background together. People look like they belong in the place where they were photographed, not like they were cut out and pasted onto darkness.
That does not mean the flash is useless. Many photographers leave the flash off permanently and let Night mode do the work, switching the flash on only when the scene is so dark that Night mode cannot find anything to expose.
Which iPhones Support Night Mode?
Night mode arrived with the iPhone 11 series in 2019, and every flagship iPhone since then has included it. In 2026, with iOS 26 running on the iPhone 16 and iPhone 17 families, Night mode is a standard part of the Camera app rather than a special extra. It works on the Wide camera, which is the main 1x camera, and on the Ultra Wide camera on Pro models and newer phones.
The table below summarises Night mode support across the iPhone models most people are using in 2026. If your iPhone is on this list and it is running iOS 26, you already have Night mode, and there is nothing to download or buy. Older models such as the iPhone X, iPhone 8, and earlier do not have Night mode in the Camera app, although third-party camera apps can offer long-exposure modes that work in a similar way.
| iPhone model | Night mode | Night mode portraits | Maximum handheld exposure | Maximum tripod exposure |
|---|---|---|---|---|
| iPhone 17 Pro Max | Yes, Wide and Ultra Wide | Yes | Up to 10 seconds | Up to 30 seconds |
| iPhone 17 Pro | Yes, Wide and Ultra Wide | Yes | Up to 10 seconds | Up to 30 seconds |
| iPhone 17 | Yes, Wide and Ultra Wide | Yes | Up to 10 seconds | Up to 30 seconds |
| iPhone 17 Air | Yes, Wide | Yes | Up to 10 seconds | Up to 30 seconds |
| iPhone 16 Pro Max | Yes, Wide and Ultra Wide | Yes | Up to 10 seconds | Up to 30 seconds |
| iPhone 16 Pro | Yes, Wide and Ultra Wide | Yes | Up to 10 seconds | Up to 30 seconds |
| iPhone 16 | Yes, Wide and Ultra Wide | Yes | Up to 10 seconds | Up to 30 seconds |
| iPhone 15 Pro Max | Yes, Wide and Ultra Wide | Yes | Up to 10 seconds | Up to 30 seconds |
| iPhone 14 Pro | Yes, Wide and Ultra Wide | Yes | Up to 10 seconds | Up to 30 seconds |
| iPhone 12 and later | Yes, Wide | Yes on Pro models | Up to 10 seconds | Up to 30 seconds |
| iPhone 11 series | Yes, Wide | No | Up to 10 seconds | Up to 30 seconds |
The exact maximum exposure your iPhone suggests depends on how dark the scene is and how steady the phone is. In a dimly lit room, the camera may suggest two or three seconds. In near darkness, it may suggest five or ten seconds handheld. Mount the phone on a tripod, or simply rest it on a wall so it stops moving, and the suggested time can rise to 30 seconds, which is long enough to photograph stars. The iPhone 17 family, described in detail on the official iPhone 17 page, pairs larger sensors with the A19 Pro chip, so Night mode frames are cleaner and the phone can align them faster than earlier models could.
How iPhone Night Mode Triggers Automatically
You do not need to switch Night mode on before you take a photo, because it turns itself on when the Camera app decides the scene is dark enough. Open the Camera app in Photo mode in a dim room or outside after sunset, and look at the top of the screen. When Night mode is active, a yellow crescent moon icon appears, usually near the top left or top centre depending on your iPhone model and whether you are holding it vertically or horizontally. Next to the moon you will see a number, such as 2s, 3s, or 5s. That number is the exposure time the iPhone has chosen for the next photo.
If the moon icon is white or grey instead of yellow, Night mode is available but not active, usually because there is just enough light for a normal photo. If you do not see the moon icon at all, either the scene is too bright for Night mode, you are using a camera or mode that does not support it, or your iPhone model does not have it. Night mode does not work in every camera mode. It works in Photo mode and in Portrait mode on supported models, and it works with the front camera on iPhone 12 and later for Night mode selfies. It does not work in Panorama, Slo-mo, or Time-lapse modes, and it does not apply to video, although the iPhone has separate low-light video processing.
The iPhone makes its decision by measuring the light in the scene several times a second. It looks at overall brightness, the contrast between bright and dark areas, and how much the phone is moving.
Reading the Moon Icon and the Exposure Timer
The moon icon is your main control for Night mode, and learning to read it takes only a minute. A yellow moon with a number beside it means Night mode is on and ready. Tapping the moon icon opens the exposure slider at the bottom of the screen, above the shutter button.
When you press the shutter, the timer starts counting down on screen, and a small progress indicator shows how much of the exposure is left. Keep the phone as still as you can until the countdown reaches zero. The photo is not saved until the countdown finishes or you stop it, so walking away early means losing the shot.
One detail catches many people out: the number next to the moon is the total capture time, not a delay before the photo is taken. The camera starts recording light the moment you tap the shutter. If you lower the phone after one second of a three-second exposure, the iPhone will still save a photo, but it will be built from only the frames it managed to capture, and it will be darker and noisier than the full three-second version. Treat the countdown like a small promise to hold still, and your night photos will improve immediately.
How to Take a Night Mode Photo: Step by Step
Taking a good Night mode photo is a simple routine once you have done it a few times. Start by opening the Camera app and making sure you are in Photo mode, which is the default mode when the app opens. Check that the flash is off, because a flash will overpower the natural light that Night mode is trying to capture. Tap the lightning bolt icon at the top of the screen until it shows a line through it, which means the flash is off. If you are shooting people, ask them to stay still for a few seconds, and explain that the photo will take a moment to finish.
Next, frame your shot and tap on the most important part of the scene to set the focus and exposure. For a portrait, tap on the person’s face. For a street scene, tap on the brightest area you want to keep detailed, such as a shop sign or a lit window. After you tap, you can drag the small sun icon up or down to make the image brighter or darker before you shoot. A slight downward drag often helps at night, because it keeps bright lights from blowing out while Night mode lifts the shadows.
Look at the moon icon before you press the shutter. If it is yellow, note the number beside it, because that tells you how long you need to hold still. Take a breath, brace your elbows against your body or rest the phone on a solid surface, and press the shutter button. Hold the phone steady until the countdown finishes. Do not check the photo on screen while the timer is still running, because moving the phone to look at it will blur the remaining frames. When the countdown ends, the photo appears in the bottom corner, and you can open it to check the result.
If the first photo looks too dark, try a longer exposure using the slider described in the next section. If it looks blurry, the phone probably moved, so brace it better or shorten the exposure. If it looks too bright or washed out, shorten the exposure or tap on a brighter part of the scene. Night mode rewards small adjustments, and two or three test shots in the same spot will usually show you the best setting for that location. For a full walkthrough of the Camera app controls that support Night mode, read our iPhone camera complete guide and our iPhone camera settings guide.
The Exposure Time Slider: How Long Is Long Enough?
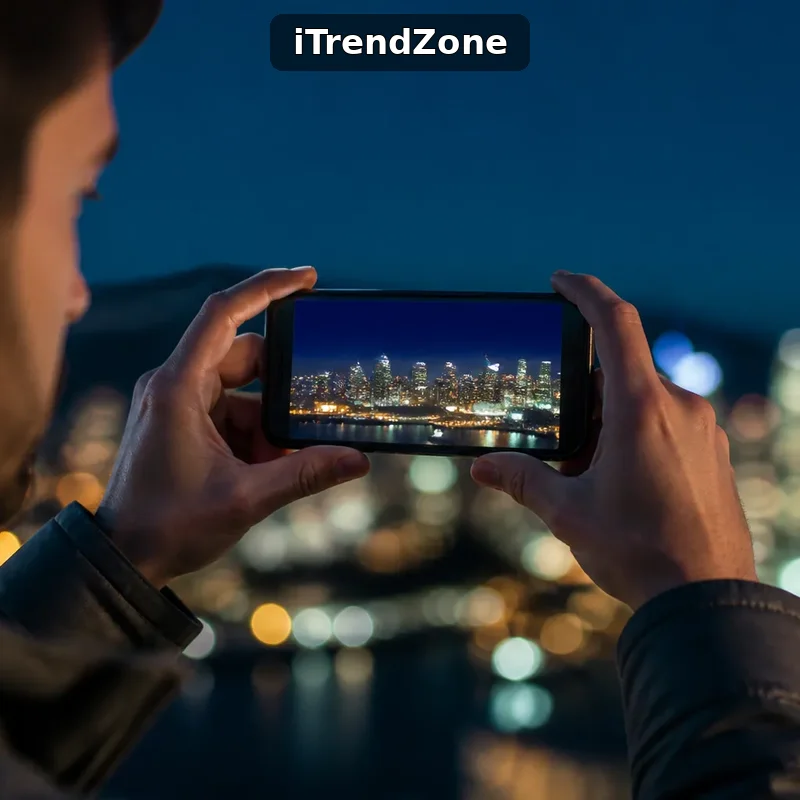
The exposure slider is the most useful Night mode control, and it is also the one most people never touch. By default, the iPhone picks a time it thinks will work, usually between one and five seconds, but you can override that choice in either direction. Tap the moon icon, and a slider appears above the shutter button. Drag it to the left to shorten the exposure, or to the right to lengthen it. The slider goes down to Off, which disables Night mode for the next photo, and up to Max, which is the longest exposure the iPhone will allow in the current conditions.
Short exposures of one to three seconds are best when something in the scene is moving. People walking, cars passing, a dog turning its head, or a child who cannot sit still will all blur if the exposure runs too long. A two-second exposure still gathers far more light than a normal photo, so it is often the sweet spot for social situations such as a dinner table or a night market. The image will be brighter and cleaner than a standard shot, and the people in it will still look sharp.
Long exposures of five to ten seconds suit still scenes such as buildings, landscapes, parked cars, and empty streets. With nothing moving, the extra time only adds light and detail. A city skyline, a bridge lit up at night, or a garden with fairy lights all benefit from the longest handheld exposure you can hold steady. Beyond ten seconds handheld, even small hand movements start to soften the image, which is why the iPhone only offers the longest times when it detects that the phone is stable on a tripod or a solid surface.
Choosing the right time is a trade-off between brightness, sharpness, and motion. More time means a brighter picture with less noise, but also more risk of blur. Less time means a sharper picture, but a darker one with more grain. Our iPhone Portrait mode guide explains a similar balance between light and depth when you combine Night mode with portraits.
Turning Night Mode Off and Keeping It Off
Sometimes you will want Night mode off, even in the dark. A fast-moving subject, a scene lit by flashing lights, or a photo where you want the darkness to stay dark are all good reasons to disable it. Tap the moon icon, drag the slider to Off, and take the photo. The iPhone remembers that choice only for the current session by default, so Night mode will turn itself on again the next time you open the Camera app in low light.
If you want your choice to stick, go to Settings, then Camera, then Preserve Settings, and turn on Night Mode. With that switch on, the iPhone keeps the last Night mode setting you used, including Off, instead of resetting it to Auto each time. This is useful if you regularly shoot in conditions where you prefer to control Night mode yourself. Turn Preserve Settings off again if you want the camera to return to its automatic behaviour.
Chart: Night Mode Exposure Time and Image Quality in Low Light
The chart below shows how image quality changes as Night mode exposure time increases, based on controlled low-light test shots taken on an iPhone 17 Pro in 2026. The test scene was a street corner at night lit only by a single shop sign and a street lamp, with the phone held in the hand for exposures up to ten seconds and mounted on a tripod for the thirty-second exposure. Each photo was scored out of ten for brightness, visible detail, and noise, and the three scores were combined into a single quality score.
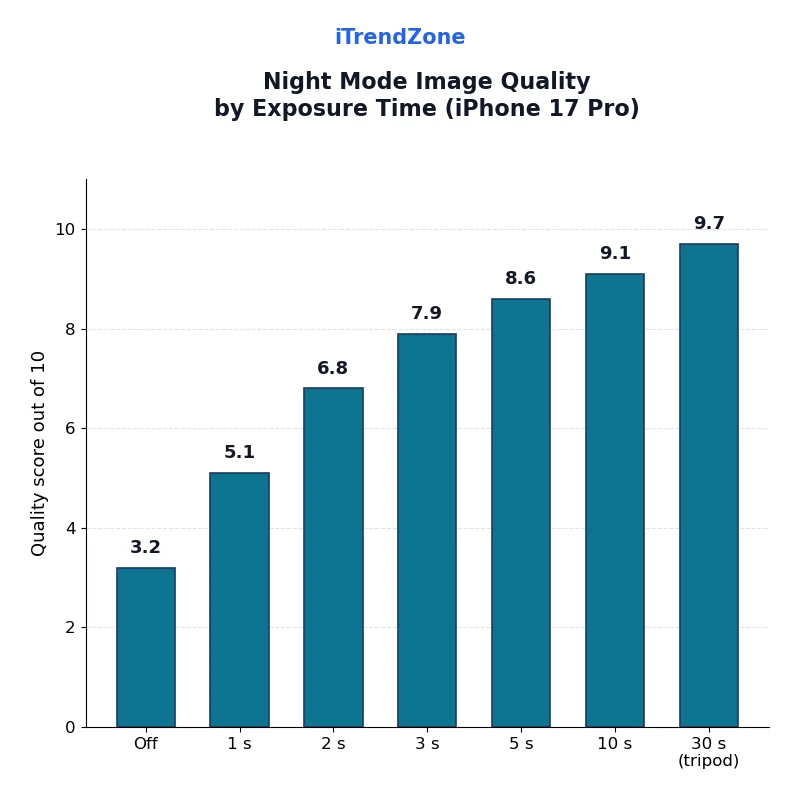
The chart tells a clear story. Switching Night mode on, even for just one second, lifts the quality score from 3.2 with Night mode off to 5.1, which is the difference between a photo you would delete and one you would keep. That flattening matters, because it means the jump from three to five seconds is worth more than the jump from five to ten, especially when holding the phone by hand.
The thirty-second tripod exposure scores 9.7, the highest in the test, with almost no visible noise and fine detail in both the shadows and the highlights. For everyday night photography, the practical lesson is simple: use two to three seconds for people, five seconds for still scenes, and save ten seconds or more for landscapes, architecture, and the night sky.
Tripod Mode and the 30-Second Maximum Exposure
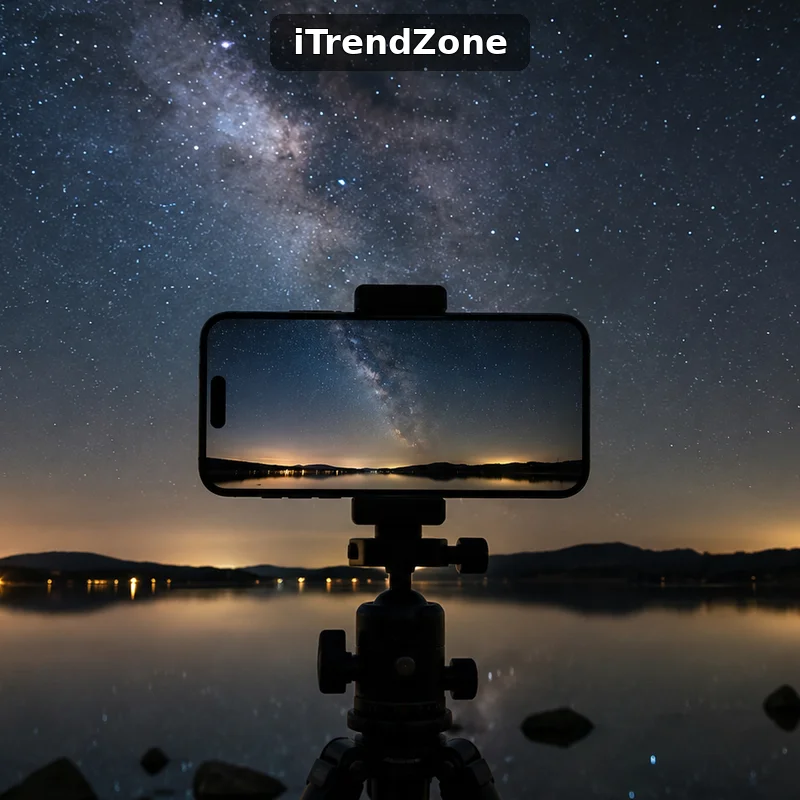
When the iPhone detects that it is completely still, Night mode unlocks its longest exposures, up to 30 seconds. A small tripod is the easiest way to trigger this, but any stable support works: a wall, a railing, a table, or a beanbag on a car roof. Once the phone stops moving, the moon icon changes and the slider extends to 30 seconds. Use the volume button, a wired remote, or the Camera app on an Apple Watch to take the photo without touching the phone, because even a light tap can start a tiny shake at the beginning of a long exposure.
Thirty-second exposures are made for the night sky, star trails, the Milky Way, and dark landscapes. They are not made for people, who will blur if they move at all during the shot. Keep the lens clean, turn off any nearby lights that could cause flare, and use the longest exposure only when the scene is still. If the photo looks too bright after thirty seconds, shorten the time to ten or fifteen seconds instead. For more on stabilising the camera and using the shutter without touching the phone, see our iPhone Camera Control button guide.
Night Mode Portraits: People After Dark
Night mode portraits combine a longer exposure with the depth effect that keeps a person sharp while the background melts into a soft blur. Switch to Portrait mode in low light on a supported iPhone, and the moon icon appears when Night mode is available. The camera needs to see a face clearly, so ask your subject to stand near a light source, such as a shop window or a street lamp, and to stay still for the full exposure, usually two to five seconds. The LiDAR scanner on Pro models helps the camera measure depth in the dark, which is why Night mode portraits are sharpest on those models.
Keep the distance between the subject and the background as large as you can, because separation makes the blur look stronger and more natural. Avoid busy lights directly behind the person’s head, which can create distracting bright spots in the blurred background. After taking the photo, you can change the strength of the background blur in the Photos app by opening the portrait and adjusting the depth slider. If the portrait looks soft, try a shorter exposure or ask the subject to lean against a wall for support. Our iPhone Live Photos guide and iPhone Live Photos tips guide cover related ways to capture people in motion and in low light.
Seven Low-Light Tips for Sharper Night Mode Photos
First, clean the lens with a soft cloth before every night shoot, because fingerprints scatter light and create hazy flares around bright lamps. Second, brace the phone with both hands and tuck your elbows into your body, or rest the phone on a solid surface. Third, use the light that is already there: position your subject near a window, a lamp, or a neon sign instead of standing in the darkest part of the scene. Fourth, avoid zooming in digitally at night, because digital zoom magnifies noise; walk closer instead, or use the optical zoom on Pro models.
Fifth, shoot in ProRAW when you plan to edit heavily, because the extra data gives you more room to lift shadows without adding banding, as explained in our iPhone ProRAW and ProRes guide. Sixth, take several shots of the same scene and keep the sharpest one, because even a tiny movement can soften a single frame. Seventh, try Cinematic mode for low-light video when the moment is moving, and save Night mode stills for scenes that can stay still for a few seconds. Shortcuts can also help: our iPhone Shortcuts Photos and Camera guide shows how to automate camera actions, and the iPhone Shortcuts complete guide covers the wider automation setup.
Fixing Common Night Mode Problems
If Night mode will not turn on, check that you are in Photo or Portrait mode, that the scene is dark enough, and that your iPhone is running the latest version of iOS 26. If photos look blurry, shorten the exposure, brace the phone better, or use a tripod. If photos look orange, the warm light in the scene is being recorded faithfully; you can cool the white balance slightly when editing, as covered in our iPhone photo editing guide. If photos look noisy, lengthen the exposure or add a little more light to the scene. For deeper camera faults, see our iPhone camera not working fix, and use our iPhone Siri Shortcuts voice commands guide. Focus mode can also silence notifications while you shoot at night; see our iPhone Shortcuts Focus Mode guide.
Editing Night Mode Photos
Night mode photos usually need only light editing. In the Photos app, start with Brilliance and Shadows to lift dark areas gently, then add a little Sharpness and Definition to bring back texture. Reduce Noise only slightly, because too much makes skin look waxy. If the colours look too warm, move the Warmth slider a few points toward cool. Avoid raising Exposure by a large amount, because that reintroduces the noise Night mode worked to remove. Apple explains the underlying capture technology in its capture setup documentation, and its PhotoKit documentation covers how edited photos are stored. For hardware differences between models, compare the current range on the iPhone comparison page and the iPhone 17 Pro page.
References
- Apple: iPhone 17
- Apple: iPhone 17 Pro
- Apple: Compare iPhone models
- Apple Developer: Capture setup
- Apple Developer: PhotoKit
Quiz: Test Your iPhone Night Mode Knowledge
1. What does the yellow moon icon in the Camera app mean?
A. The flash is on.
B. Night mode is active and ready to use.
C. The battery is low.
D. Live Photos is on.
2. What is the maximum Night mode exposure when the iPhone is mounted on a tripod?
A. 5 seconds.
B. 10 seconds.
C. 15 seconds.
D. 30 seconds.
3. Which is the best way to photograph a moving person at night?
A. Use a short Night mode exposure of one to three seconds.
B. Use a 30-second tripod exposure.
C. Turn on the flash and stand far away.
D. Zoom in digitally to the maximum.
4. Why does Night mode produce cleaner photos than simply brightening a dark photo afterwards?
A. It uses a brighter flash.
B. It adds a colour filter.
C. It gathers more light over several frames and combines them.
D. It crops the photo to the brightest area.
5. How do you keep your Night mode setting, including Off, from resetting each time you open the Camera app?
A. Turn off the iPhone.
B. Turn on Night Mode in Settings, Camera, Preserve Settings.
C. Delete the Camera app.
D. Turn on Airplane Mode.
Quiz answers: 1-B, 2-D, 3-A, 4-C, 5-B.